One of the reasons why Android is so popular among smartphone users is it’s being an open source OS which paves the way for custom development activities. We have thousands of developers who keep working for different devices and bring us awesome custom ROMs and mods that enhance our mobile experience.
If you got an Android device and feel that a certain feature or function is missing from your device, there are good chances that you have to get the missing thing by flashing a custom ROM or mod. Since such things modify the system files on your device to enable or disable a feature, they require root privileges to do that.
Yesterday, we did an article where we shortlisted some of the best custom ROMs that are available for the Nexus 5. One of our visitors complained that we should have added installation procedure too. So, here is a detailed tutorial on how you can install custom ROM on Nexus 5.
Things to Do Before Installing a ROM
Any task demands some preparations to be made so that it might be done successfully. Here are a few things that should be taken care of before you proceed to install a custom ROM. Since indulging in such activities involves risk and might sometimes bring unwelcome results, it’s always better to be prepared for the worst situation.
- The most important thing that makes your device eligible for flashing ROMs and mods is that you must have root access and a custom recovery (CWM/TWRP) installed on it. If you have already done that, skip to the next point. In case you still have an unrooted phone, we have a step-by-step rooting tutorial for the Nexus 5.
- Though it’s an uncommon situation, sometimes installing a custom ROM wipes the EFS partition on your device, resulting in no IMEI. Since you have already rooted your Nexus 5, you can easily backup the EFS. If you lose your IMEI during flashing official factory image or a custom ROM, you can easily restore the IMEI from the backup. You should back up the EFS data of your Nexus 5.
- Enabling USB Debugging on your Nexus 5 should be your next step. To do this, go to Settings> About> Build Version and tap it 7 times. Then go back to Settings> Developer options and enable USB Debugging mode. Please note that this step has nothing to do with installing a custom ROM, but keeping USB Debugging enabled all the time always does good in unexpected situations.
- Having made sure that you have made the above-mentioned preparations, download the custom ROM of your choice and the appropriate/recommended package of Google Apps. Both the files come in ZIP and are not meant to be extracted. Copy both ZIP files to your Nexus 5. You can find some good ROMs for your Nexus 5 at XDA.
- It’s time now to boot your device in Recovery mode. To do it manually, turn off your Nexus 5. Then press the Volume Down/Up + Power buttons together for 2-3 seconds. Your phone will boot into Bootloader mode. Now press any of the volume buttons to scroll Recovery menu. When you see Recovery option, press the Power button to select it (see below).

Things to Do While Installing a ROM:
So, if you have gone through all the prerequisites, let’s proceed to install the custom ROM on your Nexus 5. Follow the steps given below:
- If you have TWRP recovery on your Nexus 5, its main menu will look like this:

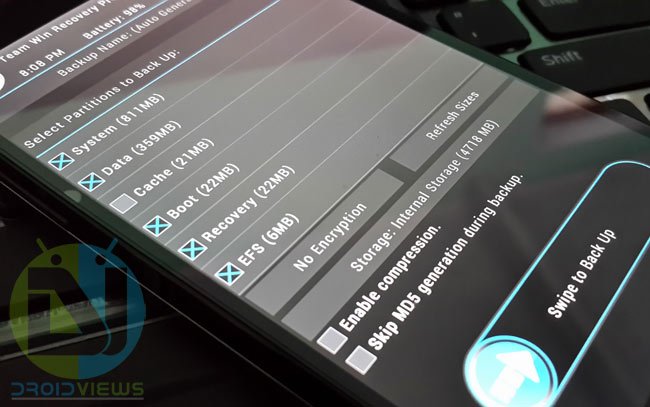
- The first and most important thing that you need to do before installing the ROM is backing up your current ROM. Whenever you flash a new ROM, never forget to backup the current one, or always keep one ROM backup at least. To back up, your ROM, tap on Backup option and select the following elements: System, Data, Boot, Recovery, EFS.

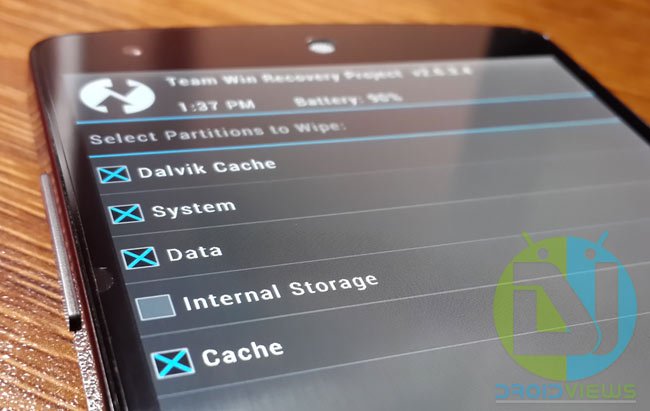
- After performing the ROM backup, return to the TWRP main menu and tap the Wipe button and select Advanced Wipe. Then wipe Dalvik Cache, System, Data, and Cache.

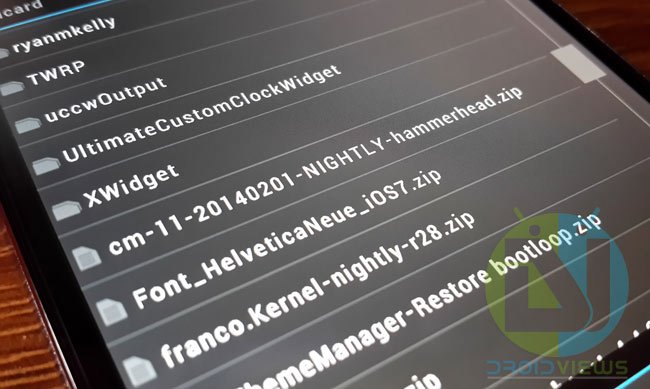
- Go back to the TWRP main menu again and tap on Install option. Navigate to the ROM file and select it.

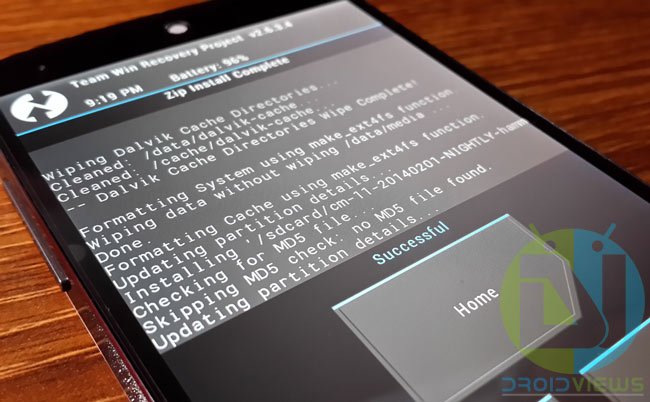
- Swipe the confirmation button to proceed with the installation. The ROM will be installed in a matter of seconds.

- When the ROM is installed successfully, tap on the Back button. and select the Gapps ZIP package.
- After the Google Apps package has been installed too, tap the Reboot and then System button.
- Your Nexus 5 will reboot and you will see the boot-screen for a couple of minutes. So, wait till you’re greeted by the welcome setup screen.
Enjoy the newly installed ROM! And yes, do not forget to share if you face any issue or have any question. Cheers!


Hi. I just finished follwoing your instructions,
Which ROM did you install?
Turn off the phone, boot into recovery mode, wipe data, dalvik, system and cache and restore your previous ROM.