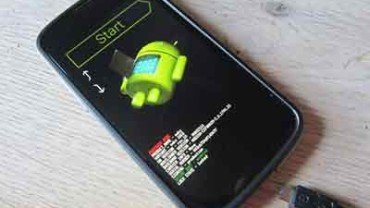
Nexus 4: Google’s latest Nexus smartphone or let’s say “The phone of the era”. This marvel shall beat all others standing against it with its 15 GHz Quad-Core Krait processor and 2GB RAM and also yet other massive features that would clean its way.
If you’re somehow stuck or have messed up with your current ROM, it’s better to go stock and return everything to how it was when your device came in new! So lets hit up the Instructions and see how we could do this.
Warning!
- The Instructions are meant only for LG/Google Nexus 4. Do not attempt to try them on any other Android device.
- Read and Understand the Instructions carefully before performing any actions
- DroidViews Community or any of its members are not responsible for any damage to your device
Prerequisites
- At least 60% available phone battery.
- A USB Data cable compatible with Nexus 4.
- Appropriate USB Drivers.
- Required ADB & Fastboot files. Extract the downloaded N4Tools.zip to your desktop. So now you have N4Tools folder on your desktop. [Download here]
- Backup your complete SD Storage, text messages, Organizer, Calendar and contacts manually.
Steps to Flash Jellybean 4.2.2 Factory Image
- Download Nexus 4 “occum” Factory Image [occam-jdq39-factory-345dc199.tgz | SHA-1 Sum: 345dc1995eb9142912f667977fa76977b734fa4c]
- Extract the downloaded occam-jdq39-factory-345dc199.tgz to the N4Tools folder already placed on your desktop.
- Now within the same folder, press the Shift Key and Right Click, a menu shall pop up. Select Open Command Prompt Here.
- A CMD Window already cd’ed to the N4Tools folder location will open.
- Power off the device. Enter into Bootloader (fastboot) mode by pressing Volume Down and Power buttons altogether until you see the Bootloader screen.

- Connect the device to PC via USB Data cable while the device is in Bootloader mode.
- Type in CMD:
fastboot erase boot
fastboot erase cache
fastboot erase recovery
fastboot erase system
fastboot erase userdata
- Flash Bootloader Image, type:
fastboot flash bootloader bootloader-mako-makoz10o.img
- Reboot Bootloader (This is necessary). Type:
fastboot reboot-bootloader
- Flash Radio Image, type:
fastboot flash radio radio-mako-m9615a-cefwmazm-2.0.1700.48.img
- Reboot Bootloader again, type:
fastboot reboot-bootloader
- Flash the 4.2.2 Jellybean Factory Image. Type:
fastboot -w update image-occam-jdq39.zip
- This flashing process might take some time, so kindly sit back without messing with anything.
- When the flashing process is finished, make your choice. Either to go back completely stock by locking the bootloader again or sticking to the unlocked bootloader.
- To lock the bootloader, type:
fastboot oem lock
You’ve successfully flashed the updated 4.2.2 Factory Image on your Nexus 4, your device shall reboot now.
If you have got any issues while this process, comment it here and we shall provide you with the best of our knowledge and equipment. A feedback about this guide is always welcome.


nice job successful update firmware
You are the genius bro…a real CHAMP!! thanks for saving my Nexus 4 …:)
You did the things rightly so you’re a champ.
i get “erasing ‘boot’…
FAILED (remote: not supported in locked device)
finished. total time: 0.004s”
Flashing a factory image requires bootloader to be unlocked. Follow this guide to unlock: http://droidviews.com/2012/nexus-4-guide-unlock-bootloader-install-clockworkmod-and-root/
Make sure to backup everything up before proceeding.
Thanks,
Worked like a charm.
Pankaj
Bro I mistakenly flashed Android 4.3 meant for S4 to my Nexus 4 (4.2.2) without checking the make and now my doesnt connect to network or wifi, wifi/bluetooth is off, desnt come on at all.
Source :Install Android 4.3 on your Galaxy S4 (GT-I9505), ported – SamMobile
Tried your steps as well from XDA
Flashed fine to stock rom but issues still persist, any idea why? Could you help??
Please make sure to flash the complete factory image, which includes, Radio, Bootloader and the system ROM image.
thank you, thank you, thank you! Of all the tutorials on the internet, this was the only one to get my phone back to work! My hero
I’m glad it worked and was helpful
When I’m in Bootloader mode – with the Start green arrow as shown in your above screenshot – on my laptop I issue : fastboot erase boot I just get message : waiting for device
It indicates that you do not have fastboot interface correctly setup for your device.