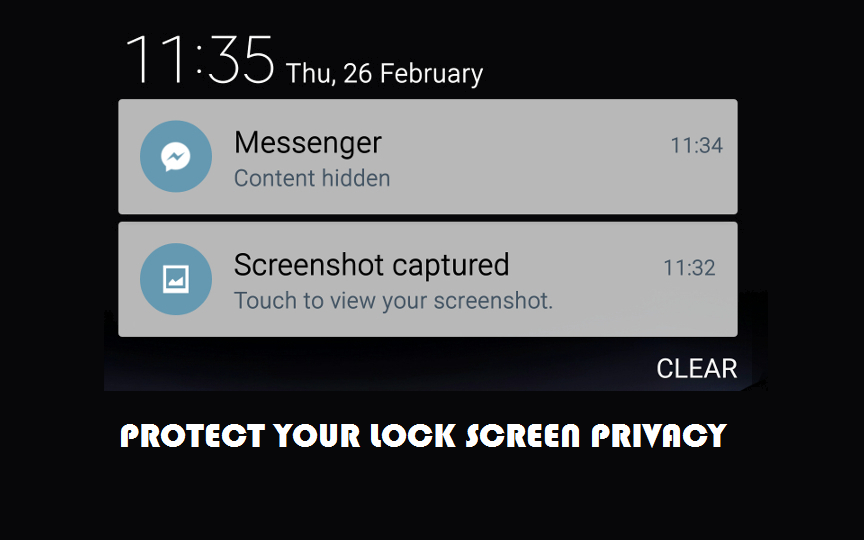
Lock screen notifications are one of the most useful features a smartphone has to offer. However, this ease of access comes at the cost of privacy as anyone could pick up your phone and have a glimpse of your texts and mail. Most of us settle for a compromise: by hiding sensitive contents from the lock screen. Over the last few years, Google has added several ways to manage lock screen notifications, and 3rd-party apps are always there for the pickier among us. In this post, we will look at various free and easy methods to manage lockscreen notifications. There is no need for any root access whatsoever.
Per app Notification Access
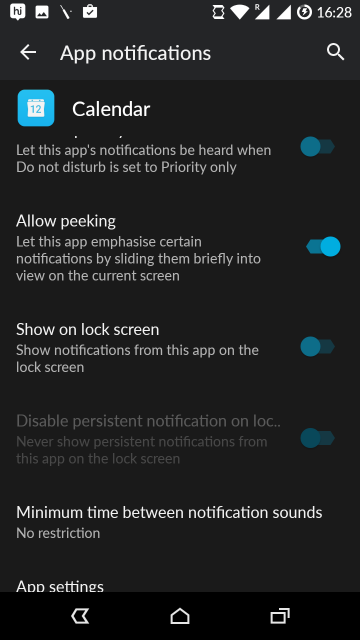
Starting from Lollipop, Android allows us to manage each app notification separately. Head over to Settings-> Apps. Select any app you want and tap on Notifications. In the following screen, turn off ‘Show on lock screen’ option.
Must read: Tips to Recover Lost Notifications on Android Devices
Using Android settings
- Open Settings.
- Select Sound and Notifications.
- Scroll down to the notification section and select when the device is locked.
- Here you can choose whether or not to show notifications on your lock screen. You can also select ‘Hide sensitive notification content’ which simply displays the headers and hides all details.
For Samsung Galaxy devices
Samsung’s custom skin, the TouchWiz UI, differs somewhat from the Stock Android experience. For these devices, you need to open Settings-> Lock Screen and Security. Now select ‘Notifications on Lock Screen’. A new screen will open up where you can not only change the lock screen notification content but also select which apps are allowed to push lock screen notifications.
Android Nougat experimental settings
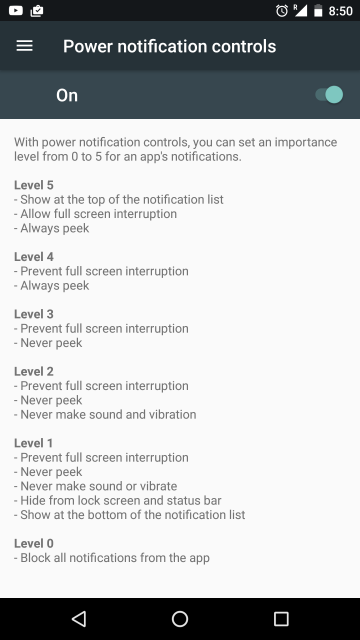
Nougat has some cool experimental settings hidden in plain sight. Pull down the quick settings shade. You will notice a cog icon in the top right, and tapping it will open the settings menu. However, if you long press on the icon for a few seconds, the cog icon will start to turn, and a small wrench will appear next to it. Now open Settings, and scroll to the bottom. You will find a new entry: System UI Tuner. Tap on it and select ‘Other.’ Now enable Power notification controls. As explained in the next screen, this will break down notification permissions into six levels (0 to 5). To use this feature, head back to the main settings page and open the apps section. Select any app and open app info. Now tap on the Notifications option, and you can assign any permission level to the app.
Must read: How to Add, Remove and Manage Accounts on Android Devices
App lockers
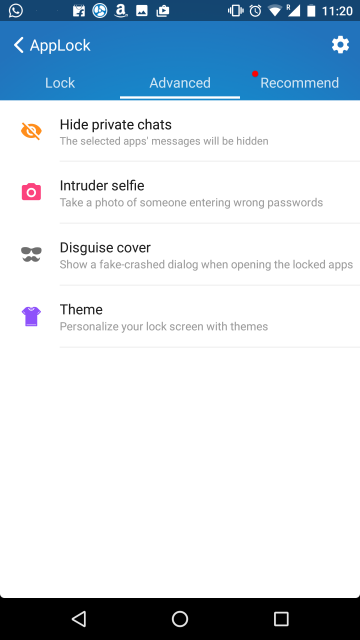
There are plenty of apps in the market to protect your privacy with a password or pattern lock. As an added feature, many such app-locker apps can hide sensitive notification contents. There are many popular choices in the Play Store, be sure the check them out.
Using automation apps
Automation apps are a great way to customize your device and change the way it behaves to suit your needs. There are a lot of such apps available in the market, both free and paid. In this tutorial, we will describe the process on a popular and easy to use a free app called Macrodriod.
- To create a ‘macro’, tap on add macro.
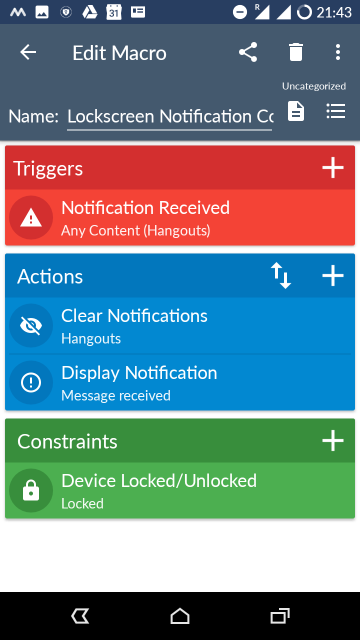
- Now we will set the Trigger, the actions, and the constraint.
- In the trigger section, scroll down the list and select Notification-> Notification received. Now you can select apps to hide lockscreen notifications or tap on any application.
- Move over to actions. There are two actions to be made: removing the original push notification and replacing it with our own custom message. For the first action, select clear notification from the list and select those apps you’ve selected before in the trigger menu. For the second action, tap display notification, and fill out the box as shown below.

- Moving over to the constraints section, select Device Locked/Unlocked and set it to Locked.
- Once you completed each step, tap on the tick mark in the bottom right corner to create your macro.
In order to open the respective app by tapping on the notification, you need to create another macro. In this case, the trigger is ’empty trigger’, action is ‘launch application’ (select the desired app in the following screen) and there are no constraints.
Recommended: How to Set up 2-Step Verification for Google Account on Android
Next, head back to the previous macro (tap on Macros in the main screen), select the second action and select Configure. Tick the checkbox ‘Invoke Macro when pressed’. From the drop-down list below, select your newly created macro.
That’s all! You can also play around with other options to add more functionalities and customizations.


Join The Discussion: