Google Alerts lets you receive important notifications regarding the topic of your choice. All you have to do is let Google know your favorite topics and it will subsequently send you alerts of the same via Gmail. You may receive alerts whenever someone writes about them, only once during the day or even once a week. Moreover, you may even customize them based on your language preference, type (audio, video, blogs, news, etc), region among others. With the following Google Alerts tips, you can set up and manage it pretty easily. Just follow the instructions to use Google Alerts more efficiently.
Create your Google Alerts
Stating the obvious, you will need to have a Google Account to create these alerts. Those of you who already have one, head over to the Google Alerts website. The currently logged in account will be automatically selected for these alerts. If you wish to change it, click on the avatar present at the top right and choose the desired account. Now you may start with the process.
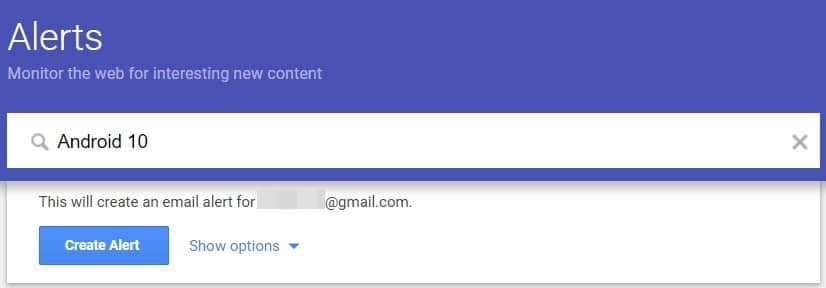
To create your Google Alerts, enter the keyword for which you wish to receive alerts. Then click on the Show options button to further customize your alerts. You may choose the frequency of receiving these alerts, the time and day of these alerts and the region and language-specific alerts.
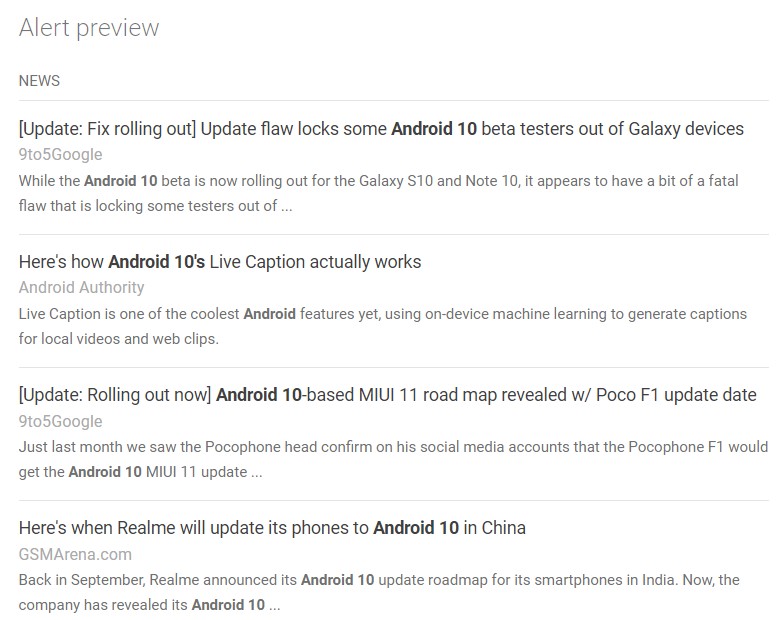
Once you are customizing the process, you may even preview these alerts before finalizing it. Just scroll down a little to the Alert Preview section and have a look at your alerts. If you are satisfied, go ahead and click on Create Alerts. That’s it. you have successfully created a new Google Alert. To further modify these Google alerts, refer to the instructions in the next section.
Customize Google Alerts
You may further modify or customize these alerts by using the Google Alert tips mentioned below. These include editing, deleting, changing the delivery time, choosing how to receive these alerts, etc. You may even take the help of Google Search tips to further modify your searches, as would be shown later in this guide.
Edit and Delete Alerts

To edit an alert, head over to the My Alerts section and click on the pencil icon. Now change the frequency, source, language, region, etc as per your need. Once done, just click on Update alert. The changes will now be reflected in your alerts.
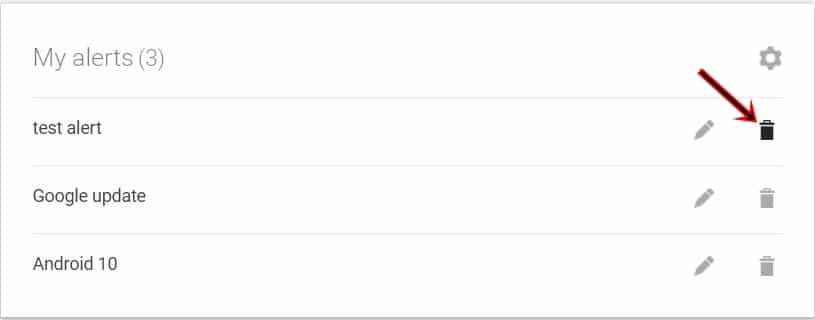
To delete an alert, simply click on the bin icon next to your Google alert. This will also be present under the My Alerts section. Although there wouldn’t be any confirmation dialog box, you could revert your decision even after you deleted an update. A notification will pop up notifying about the deletion. You may click on Undo to revert back the changes or Dismiss if you are satisfied with your decision.
Change Delivery Type
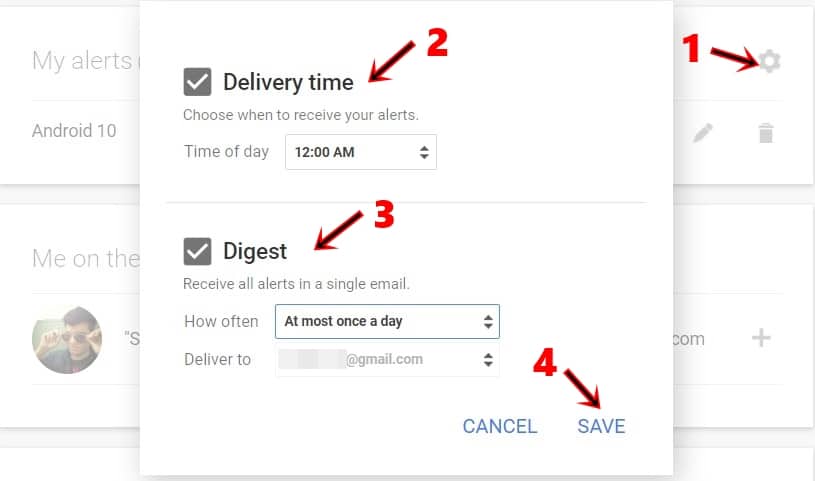
You may further change the delivery style of Google Alerts. These include setting up the Delivery time and the mode of sending these alerts. To make such changes, head over to My Alerts section and tap on the cog (gear) icon situated at the top right. Next, under Delivery time, choose the desired time at which you wish to receive these alerts. Furthermore, you may select the Digest option to receive all alerts in a single email. The delivery frequency of these digest could also be set up via the “How often” option. Once you are done, click on Save to confirm the changes. Using these best email managing apps, you can manage all your email accounts very easily.
Refine your Search
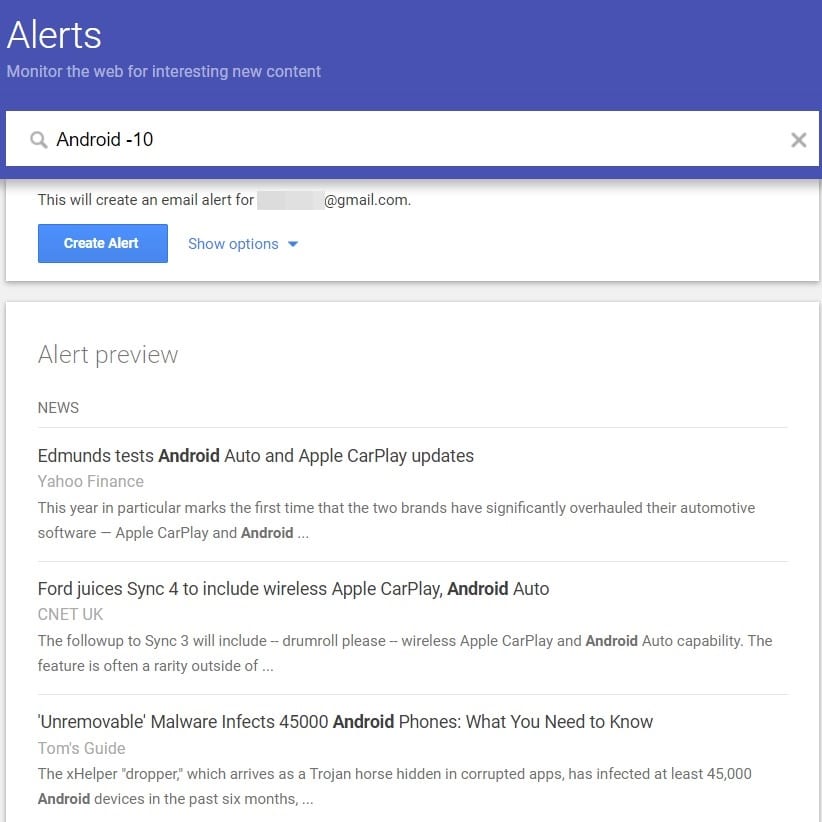
There are some search tips like usage of quotation marks to search for the exact term. You may do the same with Google Alerts. Under the Alerts section, if you enter “Android 10“, then the alerts will only be shown that has this exact same keyword. There wouldn’t be any similar or matching results to Android 10 in your alerts. Only the results with the said word will be shown.
Moreover, you may also exclude certain keywords from appearing in the alerts. Similar to what you do in Google searches, you may use the hyphen (-) sign to exclude any particular word. For example, Android -10 will only show everything related to Android, except Android 10. See the above image as a reference. None of the results under the Articles Preview section displays anything related to Android 10 when the keyword was set as Android -10.
So, this was all about Google Alerts tips and its management. You may further customize the searches and alerts based on your likes and preferences. The ones mentioned here are just the tip of the iceberg. Also, if you don’t want to receive these alerts every now and then, it’s better you go for the Digest option and under the “How often” feature, set it to At most once a day.
Read next: 7 Best Lightweight Android Launchers


Join The Discussion: