Some of the biggest talking points from Android 10 were privacy enhancement, system-wide dark mode, and the new gesture navigations. And it is the last one that has managed to raise quite a few eyebrows. Make no mistake, these gestures are a much-needed change from the regular 3-button navigations. But it suffers from one major drawback. You can’t use these gesture navigations with any custom launcher.
You’ll have to stick with your device’s stock launcher to keep on using these gestures. After facing much flak over this decision, Google allowed the use of these gestures with custom launchers, but only on the Pixel series (more importantly on Pixel 3 and 4). On the other hand, Action Launcher has also managed to incorporate this gesture, but with a varying degree of success.
The point is not everyone owns a Pixel device and neither does everyone use the Action Launcher. I own a Motorola handset with Hyperion as the custom launcher. And I wasn’t ready on switching over to Motorola’s stock launcher. So this is where I got hold of a trick through which allows you to use the Android 10 gesture navigation on any custom launcher. Let’s see how this could be done.
Use Navigational Gestures on Android 10 Devices’ Custom Launchers
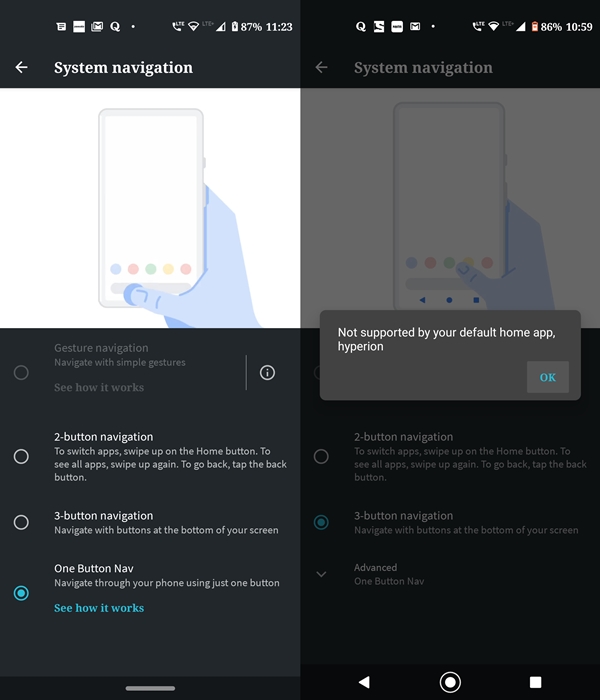
Currently, if you try using the Android 10 Gesture navigation with any custom launcher, an error message will pop up. The option will be greyed out and if you tap on info, it says: Not supported by your default home app <launcher name>.

To overcome this, all you have to do is enter a few lines of ADB codes on any Android 10 device. The best part is it doesn’t even require root. Moreover, this guide has been carried out on the Hyperion Launcher but should work on nearly all the popular custom launchers. With that said, here are the required instructions. But before that, please go through the requirements section below.
Prerequisites
- In order to try out the steps, you’ll need to have an Android 10 device with the preferred custom launcher installed.
- Also, set up the Android ADB and Fastboot Tools on your PC. This is because we will be importing the gesture navigation to the custom launcher via the ADB commands.
- Moreover, make sure the USB Debugging has been enabled. To do so, head over to Settings > System > Advanced > Developer options > USB Debugging. If you are having trouble doing so, please have a look at our detailed guide to enable USB Debugging.
Steps to try the new Navigational Gestures

- Download and install the Android SDK and Platform Tools on your PC.
- Also, make sure the USB Debugging has been enabled. Then connect your device to PC via USB Cable.
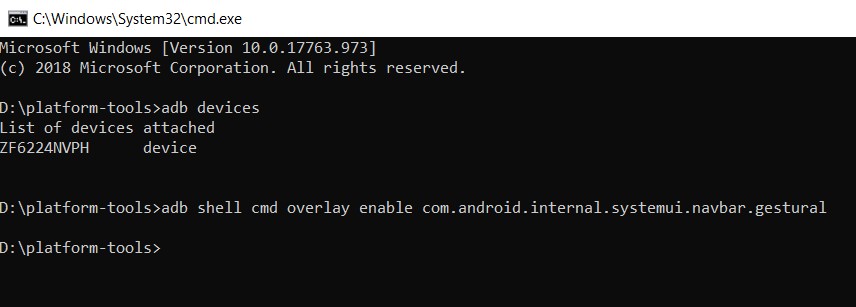
- Head over to the folder where you have installed the platform-tools. Enter cmd in the address bar. This is where we will be entering the codes to enable gesture navigation on custom launchers.
- This will open the Command Prompt. Enter the below command and press Enter. You should get an alphanumeric string with the device keyword.
adb devices
- Finally, enter the following command. This will enable the gesture navigation on your installed custom launcher:
adb shell cmd overlay enable com.android.internal.systemui.navbar.gestural

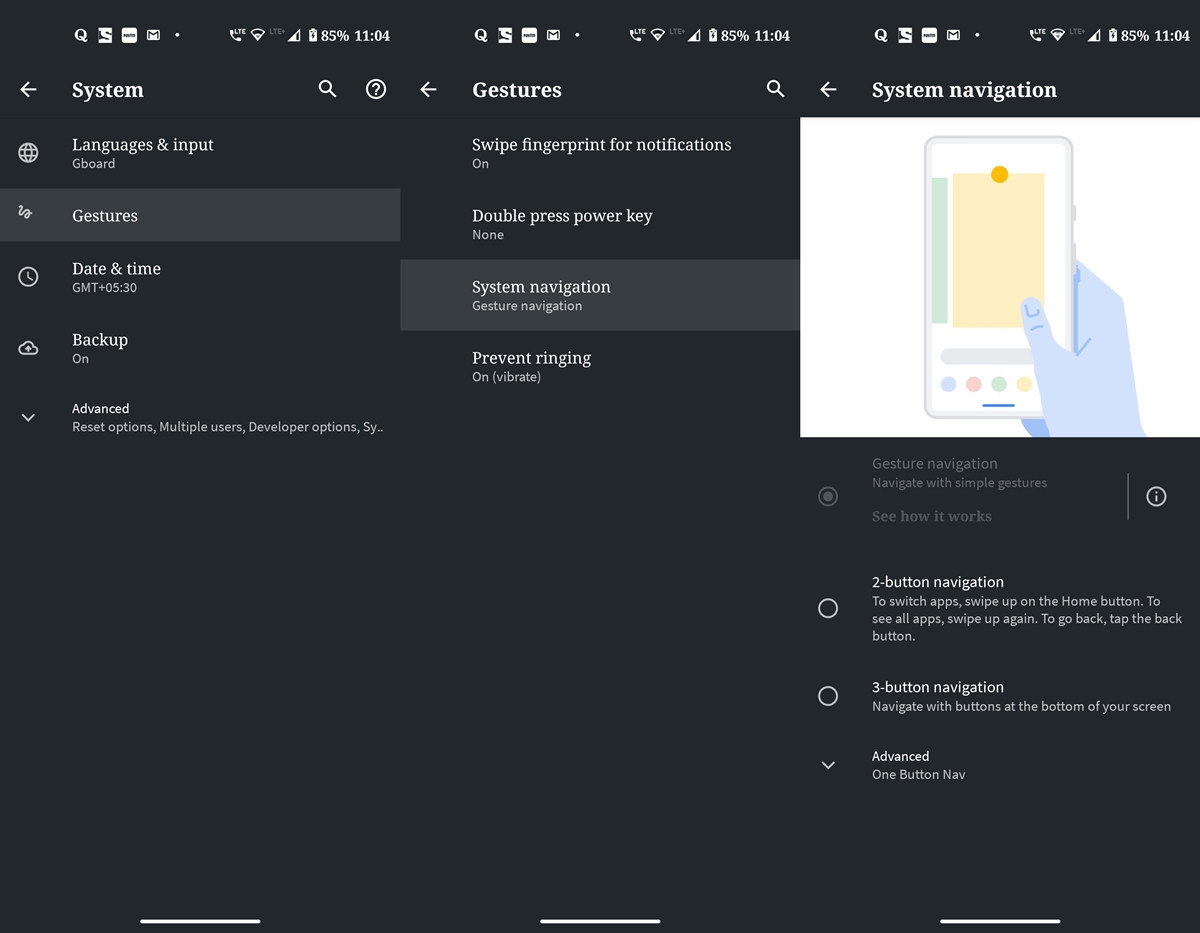
Once you execute the above command, head over to Settings > System > Gestures > System navigation. The Gesture Navigation will still be greyed out but will have been automatically selected (see above image). You could now use these gesture navigations on any of your preferred custom launchers.
Read next: Get Pixel 4 Live Caption On Any Android 10 Device


Join The Discussion: