Android, being an open-source platform, encourages users to involve in different kinds of custom activities like gaining root access, installing a custom recovery and flashing custom ROMs and mods. To add variation to our mobile experience, we keep switching between stock and custom by trying ROMs, Kernels, and mods and then returning to the official firmware.
If the flashing business is your favorite pastime as an Android user, you must have gone through many sweet and a few sour experiences. We get into boot loops, encounter errors, start looking for a solution and learn new lessons. Today, we’ll see how to fix Status 7 error on Android devices. The is often reported by users who download an OTA update package and try to sideload it on their device. Status 7 might also pop up while installing a ROM via a custom recovery like ClockworkMod, PhilZ or TWRP.
Fixing Status 7 Error While Sideloading OTA Zip
We all love new software updates from the OEM as they bring new goodies, features and improvements. But sometimes we do not receive an OTA as soon as it is out due to regional limitations. In that case, we search for the OTA zip file and get the new update by sideloading it on our device or flashing it via stock recovery. While things go nicely for some people, some users get the Status 7 error on the screen due to several reasons. Just take a look below:
Finding update package...
Opening update package...
Verifying update package...
Installing update...
Verifying current system...
"/system/app/Drive.apk" has unexpected contents.
E:Error in /tmp/update.zip
(Status 7)
Installation aborted.
OR
Installing update...
Verifying current system...
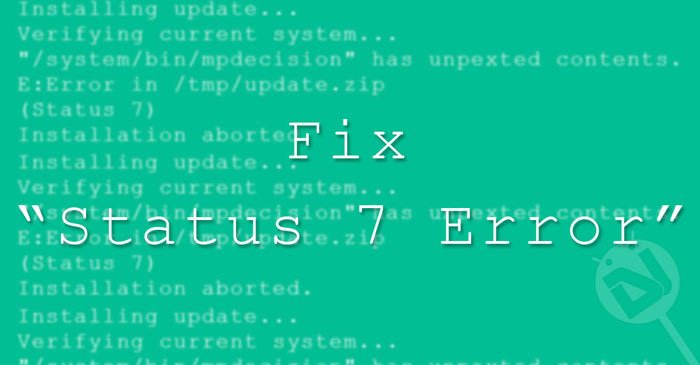
"/system/bin/mpdecision" has unexpected contents.
E:Error in /tmp/update.zip
(Status 7)
Installation aborted.
OR
Verifying current system...
/dev/block/platform/msm_sdcc.l/by-name/system has been remounted R/W; reflash device to reenable OTA updates
(Status 7)
Installation aborted.
OR

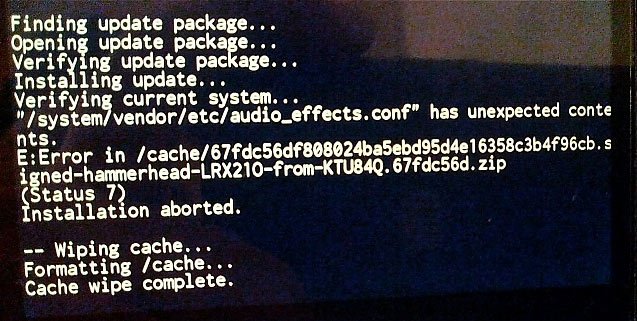
If you just take a closer look at the recovery logs given above, you’ll get an idea about what lies at the root of different instances of the Status 7 Error while installing OTA files on Android devices.
Well, this error means that the system partition has been modified, and the updater is aborting the install as a result. The first thing you should keep in mind that if you are having issues with sideloading/installing the stock OTA zip file, you must have had root access or some kind of modification on your device. If you are getting Status 7 Error when you try to install the OTA, ask a few questions to yourself:
- Did you gain root access or are the SU binaries present on the device?
- Have you flashed a custom Kernel?
- Have you installed a custom recovery like CWM/PhilZ/TWRP installed on the device?
- Do you have a custom ROM installed on the device?
- Have you deleted some system app in a fit of cleaning bloats?
- If you don’t have root, did you disable any system app from Settings> Apps?
- Have you frozen any system app using Titanium Backup or some other similar app?
- Have you installed some kind of system app or sound mod on the device?
If your answer to any of the questions asked above is in the affirmative, you must fix the cause first to be able to install the OTA successfully.
The best way to fix any possible causes of Status 7 Error is to restore your device to stock by flashing the stock firmware.
Don’t Miss: Malware on Android – Everything You Need to Know
For Nexus Users
In case you got a Nexus device and you get notified that your device has got some “unexpected contents” on it and you see a message like shown below:
Verifying current system...
"/system/<SOME>.apk" has unexpected contents.
E:Error in /tmp/update.zip
(Status 7)
Download the factory images for your device from here, and extract the downloaded file. Now open the firmware folder and you’ll see a .Zip file inside. Unzip it to find the system.img file and flash it using ADB command:
fastboot flash system system.img
To find a detailed guide on flashing factory images on Nexus devices, click here. Flashing the system will restore all system apps and you will be able to install the OTA successfully.
If you have installed Franco Kernel on your Nexus device and are having issues with installing the OTA zip, follow the quick steps given below:
- Flash stock kernel.
- Reboot your device and boot it into the recovery mode.
- Run ADB Shell on your computer and rename the following files as shown below:
/system/lib/hw/power.msm8974.so.bak ---> /system/lib/hw/power.msm8974.so
/system/bin/thermal-engine-hh-bak ---> /system/bin/thermal-engine-hh
- Now install the OTA update zip via recovery.
- Then flash the latest SuperSU.
Fix Status 7 Error While Installing Custom ROMs
While I have never had issues while sideloading OTAs, I remember getting Status 7 Error a couple of time while trying to install custom ROMs and install the CM update.zip package. If you encounter the Status 7 Error in CWM or TWRP recovery while installing a custom ROM, try the steps given below:
- When I had this issue, updating the CWM recovery to the latest version worked for me. So, I would recommend you to download the latest CWM/PhilZ/TWRP recovery for your device model and flash it using ADB or custom recovery.
- If you are getting an error with flashing a ROM in CWM, for instance, you can also try switching to a different recovery (TWRP/PhilZ) and the Status 7 Error should be fixed.
In many cases, Status 7 error pops up when the ROM’s updater-script file checks to see if the model of your device is compatible with the ROM you are installing. The specific part of the updater-script is called “asserts”. Thus, by removing the asserts condition from the script, you can make it bypass the check that results in Status 7 Error. Actually, this is a safety feature but sometimes the ROM developer does make device model-specific changes to the script. Here’s how to make the changes to the updater-script:
- Now rename updater-script to updater-script.txt and open with a text file editor.
- Now remove the line starting with “assert” to next semi-colon.

- Having removed the assert part, save the changes and close the text editor.
- Rename updater-script.txt back to updater-script.
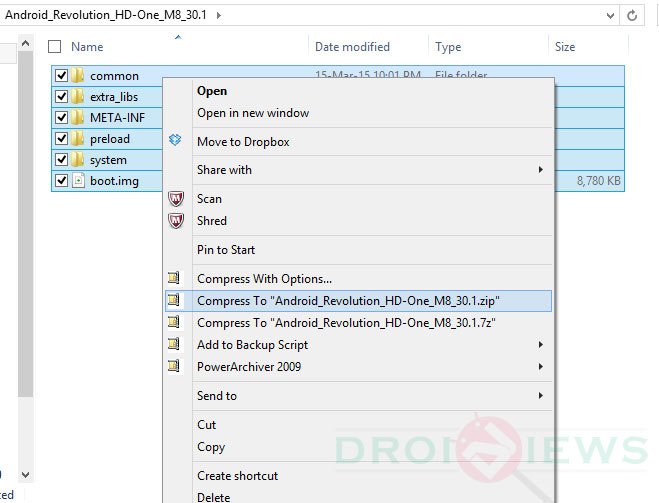
- Now return back to the ROM folder and select all files by pressing Ctrl+A on your keyboard.

- And then compress them to Zip.
- Now copy the newly zipped ROM file to your device and install it.
Done! Your ROM file should now install without giving Status 7 Error.
If you feel, I have missed something, or you have some more solutions that should be mentioned in the tutorial, please let us know. Sharing knowledge is what makes our Android community better!


not working , zip corupted
Hi! I’m trying to port Lineage OS 14.1, good at all but in “Verifying system image” it takes some time and later gives the error 7 system partition has unexpected OTA contents, I have TWRP 3.1.0-2 and I format system, cache (both of them) and data. Any fix or something?
Which device do you have? You must be making some mistake.
I’m with a Samsung Galaxy Tab 2 (P3100-espresso3g), good at all until verifying system image, it gives error 7 system partition has unexpected contents after OTA update.
Trying to apply that to a signed ROM.
Realized it won’t work. Failed due to signature verification.
Perhaps you should include that caveat.
All you guys, I’d say try unlocking your bootloader once.
All these errors happen to show in various forms depending on the recovery you’re using.
Error 7 in CWM recovery,
signature verification failure in TWRP and
corrupt file in cyanogen recovery.
Just unlock the bootloader to solve all issues like the above
what do i do for asus there are three assert commands which should i delete
i did not get those line which you mentioned the assert word is missing and instead of WT19a “armani” is used
I did it… but now it is giving me another error! 🙁
E: Footer is wrong
E: signature varification failed
PLease Help me!
Thanks Bro you’re the best !!!
What about cm 12.1 ota update for YU yuphoria rooted plz help me?
hey i have error with status 5 with cmw..
do you know how to fix it, please?
Well I have a HTC One M8 not rooted or done anything. I recieved a update and i cant seem to install it. It gives a status 7 error. I tried a facory reset even after that same error.
Same problem with my HTC desire 826, I too didn’t root the mobile yet I’m getting this status 7 error. Can some body please help us?
well i have the same problem with my htc desire 826 and believe me i have tried everything the only ways to fix this is that u either give it to the service centre or root the device(which i am not going to do)..i see that u hav posted this 7 months ago so if u hav any other solution please tell
me to have the same error with my htc one m9
any body can help?????
Try a data factory reset from stock recovery.
https://www.droidviews.com/how-to-perform-data-factory-reset-and-wipe-cache-on-samsung-galaxy-devices/