CyanogenMod, the popular crowd-sourced custom ROM developer community has released a new update to the much older 1st generation Motorola Moto E. Being a popular device in the budget section, Moto E is still receiving developer support from various communities. The latest CM 12.1 update for Moto E brings the fix for the most dreaded Stagefright bug which exposed over a billion Android device.
Stagefright is a security bug which lets an attacker overtake your device just by sending a MMS to attack ibStageFright module of the Android OS. If the attack is successful, the attacker will have major control over your device and the data on your device will be compromised. It is advisable that you install any patch to fix this disastrous bug on your device. Motorola has promised to release a security patch to address this issue but it’s better if you install the CM 12.1 update right away.
Warning!
This ROM is compatible only for the 1st generation Moto E, don’t try it on the Moto E 2015. Installing custom ROMs on your device might void the warranty of your device either temporarily or permanently. Make sure you follow the procedure carefully to avoid any hassles, proceed at your own risk. We are not responsible for any damage caused to your device during the process.
Prerequisites
- Charge your device to at least 80% to avoid unnecessary shutdowns during the process.
- Install TWRP recovery on your device. If you haven’t installed yet, follow our tutorial for installing TWRP on Moto E from here.
- Make a nandroid backup of your device so that you can revert back in case of any issues.
Downloads
- Download CM 12.1 ROM: cm-12.1-20160110-NIGHTLY-condor.zip
- Download Gapps Package
How to Install Android 5.1.1 Lollipop on Moto E Using CM 12.1 ROM
- Download CyanogenMod 12.1 and Gapps package from the above download links and transfer those files to your device’s storage.
- Reboot your device into the recovery mode to enter the custom recovery. To do this, you can use a third party app like Reboot manager to do the job.
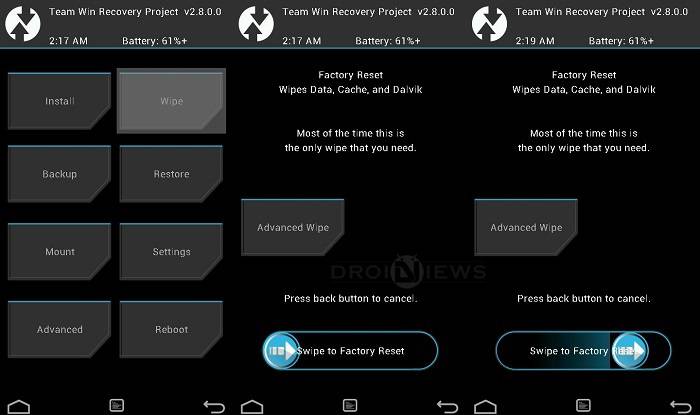
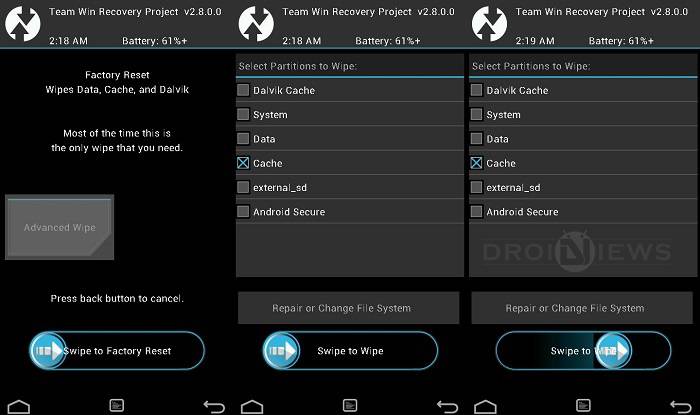
[googleplay url=”https://play.google.com/store/apps/details?id=com.jc.rebootmanager”] - In the recovery mode, wipe the device clean depending on your situation:
- If you’re flashing the CyanogenMod ROM for the first time, then you need to make a complete wipe of the device to avoid random force closes on the device. To make a clean wipe, just do a complete factory reset and also wipe the dalvik cache.

- If you’re just upgrading your CM ROM, then you get to keep the user data intact but it’s recommended that you wipe the cache to make sure that the apps doesn’t conflict with the new update. Here you won’t lose the user data as you’re not performing complete factory reset.

- If you’re flashing the CyanogenMod ROM for the first time, then you need to make a complete wipe of the device to avoid random force closes on the device. To make a clean wipe, just do a complete factory reset and also wipe the dalvik cache.
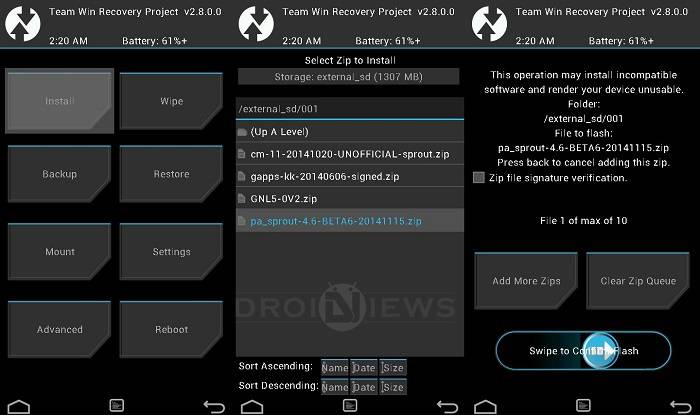
- Now flash the custom ROM. Choose the Install option from the recovery menu and choose the recovery zip from the file manager.

- After installing the CM 12.1 ROM, flash the compatible Gapps package using the same process mentioned in above step.
- Once the flashing is complete, reboot the device from the Reboot option in the TWRP main menu.
The initial boot up might take some time, so wait patiently until the device boots up. Let us know if you have any issues in the comments section below.


I did it exactly like you, very good tutorial ^^
But I wan’t to know how many time did the inicial boot (With the blue face) takes, because I’ve been waiting about an hour or so.
Thanks for everithing