We all know that the internet is like an open book. Thanks to social media and the plethora of other applications, people and their information remain online 24*7. Sometimes, people share too much information over the internet which is not required. On the other hand, sometimes it becomes a necessity to share important information over the internet. We will talk about the second one.
Today we have got so much data that it is not possible to store them all on our PC/smartphones with compact storage. Hence, we look up to file hosting services such as Dropbox. Using it, we can store our personal data as well as share files with our personal/business contacts. However, with the improvement in technology, digital thieves have also improved their modus operandi. So, it is imperative to keep our information safe. Here, the best bet is to enable two-factor authentication for Dropbox.
In this guide, we have explained the entire process of enabling two-factor authentication. Normally, we use passwords for the various applications we use. For the security aspects, we usually change our passwords frequently. However, hackers can hack passwords by implementing various password hack mechanisms. Comparing to that, two-factor authentication offers better security and user involvement. Hence, it reduces the chances of unauthorized access or stealing of files to a great extent. The Two-factor authentication is also popular as 2FA or 2-step verification.
Enable Two Factor Authentication for Dropbox
You have to keep this in mind that two-factor authentication is not possible to do from the smartphone application. So, we will use the PC/laptop and access our Dropbox account to enable two-factor authentication. Here we have put up the exact steps that you have to follow to accomplish this.
Setting up 2FA
- Log into your Dropbox account
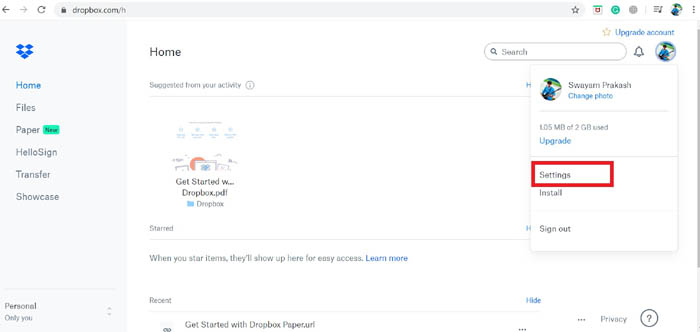
- On the home page of Dropbox, you can see your profile picture. Click on it
- A small menu will drop-down. Select Settings
- Click on the tab Security
- Under it, you see the two-factor authentication option is set to off.
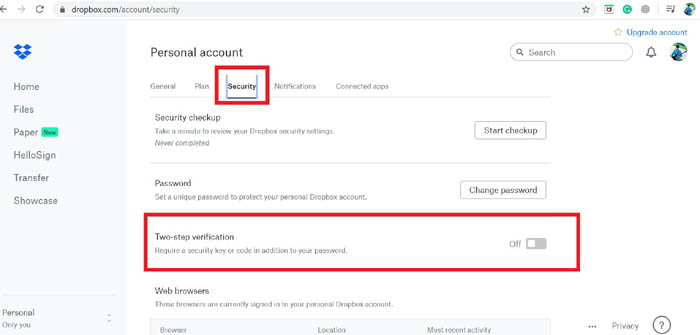
- Click on the toggle to activate it.
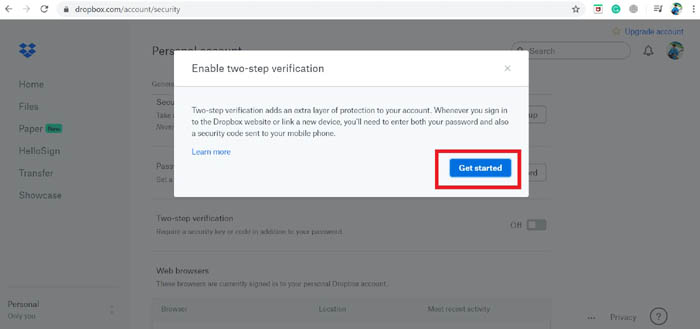
- On the confirmation dialog box, click Get Started
- Next, you have to enter your password when asked.
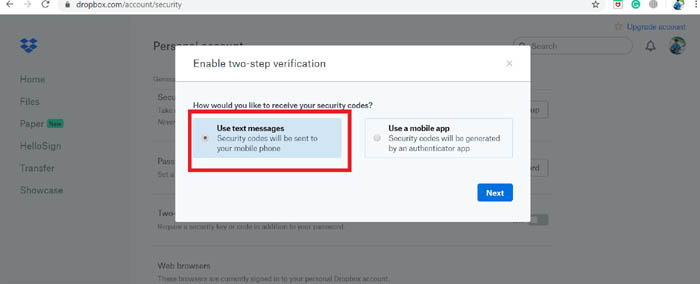
Once you enable two-factor authentication, every time you log in to your account you will receive a text with verification code on your phone.
There is also another option where an authenticator app will generate timestamp code every time you wish to log in to your account.
I will follow the text message option because that’s how I prefer it.
- Now you will see a dialog box where you have to enter your phone number. Make sure the country code is correct depending upon which country you are from.
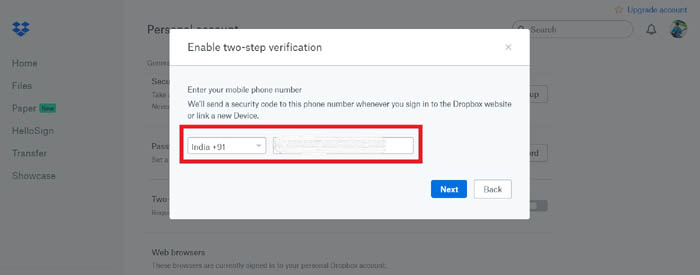
- After you enter your phone number, on the same number you should receive a verification code.
- This verification code you have to enter on your dropbox verification dialog box.
- Then you will see another optional feature to add a backup phone number which can receive the security codes if the first number is lost.
One-time Backup Codes
You will be provided with one-time backup codes that you can use to login to your account in case you do not receive code via text message. So, as pre-caution, save the one-time backup codes somewhere safe. Once you copy down the one-time backup codes, click on Next to finish the entire process.
Every time you log in to Dropbox from any different device, you will receive a verification code request along with the regular password you have set for the application.
This means if someone tries to unethically access your account, on your phone you will receive the verification code. No one can instantly log in to your account like that.
So, we hope that now you can Enable two-factor authentication on Dropbox. Keep following DroidViews to read more such informative articles.


Join The Discussion: