Smartphone displays have improved significantly over the years. As have the processor speeds, and overall specs. A couple of things haven’t changed all that much. The battery, of course, as everyone might have guessed. But there’s another thing that hasn’t changed much and it’s the audio experience. Sure some devices like the LG V series do provide a great audio experience. But other than that, finding a great audio experience on smartphones is pretty difficult even in 2018. That could be because not many people care because the audio quality they get is quite satisfying to them. If that’s not you though you can do something about it. You can install a Dolby Atmos port if your device is running on Android Oreo.
You can actually install quite a few audio mods, even with Android Oreo being relatively new. Many users prefer the Dolby Atmos experience over something like Viper4Android which I prefer more. Installing the Dolby Atmos mod won’t magically bring about a drastic change in the audio quality of your device. Because you’ll still be stuck with the same hardware. It will, however, improve the audio experience somewhat, turning an okay experience to good. The audio mod has been ported to Oreo devices by XDA developer guitardedhero, who isn’t new to the realm of audio mods. He managed to port the Dolby Atmos Digital Signal Processor and GUI from the latest ZTE™ Axon 7 firmware.
See also: Increase Audio Quality on Any Rooted Android Device
Dolby Atmos Features
- Output support for various media players.
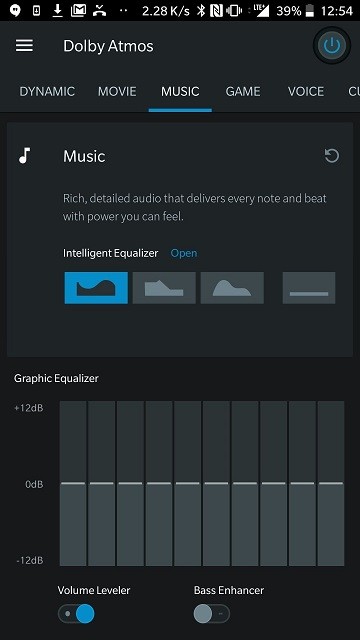
- An Intelligent Equalizer constantly analyzes and dynamically adjusts the audio to match a preset frequency response, thus delivering rich and detailed audio that packs power into every note and beat.
- Volume Leveler delivers a consistent volume, regardless of the change in content or applications based on the device’s master volume.
- Bass Enhancer improves bass response via headphones and device speakers, boosting the ability of both to reproduce low-frequency sounds.
- Dynamic enhancer identifies the audio content and adjusts several parameters based on the audio content to give the best output quality.
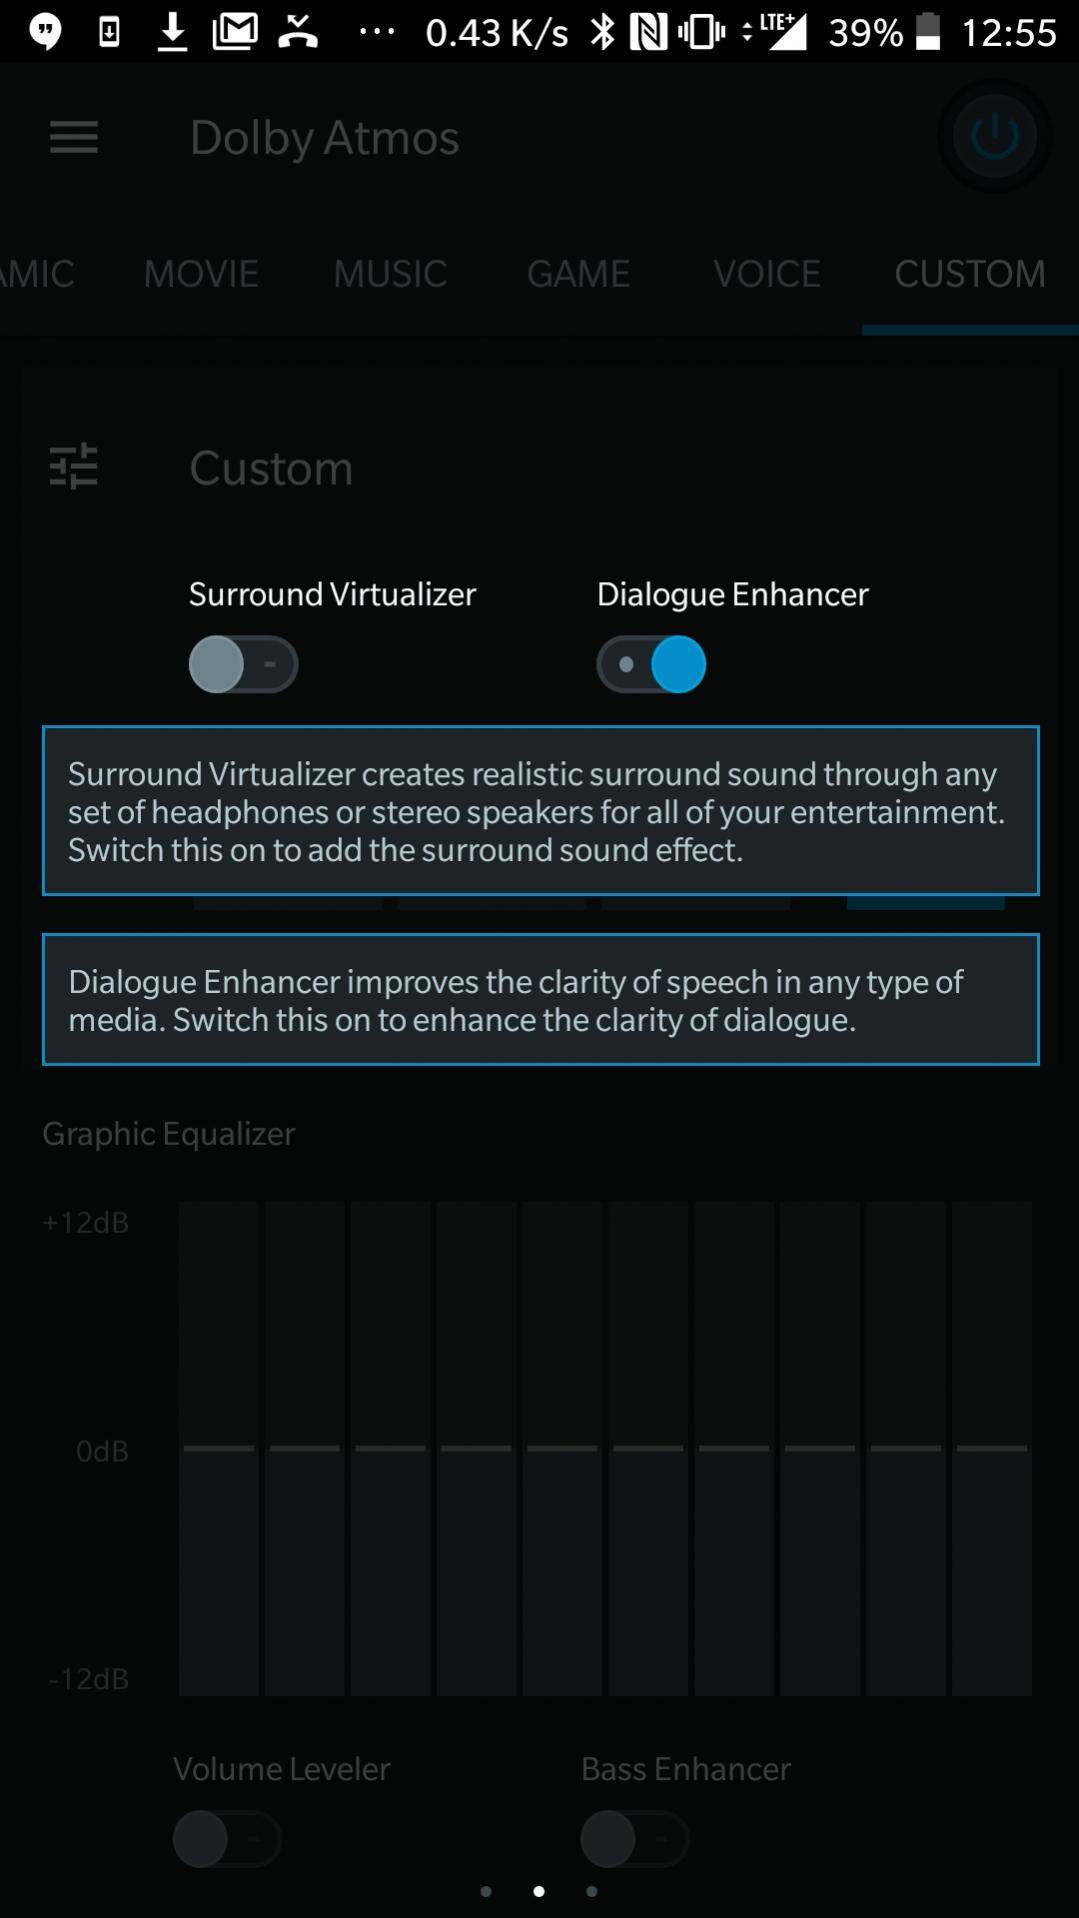
- Surround Virtualizer creates realistic surround sound through any set of headphones or stereo speakers.
- Dialogue Enhancer improves the clarity of speech in any type of media.
Requirements
- Dolby Atmos is one of those universal audio mods that can be installed on almost any device running a certain version of Android. In this case, the device should be on Android 8.0 or above.
- It’d be preferable if the device is running stock Android or something close to it.
- The device should either be rooted or have a kernel that supports Dolby. The rooting method doesn’t matter, whether it be Magisk or SuperSU.
- The device must have TWRP recovery or any other custom recovery installed.
- Other installed audio mods such as Viper4Android can cause problems, so make sure you don’t have any installed.
Downloads
Don’t miss: How to Get 3D Stereo Sound Effect on Any Android
How to Install Dolby Atmos Audio Mod on Android Oreo
- Download the Dolby Atmos zip file from the link above and transfer it to your device’s internal or external storage.
- Reboot your device into recovery mode. Before proceeding any further now would be a good time to create a backup, just in case. To do this, select Backup, check the system partition and swipe at the bottom to create a backup. This will backup only your device’s system partition, which is what the mod will be modifying. If you want you can create a full NANDroid back up by selecting all the partitions, although it will take a lot longer.
- Select Install from the TWRP main menu and navigate to the downloaded zip file.
- Select DolbyAtmos_for_Oreo_20180219.zip and swipe at the bottom to flash it.
- Tap on the Reboot system button that appears after the process is complete.
Your device shouldn’t take any longer to boot than usual. However, if it does, wait for at least 60 seconds (a minute) before doing anything. If your device still doesn’t turn on, reboot it into recovery and restore the backup.
source: xda


Join The Discussion: