
Android is the most popular and growing Operating System in the Smartphone sector. I’ll bet there is not doubt in this regard. Billions of users are now part of the Android family, but not all of them are aware of the beautiful things that are hidden beneath the layers of awesomeness. Do you know that Android has a hidden menu in the settings? Do you ever saw the Developers Options in the Android settings?
People who used the ICS or earlier versions of Android might have seen this option lying around at the bottom of the Settings menu. As Google had hidden this menu on Jelly Bean and later versions of Android, there are quite a few people who know about this hidden treasure and it’s a safe bet that even you saw this option on your device, you never knew what it was meant for.
Google had hidden this option to developers only, but there is nothing wrong in exploring an Open Source OS like Android. The developers menu contains a lot of hidden features through which you can do some high-level operations without even having any prior coding skills or development knowledge. Today we will guide you through the Developers Menu on Android.
So first of all, you should know the path to the hidden Developers menu which Google had hidden for some unknown reasons. (Presumably, Google doesn’t want its users to go crazy by some random clicks in the developers menu) To unlock the developers option on your Android device follow the below procedure.
Unlock Developer Options on Android
- Open the Settings application from the app drawer.
- Scroll down to the end of the settings menu and click on the About Phone option.
- Tap on the Build number repeatedly for 7 times to unlock the developers menu.
- Then a message text pops up saying You are now a developer.
Yay! you’re now an Android developer without any certification or coding skills.
Introduction to Developer Options on Android
Now that you’re an Android developer, the hidden menu is now open at your service all the time in the settings menu. Let’s explore the various cool features of the developers option menu.
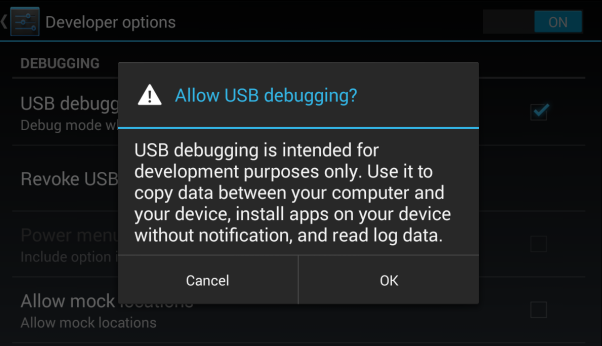
Enable USB Debugging
Most Android users often think that this option is strictly restricted to developers, this may be due to the word Debugging in it. But the irony is that this is the most widely used feature in the developers menu. USB debugging allows applications on your computer to interface with your Android phone over the USB connection.
Enabling USB debugging is must for a variety of advanced operations like rooting an Android phone, unlocking it, taking backups, installing applications, or collecting logs and screenshots of your Android device. Even the most used ADB commands needs the USB debugging enabled to get the complex tasks done. Even if you forgot the lock screen password, you can bypass it from your PC if this feature is enabled.
However, this might even open a back-door into your device. If you plugged your device to PC for charging, then anyone might remotely access your device to pull your data. So, enable this option only if it appears to be useful to you.
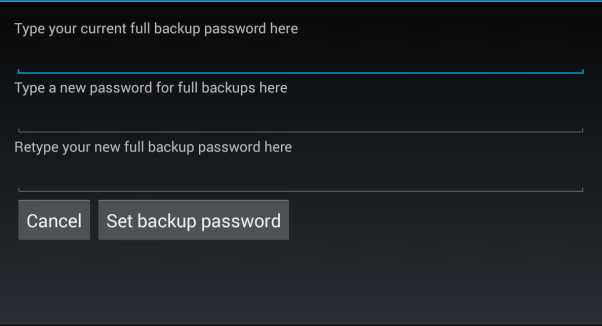
Create a Desktop Password
As we already told that the ADB interface is used to take backups of your phone, here is another important option that is related it. The desktop password is used to protect those backups with a password. This option encrypts your backups to secure them, so you won’t be able to access them if you forget the password. So this makes your backups just another Fort knox.
Stay Awake while Charging
Many of you might feel that this is a puny option to discuss, but if you’re an advanced user you will get to know the real importance of this option. While doing any development on your device by connecting it to PC, then you will require the device to stay awake to see the progress. You won’t find it easy to change the time out settings every time you plug-in your device to the PC for some work.
So don’t underestimate even the smallest feature of Android.
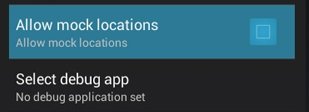
Allow Mock Locations to Fake GPS
Probably this might be interesting to you just by reading the title. You might probably wonder what we meant by faking GPS, there is the mock locations option in developers menu that makes the Android OS think that you’re at a location where you actually aren’t. This option might be useful when you want to fake your identity and location to your friends.
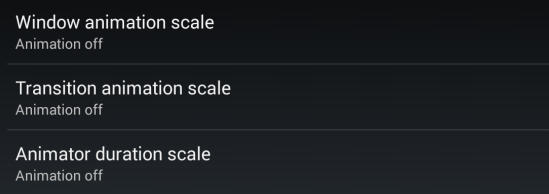
Choose your Animation Settings
Developers option is heaven for customization, here you can even change the amount of time you spend between the switching between the apps. When you switch between apps and screens in Android, the animations come into the act and they fill the gap between the app switches. So you can control these by changing the Window animation scale, Transition animation scale, and Animator duration scale options here.
You can even speed up your animations, the lower the value in the settings, the faster your animations will be. So you can literally speed up your phone, but don’t be greedy because these animations may behave weird sometimes.
Enable MSAA for OpenGL Games
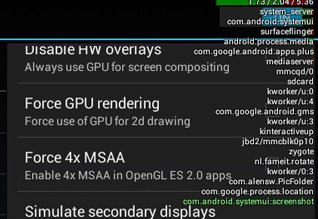
If Gaming is your main concern on your Android device, then you’ve landed in the right place. You can trigger the higher performance for gaming by enabling the Force 4X MSAA option in the Developers option.
This option will force your device to use 4x multi-sample anti-aliasing in OpenGL ES 2.0 games and other apps. Obviously crushing your device resources would drain your battery, so enable this option on demand. But this will definitely show a considerable improvement in the graphics performance of your device.
Decide on the Background Activities
You can see an option in the developers option with the name Don’t Keep activities. This option will close the apps as soon as the user closes the app, it is achieved by pushing the apps to closing state rather than running in the background. So you’re thinking that this option will boost up your device speed as there are no background processes.
You’re completely wrong, this might force close the background apps. But this has an adverse effect than expected, the apps need to build cache every time which will degrade the performance rather than improving it. So use this when you stick to one app for a long time like when watching a movie.
However, use the Background process limit option which will let you choose how many apps can run in the background.
Overplay CPU Usage on the Screen
You can view CPU usage data by enabling this option in the Developer options. The CPU information will appear on top of whatever app you’re using. We agree that the screen looks messy with this option enabled, but you can directly view what apps are using more CPU power which will be helpful when you’re testing a custom rom or kernel on your device.
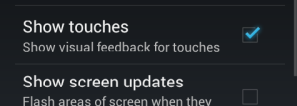
Show Visual Touches
This option enables the visual screen touches that will show the pointer location. Enabling this would help while you’re recording the screen where the touches are visible because of this.
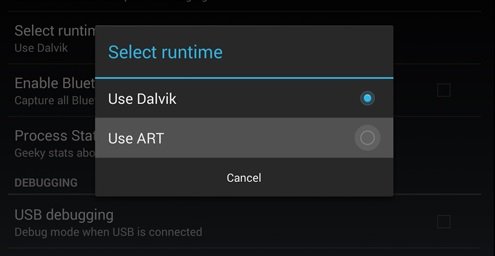
Switch the Default Runtime on KitKat
Google has provided an optional runtime on KitKat devices which is the ART runtime which is reportedly replacing the Dalvik runtime on Android L and future versions. So if you wan to test how the device performs on ART runtime, all you need to do is to choose it from developers options.
We’ve covered most of the Developer options on Android, but enlighten us if we missed something by mistake. Leave your feedback in the comment section below.





Join The Discussion: