When you take a picture from your smartphone, you could make that image’s EXIF metadata store the location where it was clicked. This could be done using the Stock Camera (or the Google Camera app) and Google Maps. With the help of these two apps, we will be listing the steps to click and view your images location-wise. Some location permissions also need to be enabled along the way for this tip. With that said, here are the steps to follow. On that note, also check out our guide on how to perform manual face tagging in Google Photos.
Click and View Images Location Wise
Before beginning with the instructions to click and view your images location-wise, enabling the Location Permission for your Google Account is the first requirement. This is how it could be done. Moreover, does an app asking for location permission actually requires it? We have answered this in our guide on which Android apps really need location permission. Do have a read it.
Enable Location Permission on Android
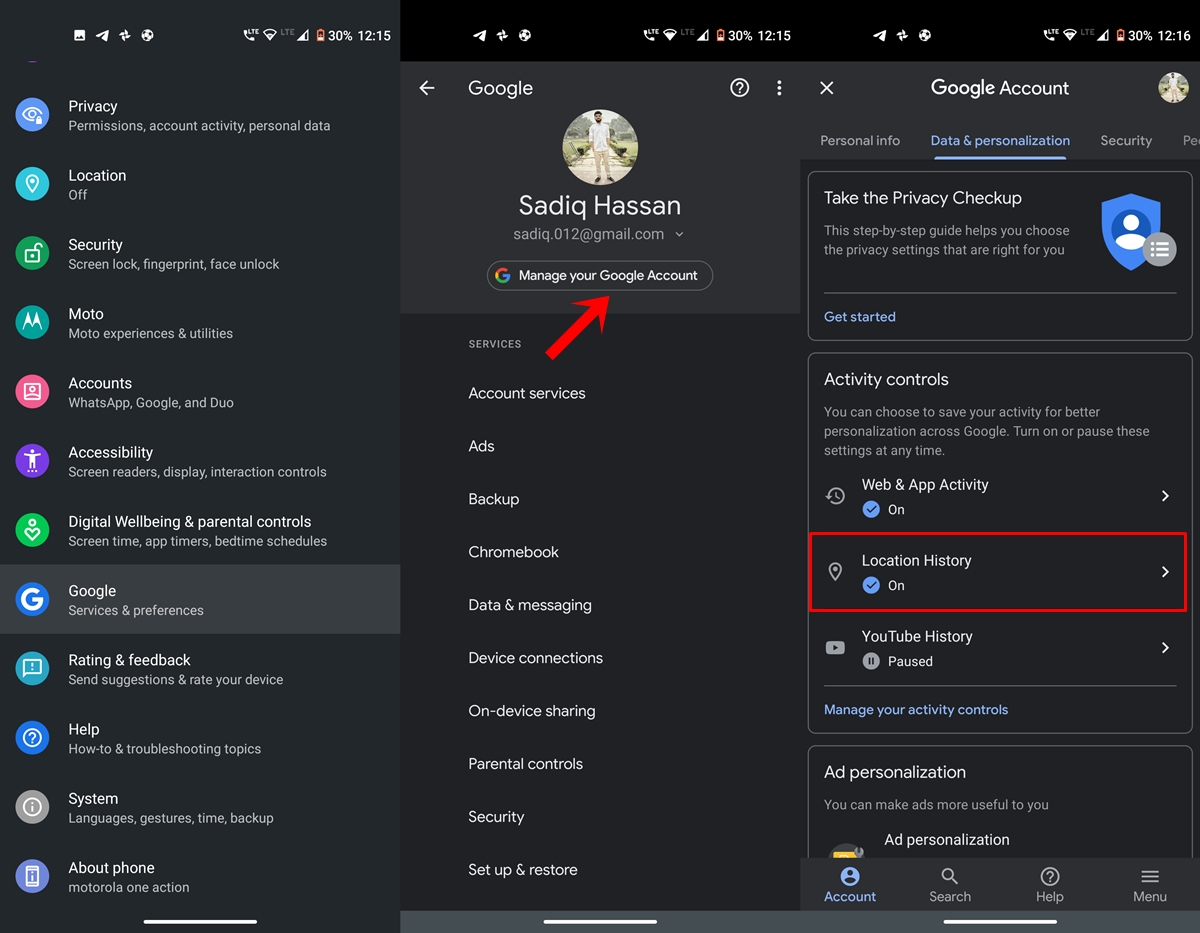
- Head over to Settings on your Android device.
- Go to Google and tap on Manage your Google Account.
- Tap on Data and Personalization from the top menu bar.
- Next, under Activity controls, check whether Location history has been turned on or not. If not do it right away.
That was all from this section. You’ll now have to enable the location permissions for your camera app. Until and unless you do so, you won’t be able to click and view images location-wise. On that note, have a look at all the Google apps permissions on Android.
Enable Location Permissions on your Device’s Camera
Different cameras have this option placed at a slightly different section. Just for reference purposes, we have attached two images, one from Motorola Stock Camera App and the other is from Google Camera v7.0. However, the steps will near about be identical in other stock camera and GCam builds respectively. Here are the steps to keep in mind.
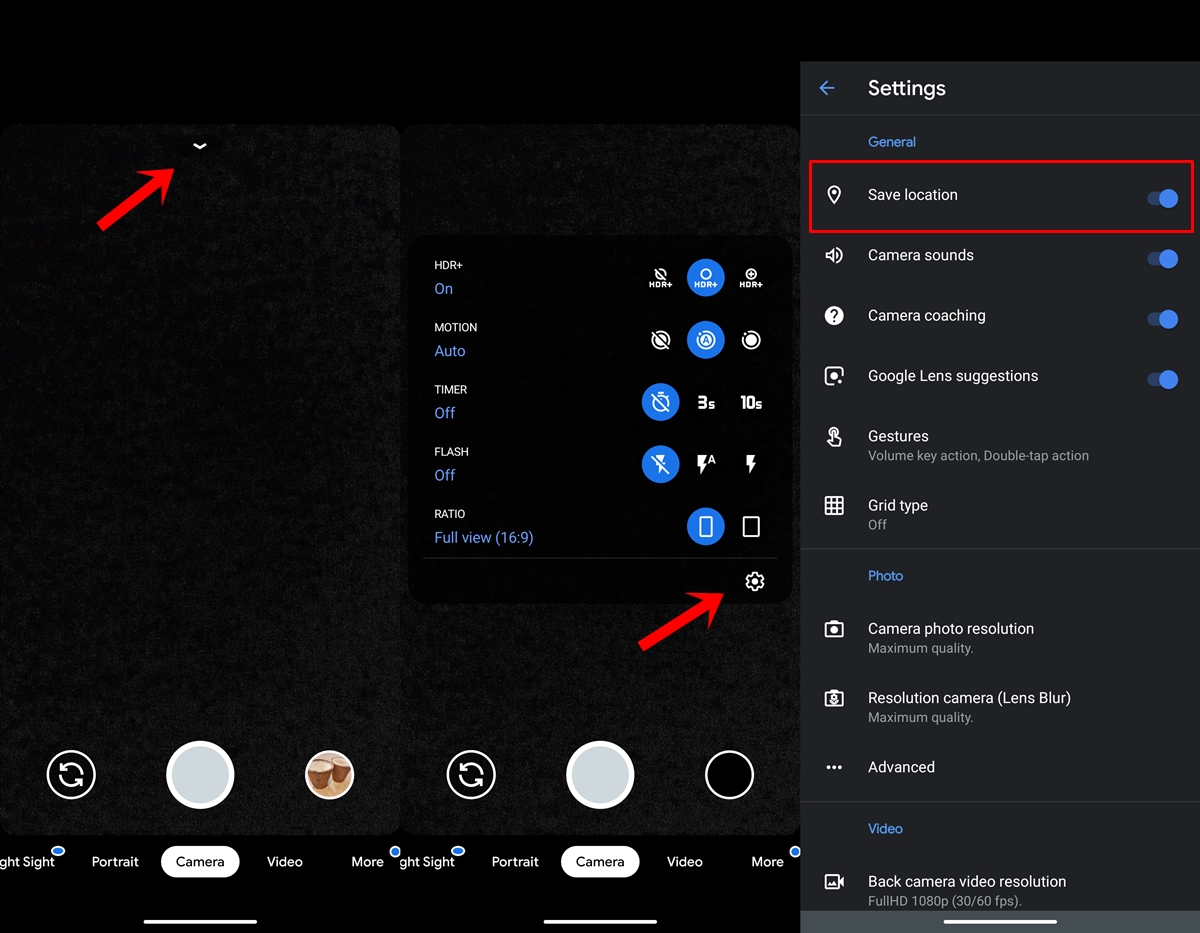
- In the case of Google Camera, under the camera section, tap on the downward-facing arrow situated at the top. Next, tap on the Settings icon. Look out for the Save Location feature and enable the toggle next to it. This option is usually found under the General section.
- In case of any stock camera (which is of Motorola in this case), head over to Settings. Search for the Save location option and enable it. The option will be similar in other stock camera apps as well.
Now that all the required permissions are enabled, the first half of the guide on how to click and view images location-wise is completed. This is because since you have given location permission to the camera app, any images it will now take will have an associated location in its metadata. Let’s now see how you could view these images location-wise.
Steps to View Images Location-Wise
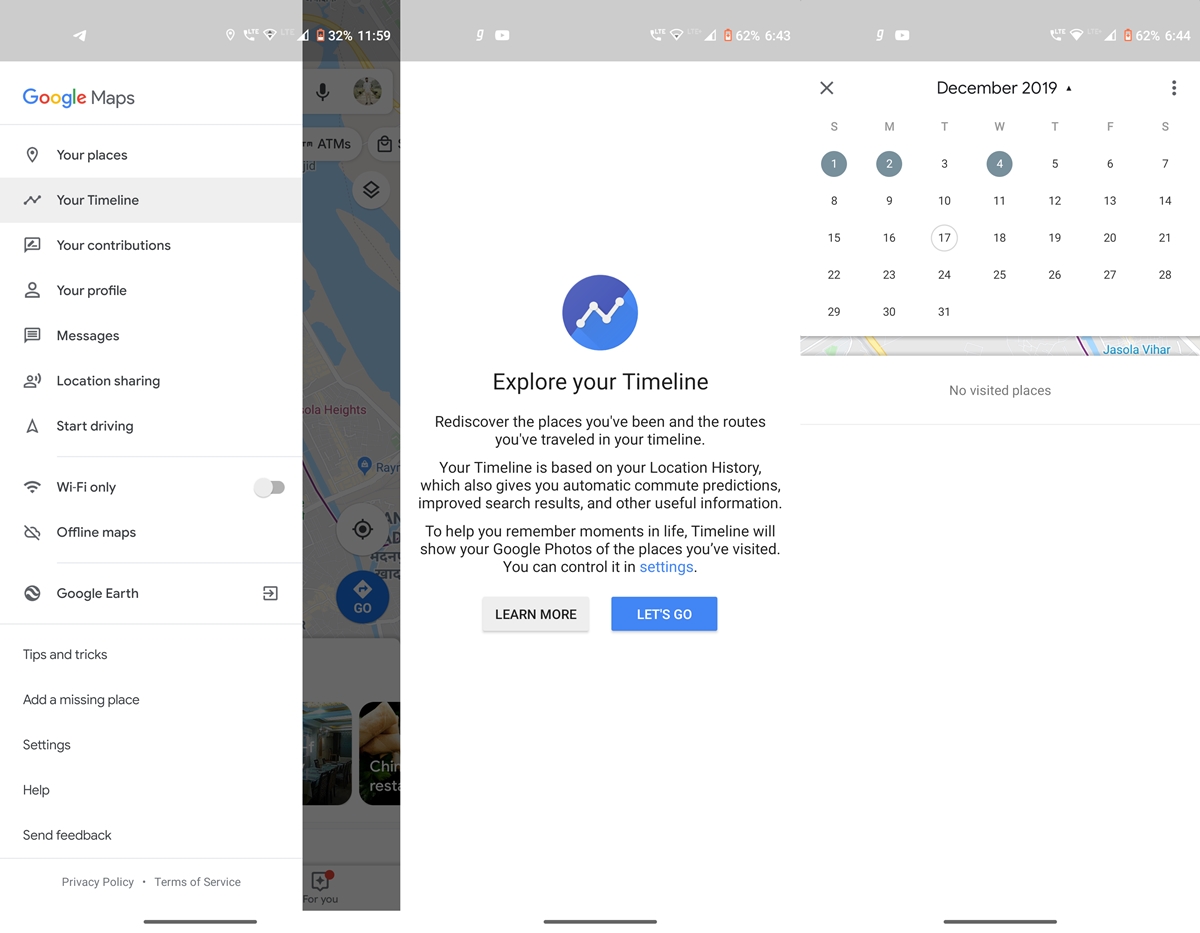
- Head over to Google Maps on your Android device.
- Tap on the hamburger menu and visit the Your Timeline section.
- By default, you’ll be taken to the images that you have clicked today. To view images of any other day, tap on the Today keyword and choose the desired data.
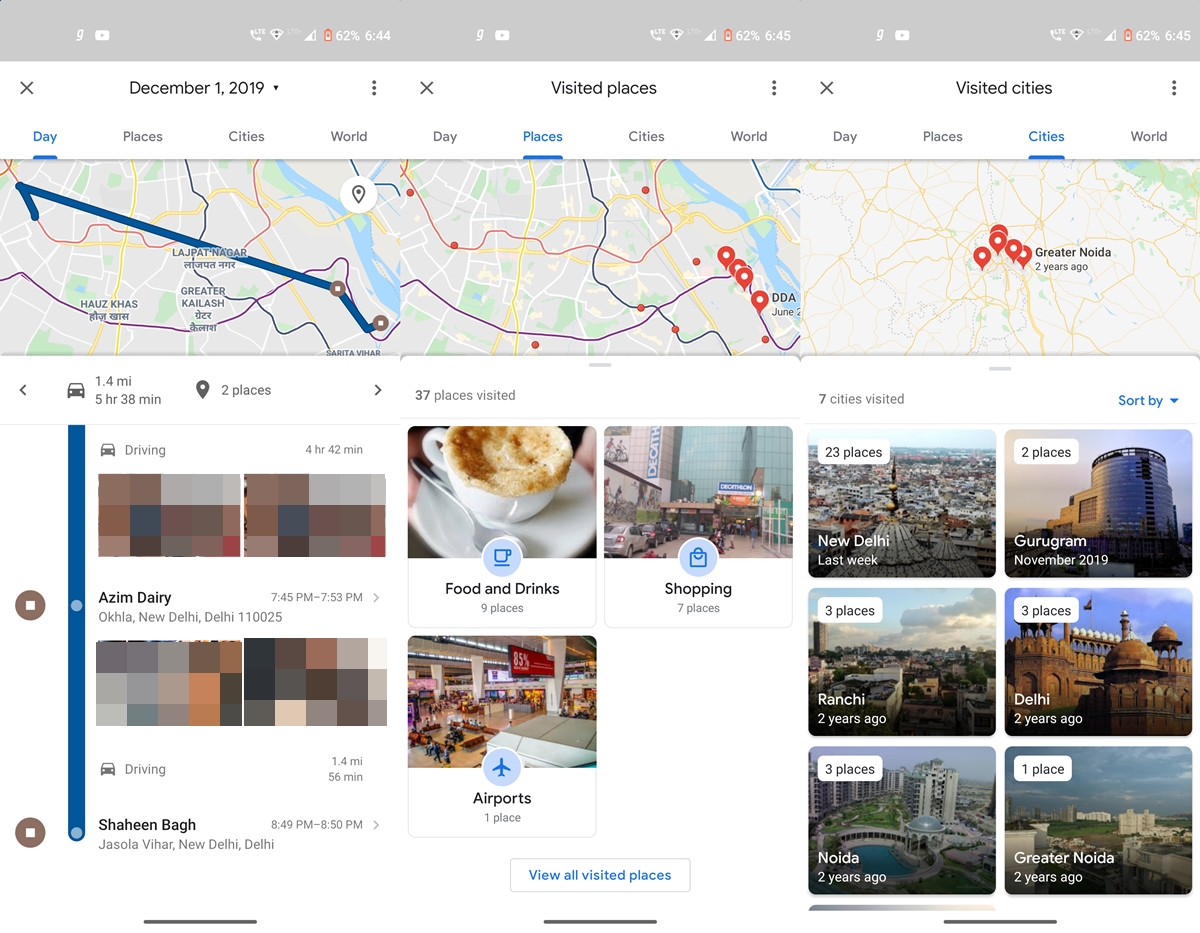
- For your convenience, Maps will grey out the circle on the dates it has saved the locations.
- Moreover, if you wish to view the images location-wise, tap on Places and choose the desired location. If you moved out of your state or even countries and have taken pictures there, have a look at the Cities and World section.
What if you clicked an image but the photo’s location is not showing correctly. Well, Google Photos allows for changing of location also. But the steps can’t be carried out from its app. You’ll have to head over to the Photos website and do the necessary changes. We already have covered an in-depth guide on the steps to manually add locations to Google Photos. You could take its help and modify the location.
With that said, we come to the end of the guide on how to click and view images location-wise. Do let us know if you face any issues while executing the steps mentioned above.
Read next: 7 Google Maps secret features you should be using


Join The Discussion: