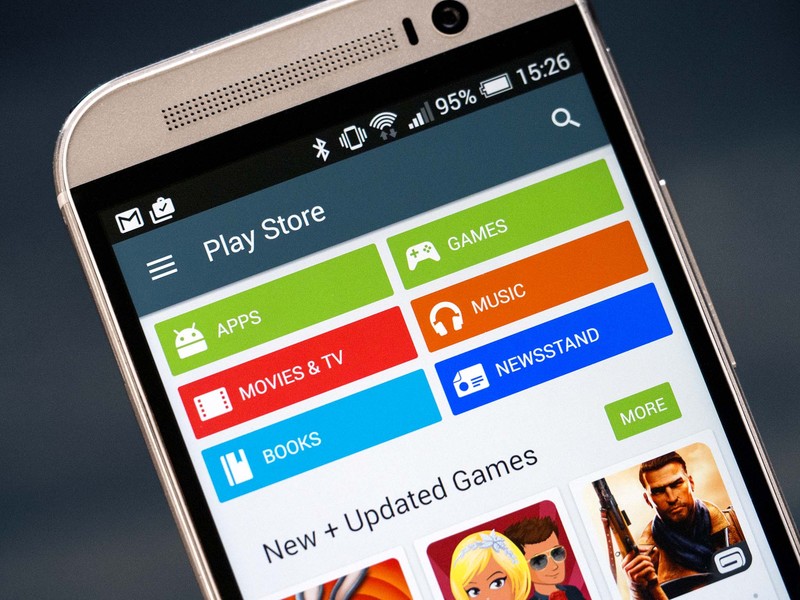
Buying apps from the Google Play Store through carrier billing is not a new and unknown feature. But I was surprised when I came to know that majority of the people didn’t know about it. Yes, the majority were teenagers but still, they comprise a lot of the total population. This led to the rise of this post.
Buying apps through carrier billing might be a good news for users who are less than 18 years of age or for users who doesn’t have a debit or credit card or simply don’t wanna use it. For developers, this is even a better news as Google just did encourage them to make more apps and games at competitive prices.
You may also like: Our Favorite Android Apps [2016 Edition]
I know Google did a great job by making this carrier billing option available. But still, when I was trying to use the carrier billing option, it made me realize how complicated the process can get. At least for a beginner. Moreover, this method requires being executed perfectly because money is involved. Nobody likes to play ketchup when money is involved. So I decided to write a simplified guide for users that are willing to use the carrier billing option for payment.
Important Information to be Noted
- The SIM Card should be inserted, activated and be working on your smartphone. Moreover, it should be only inserted in the first SIM slot (SIM 1).
- Prepaid users should have enough balance before buying any app. It is recommended to keep the main balance more than the bill amount. It is so because the carrier will charge a nominal service fee. This is okay because the carrier also needs to make a profit.
- The process described can also be used for In-App purchases.
But before we dive into the topic let me inform that for postpaid users the amount will get added to their monthly bill. Whereas for prepaid users, the amount will be deducted from their main balance. Yup, now the environment is ready to dive into the topic.
Also read: How to Customize Android Status Bar without Root
Prerequisites
- An Android smartphone
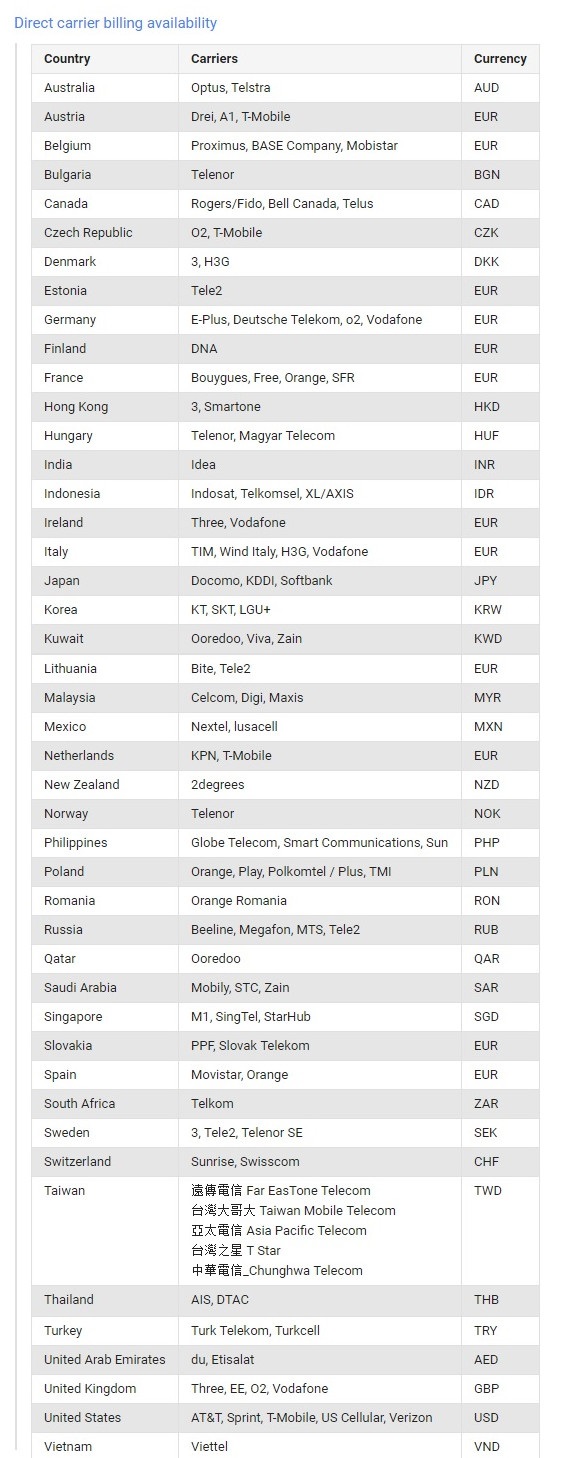
- A SIM card from the carrier list (available at the end of the post)
- An Internet connection
Simplified Steps to Add Carrier Billing in Google Play Store
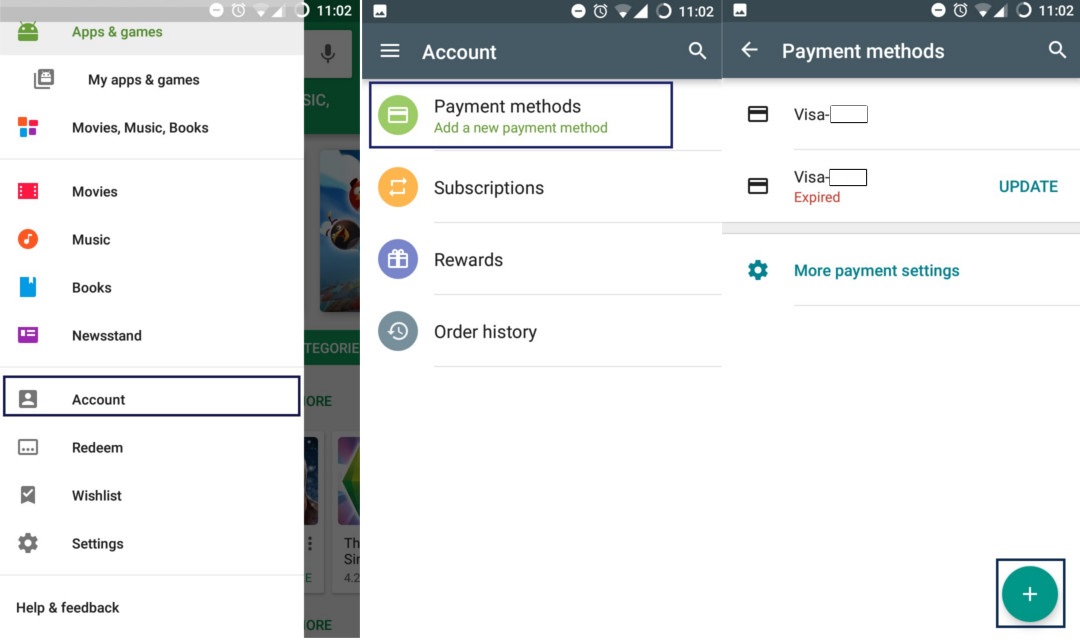
- Open the Google Play Store App.
- Swipe from the left and select the Account option.
- Then, select the Payment methods.
- Tap the + sign.
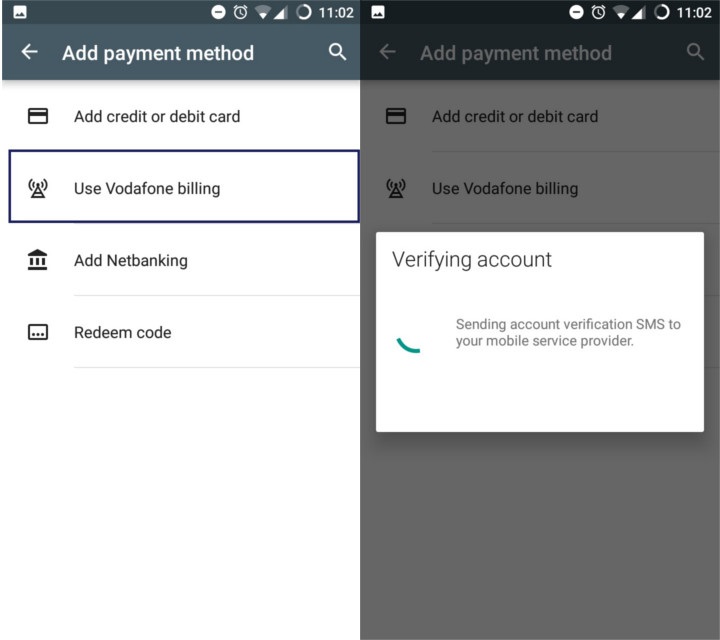
- After that, select the Use Vodafone billing option (I have used Vodafone SIM in this procedure, you can use any of the carriers).
- A message will pop-up stating that carrier charges may apply.
- Accept it (This may charge you with a normal SMS fee).
- Then, it will display a pop-up mentioning Vodafone Billing.
- Click on Save (Make sure to read the terms of service).
That’s it! Head back to the payment methods and you should see there Bill my Vodafone account.
Don’t miss: How to Make Your Phone Look Like Google Pixel
How to Buy Apps from the Play Store
- Head over to the app you want to buy.
- Click on the Install button (The price is listed).
- A message will pop-up saying Bill my Vodafone account.
- Click on Buy.
- Wait for some time and it should display Payment Successful.
- Click on Continue.
That’s it! Your app will start downloading. A message will be sent from your service provider with the details of the bill.
Troubleshooting
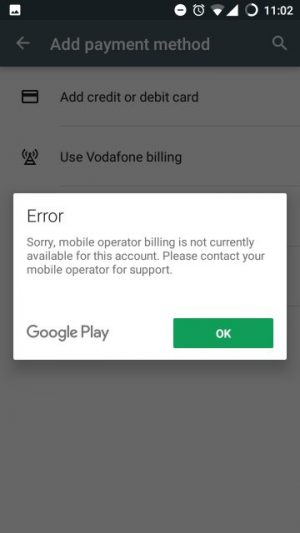
If you get an error like in the image above. This is because the carrier billing functionality is not activated for all users yet. If you’re a postpaid user then you won’t face any problem. This error is mostly faced by the prepaid users. In this case, I would recommend you to contact the Customer Care. I had the same issue but I got it fixed.
Editor’s Pick: How to Add, Remove and Manage Accounts on Android Devices
List of Carrier Options Available For Direct Billing
This must have simplified it. I have wrapped everything up. If you guys still have any trouble or issue related to this post please let me know in the comments section below. I will be happy to help.


Join The Discussion: