Regardless of how careful you are, if you like customizing your Android device something could go wrong. ADB, or Android Debug Bridge, is a very powerful tool which allows you to launch commands on your smartphone passing through your PC. There are many benefits of using it, especially when you don’t have root access. However, in situations where your phone is unusable, it may become critical to recover your data. Keep reading and learn why and how you should authorize ADB commands on Android devices using a Windows PC.
What does it mean to authorize ADB?
When you launch an ADB command from a PC, your phone accepts it as an administrator instruction. This means that ADB can effectively replace the root profile in many situations. With great power comes great risk, so it wouldn’t be wise to accept any command. This is exactly why Google implemented debugging authorizations into Android.
First of all, ADB has to be enabled on your phone. Doing this wouldn’t be enough to allow someone with bad intentions getting access to your phone. Of course, assuming that you’re using an effective screen lock method. Moreover, keeping it disabled wouldn’t be really useful if you end up needing it, because it could be too late in some situations.
When you run a command from a computer your device doesn’t recognize, it will pause it and ask for authorization. The authorization has to be granted from your device, which needs to be unlocked. As a result, as long as your device stays locked, you won’t have to worry about it.
How to enable ADB on Android devices
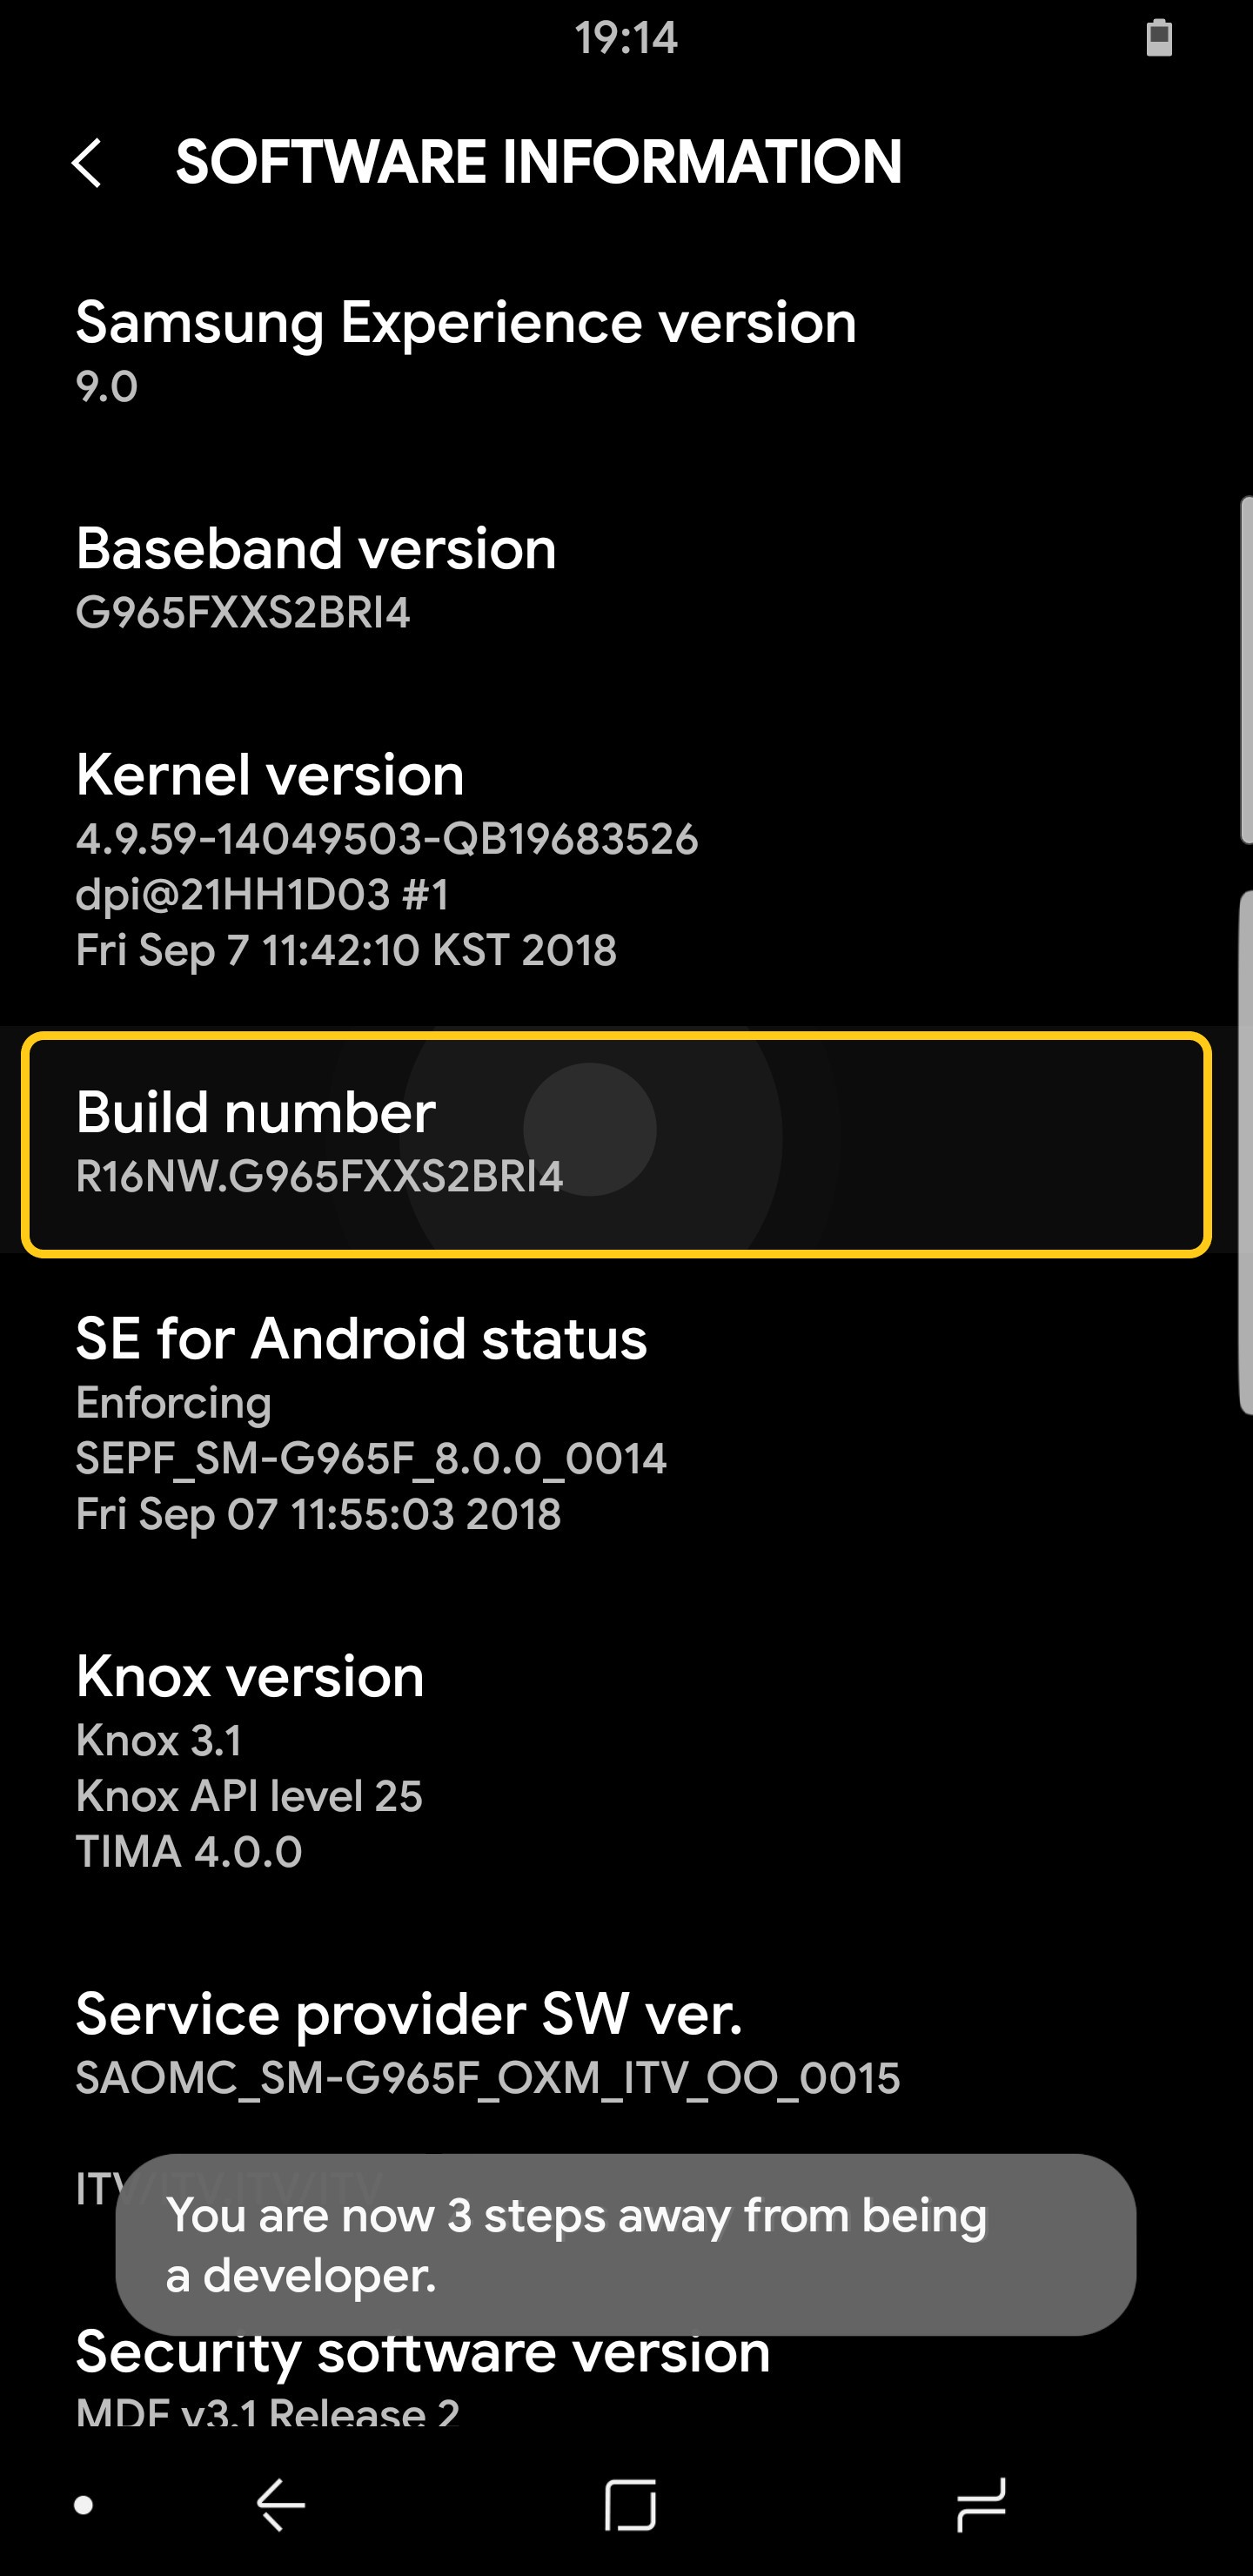
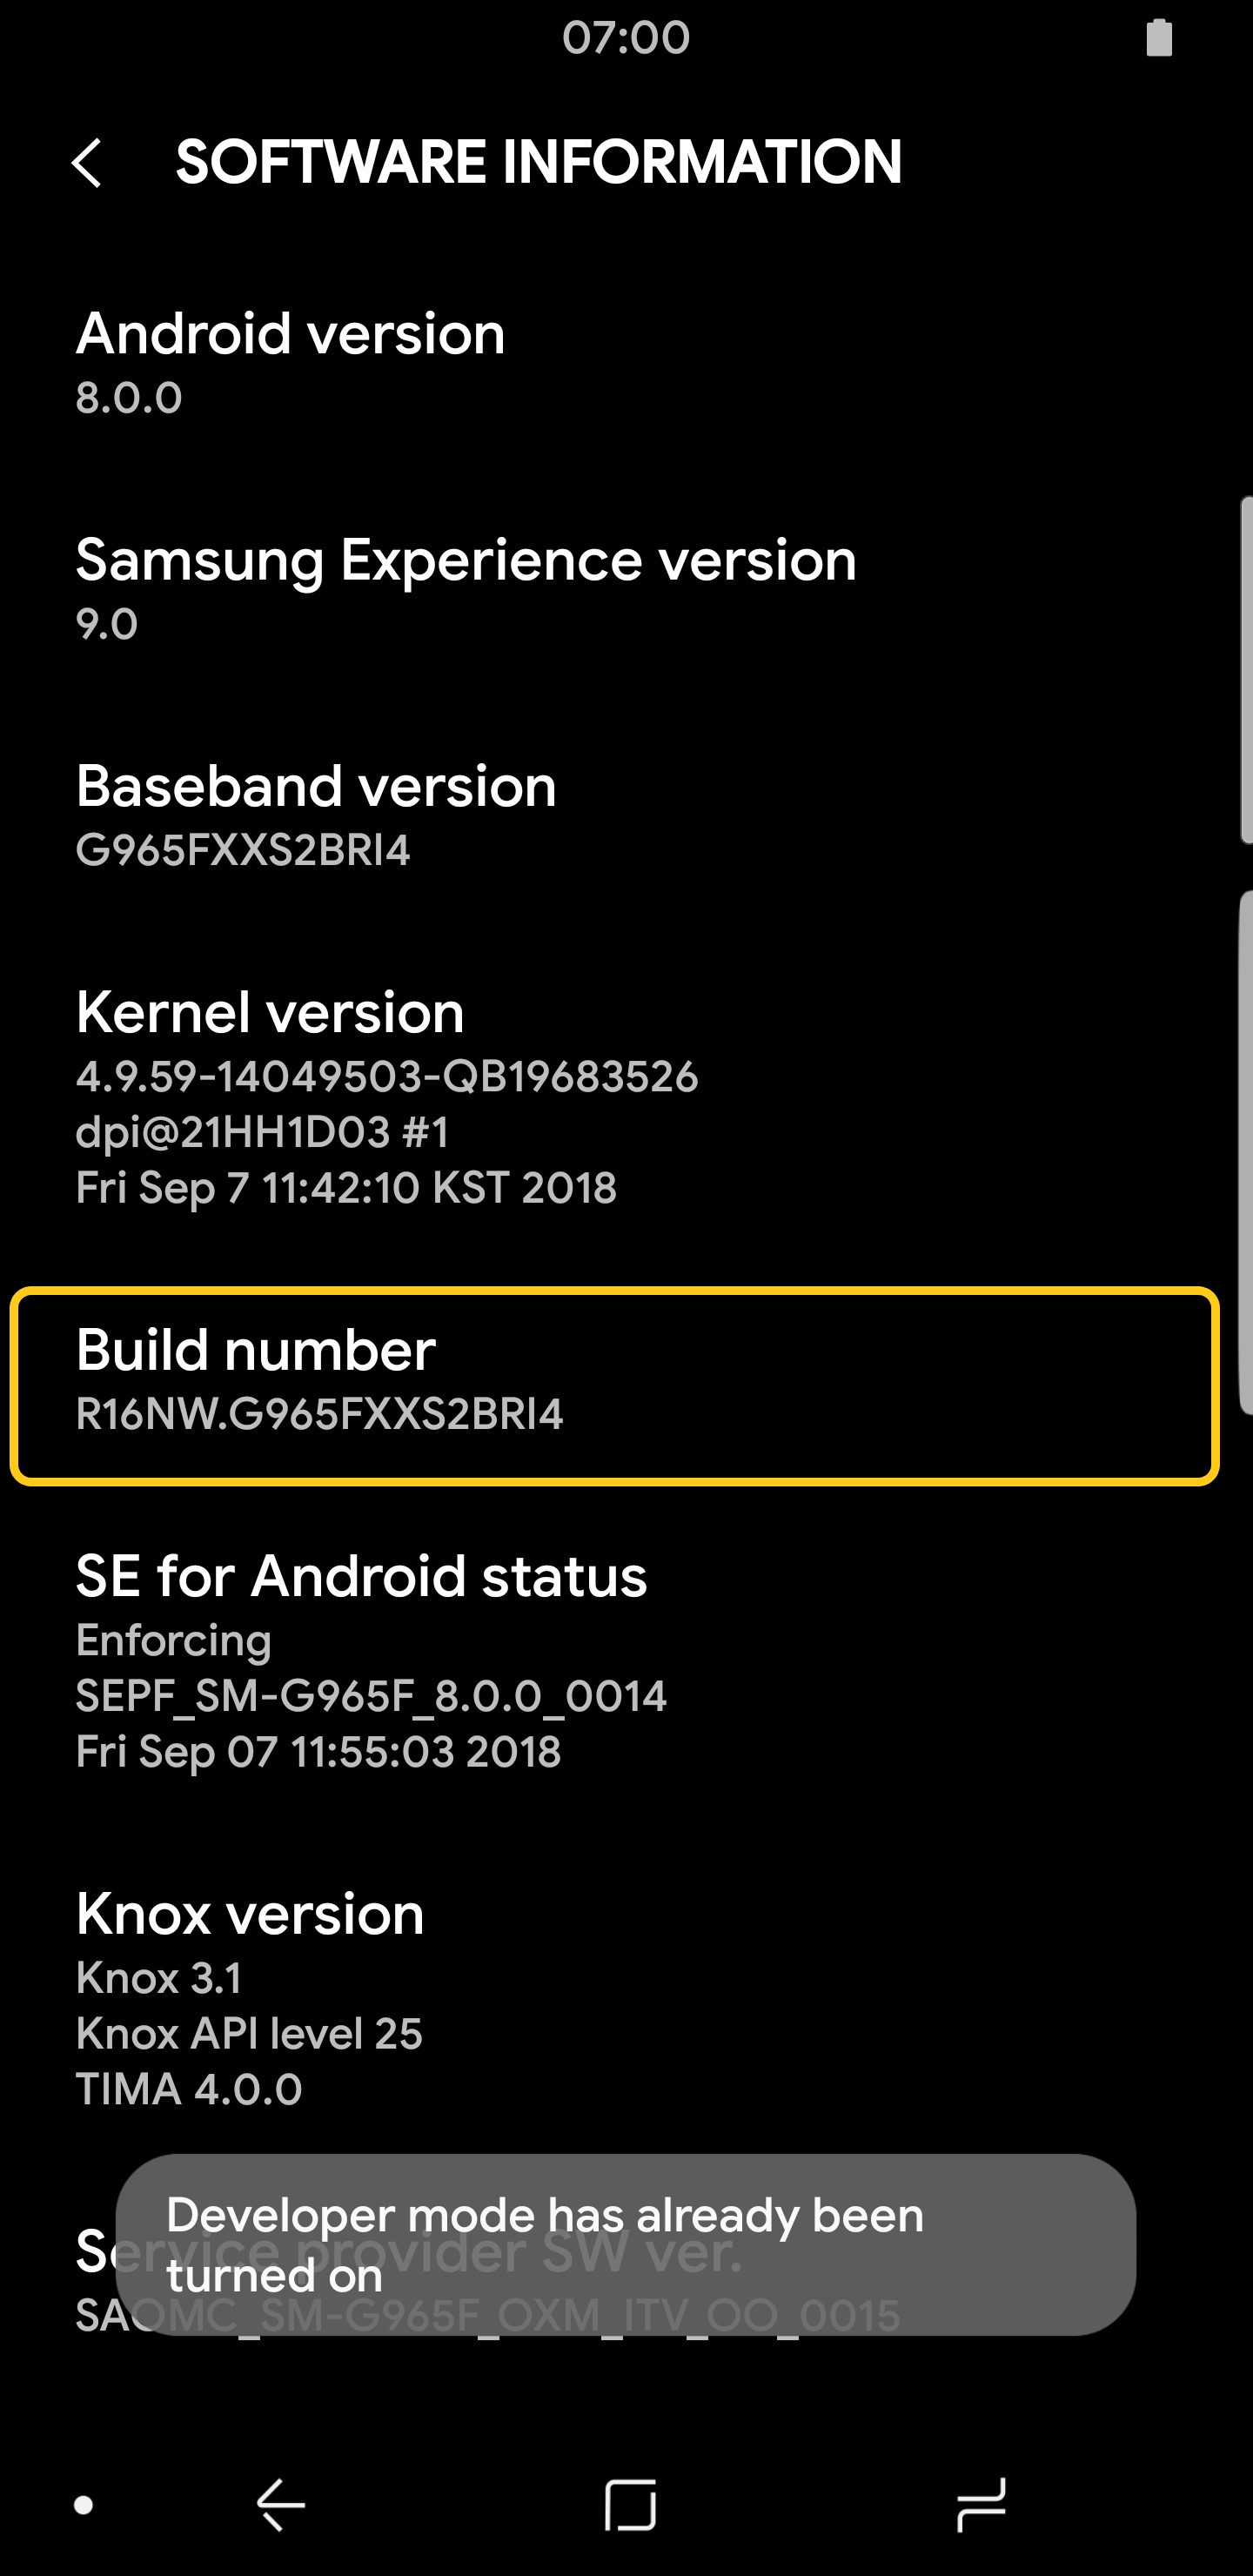
This step is fairly easy: the first thing to do is activating Developer Options in the settings menu. You can do this by going into your system information and clicking on the build number several times. A toast notification will let you know when you’re done and, if you have a screen lock, it will ask for your pin/pattern.
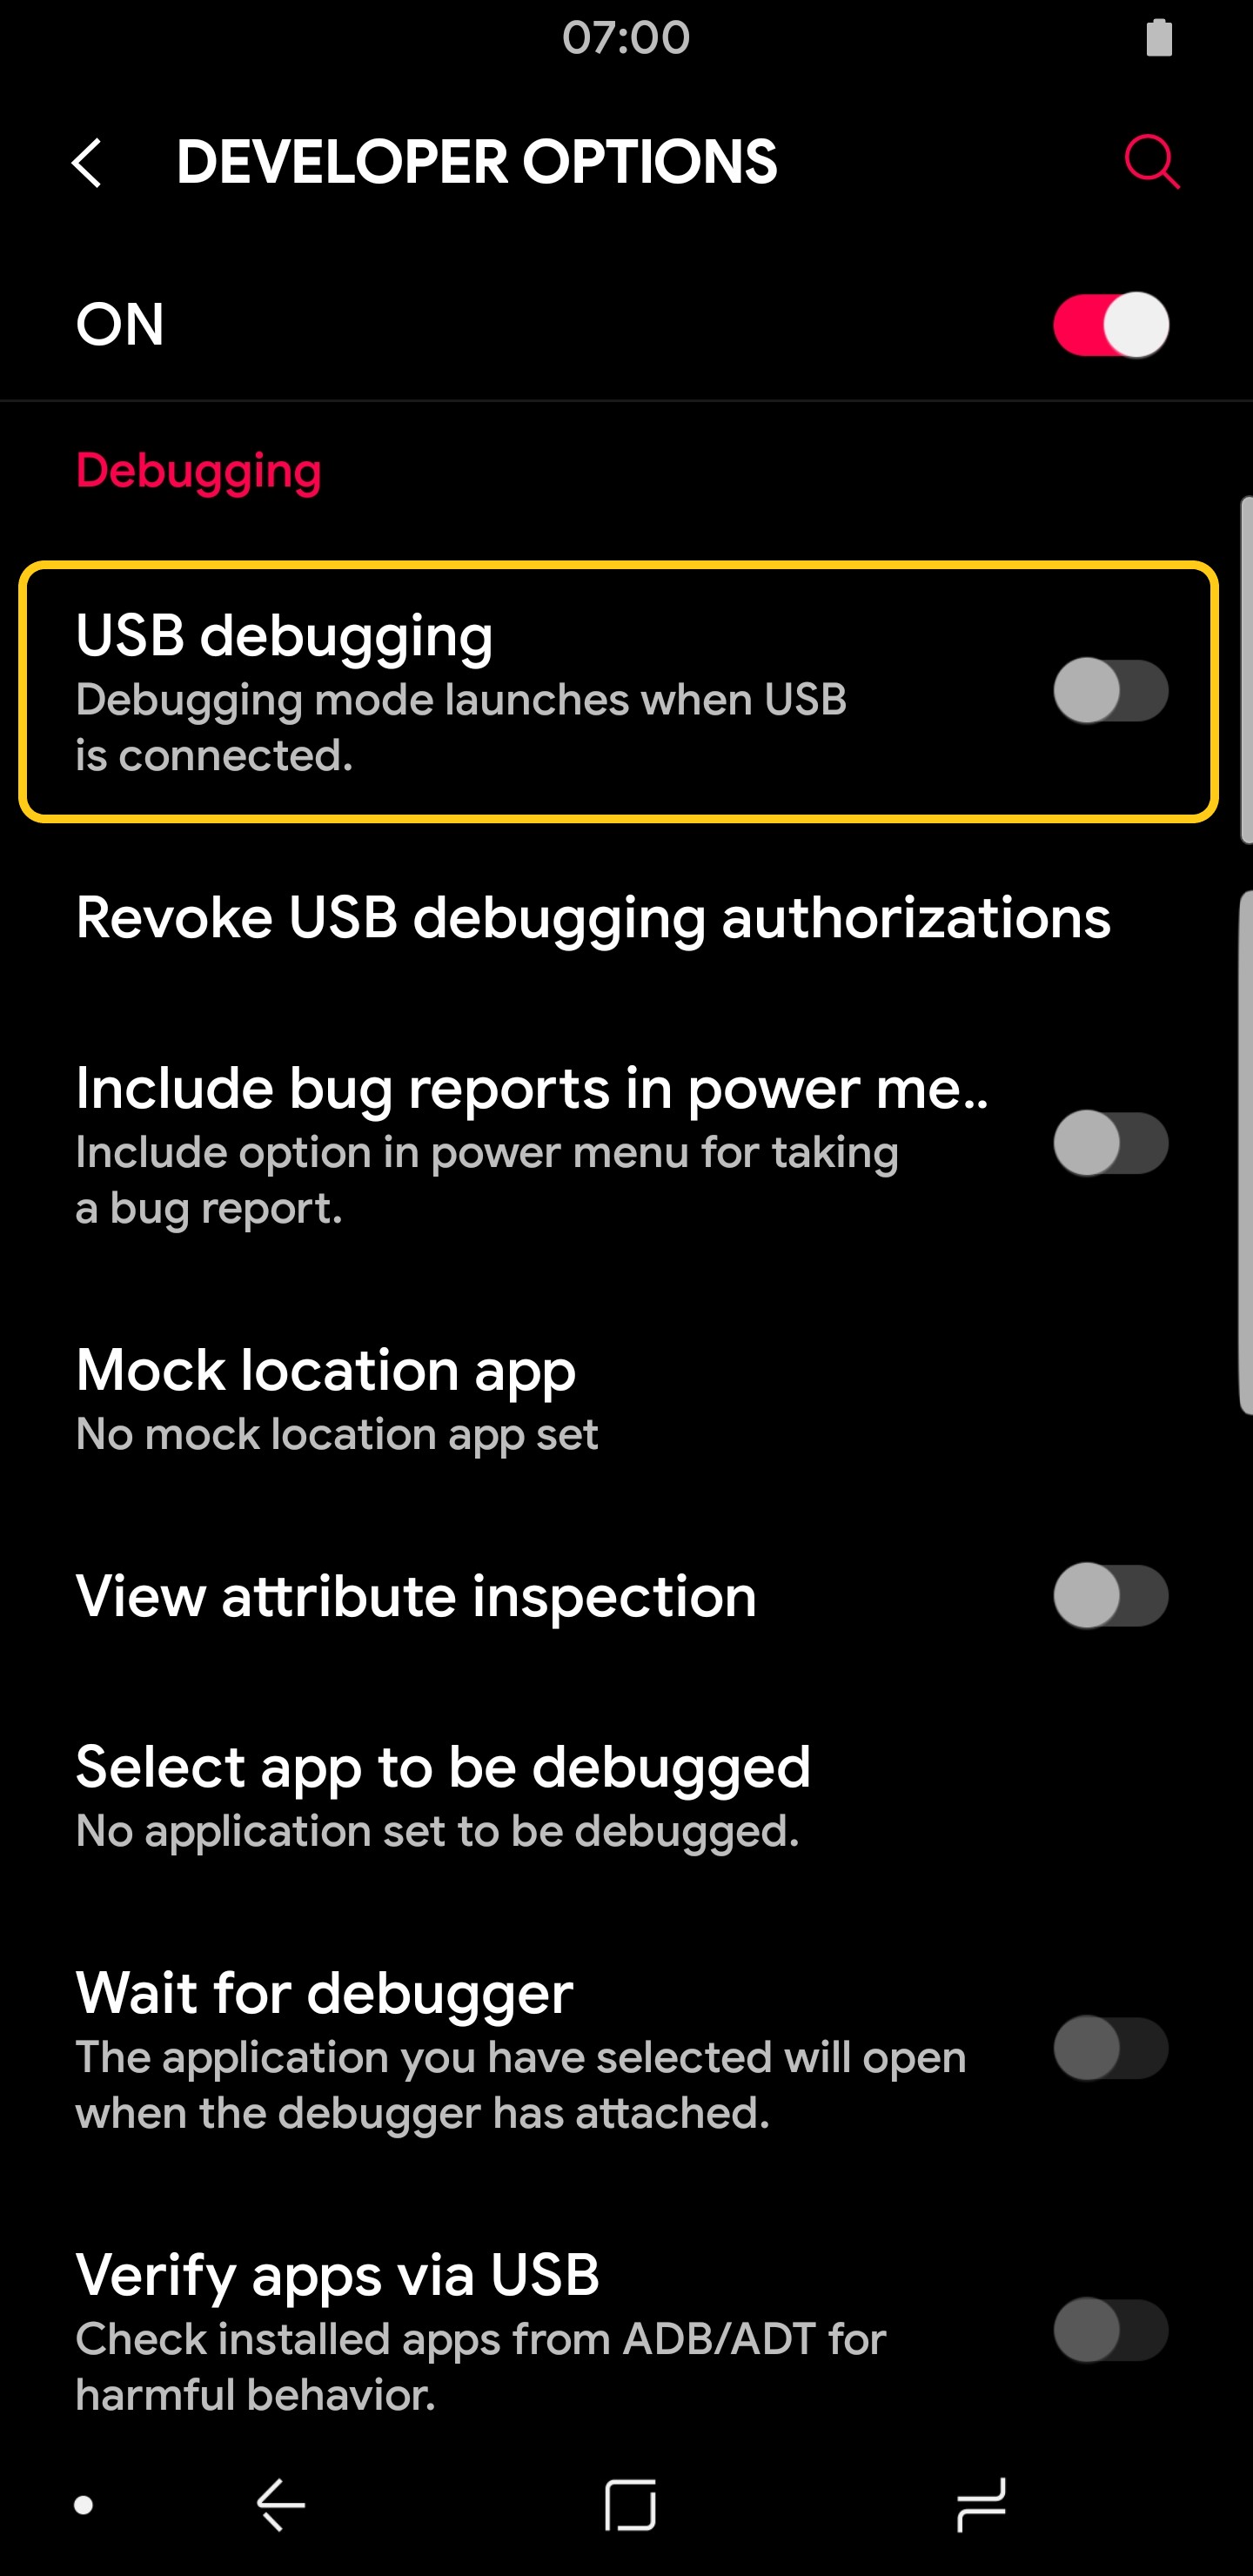
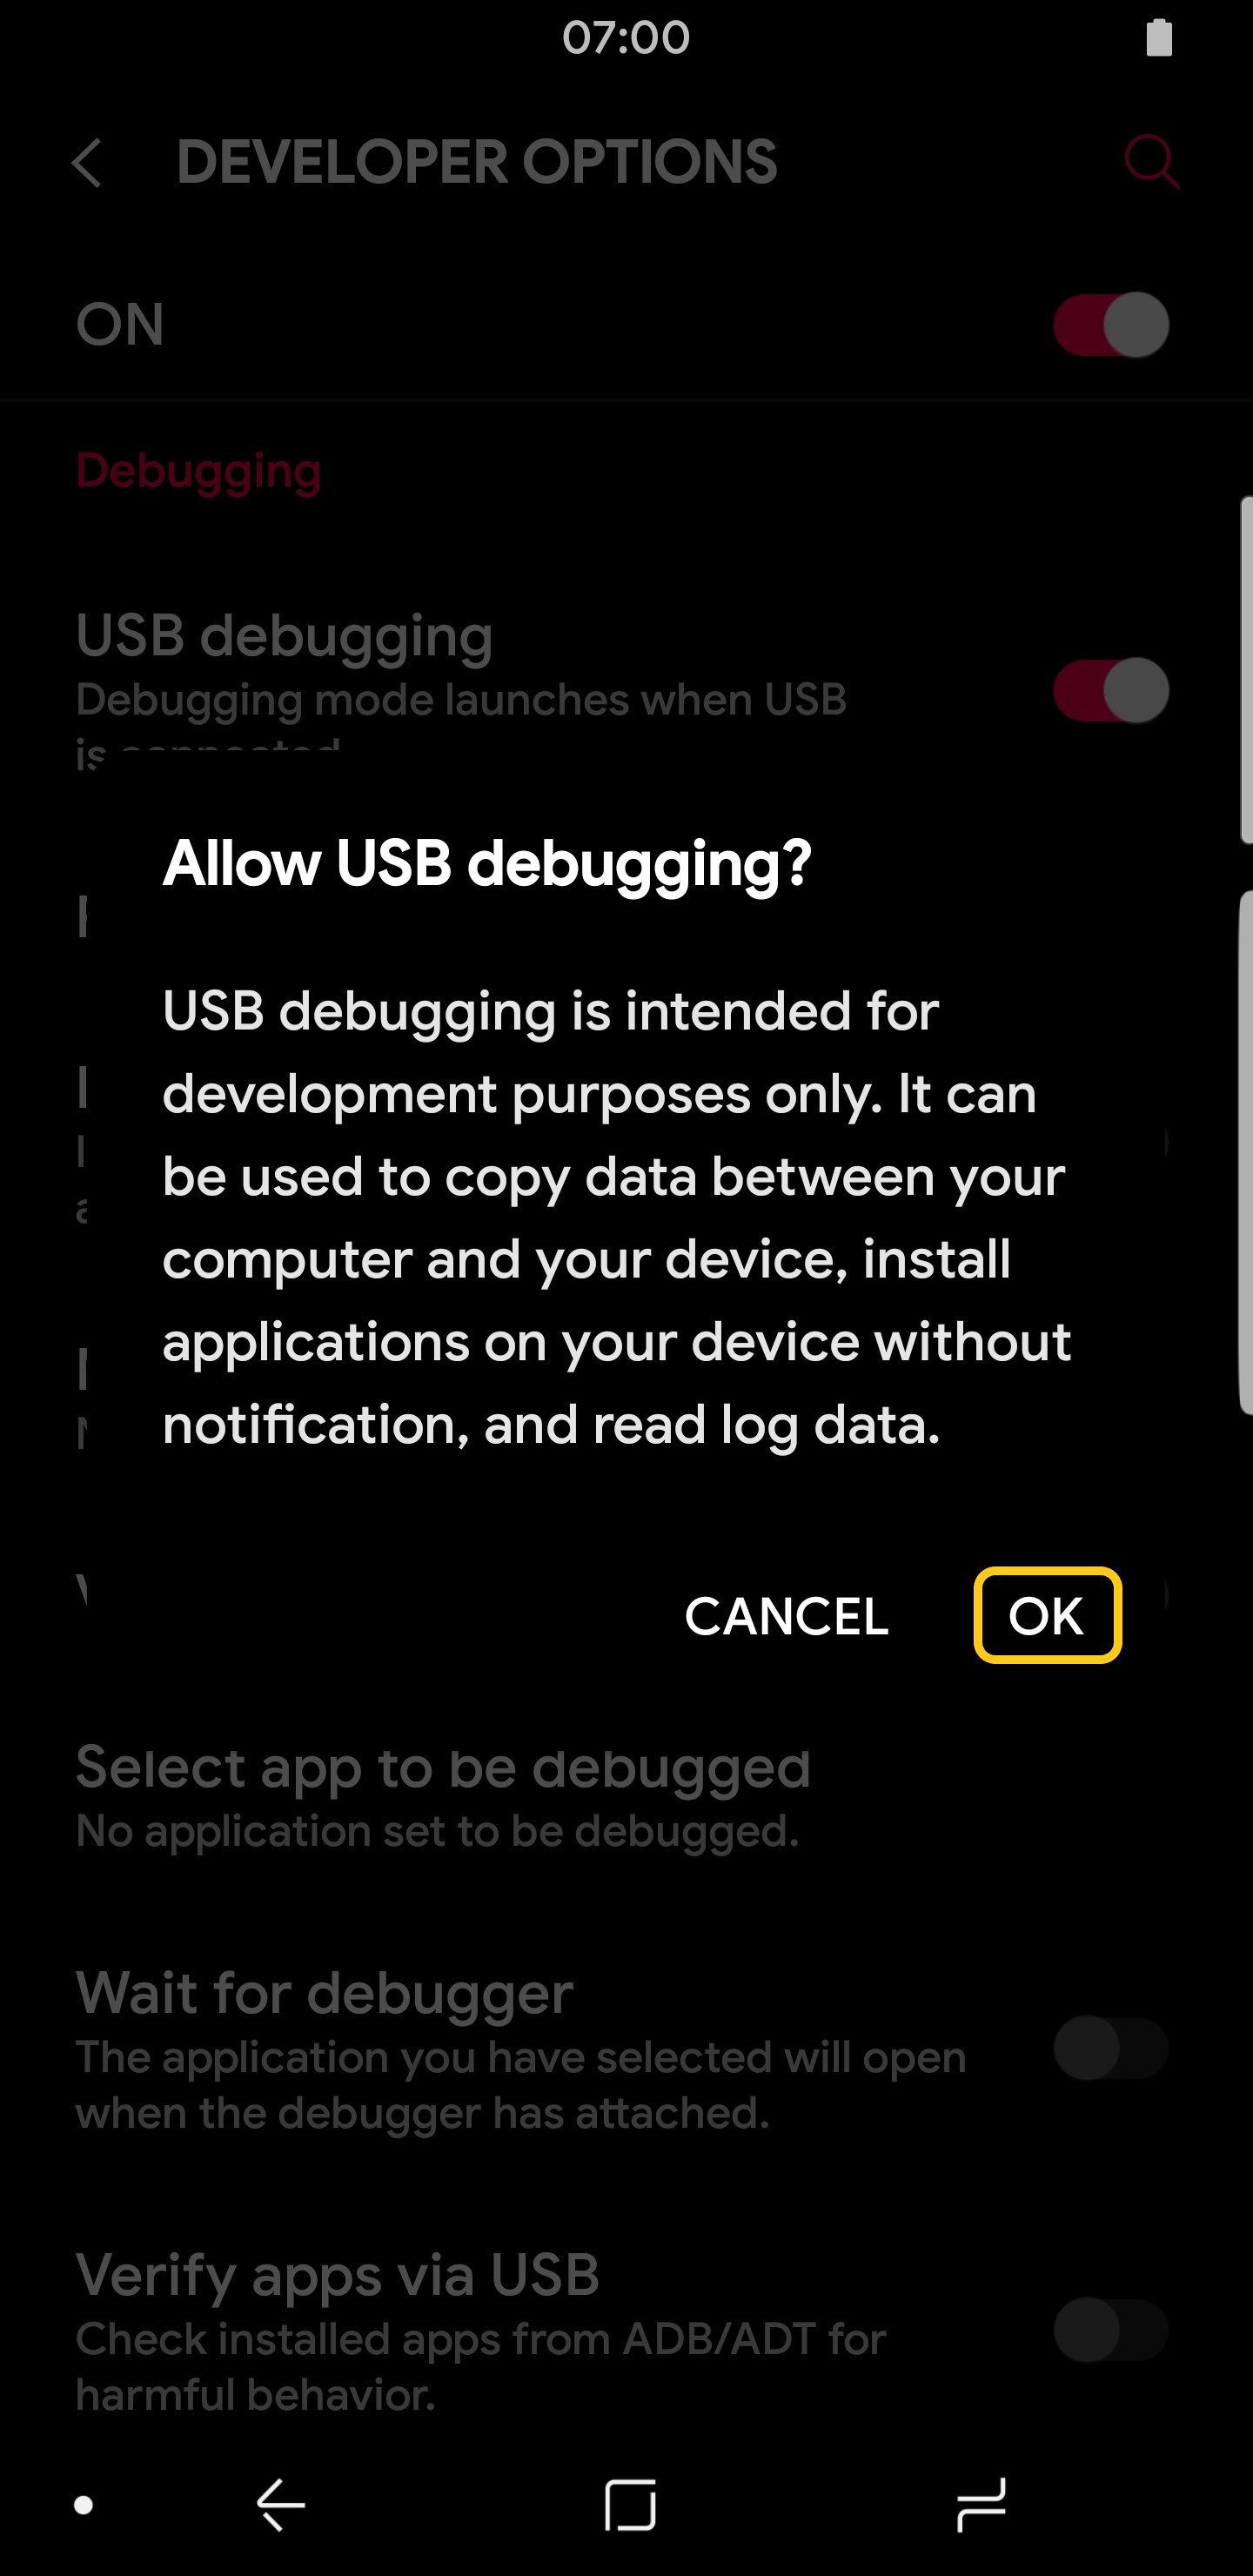
You will find Developer Options on the main settings page or categorized under System, depending on your device. Once you scroll down to the Debugging category, you’ll need to enable USB Debugging. A popup will inform you about what you’re doing and ask for a confirmation. After this part, we can head on to the PC.
Recommended: Make Your Android Device Look Amazing with Swift Installer!
How to authorize ADB commands for Android on Windows
Before going on with the procedure, you need to make sure that ADB Drivers are installed. Depending on how you installed the drivers, the method to access the console could also change. If you need more information about setting up ADB drivers, check out these quick tutorials:
Once you’re ready you should launch the ADB console. This may come included with the driver setup and it’s basically a Command Prompt window. Make sure your device is connected via USB cable and the display is unlocked. Then, we’ll run a test command just to trigger the authorization request. What it does is simply scanning the USB ports to find devices with ADB enabled and provide their ID. Here is what you need to type:
adb devices
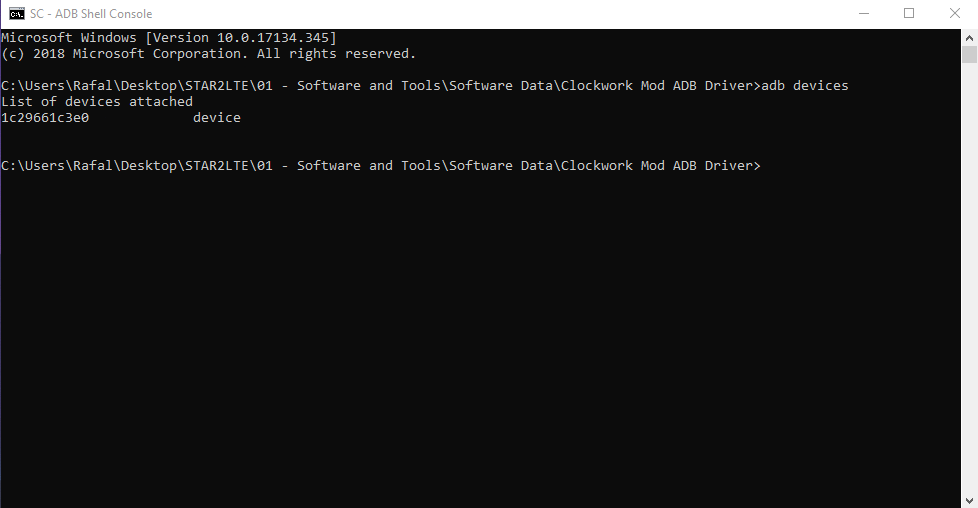
You’ll notice that many things will happen. First of all, if it’s the first time using ADB on your PC since the last restart, you will see a couple of lines regarding the daemon starting up. Then, the PC will forward the command to your smartphone. The request to authorize ADB will look like this:
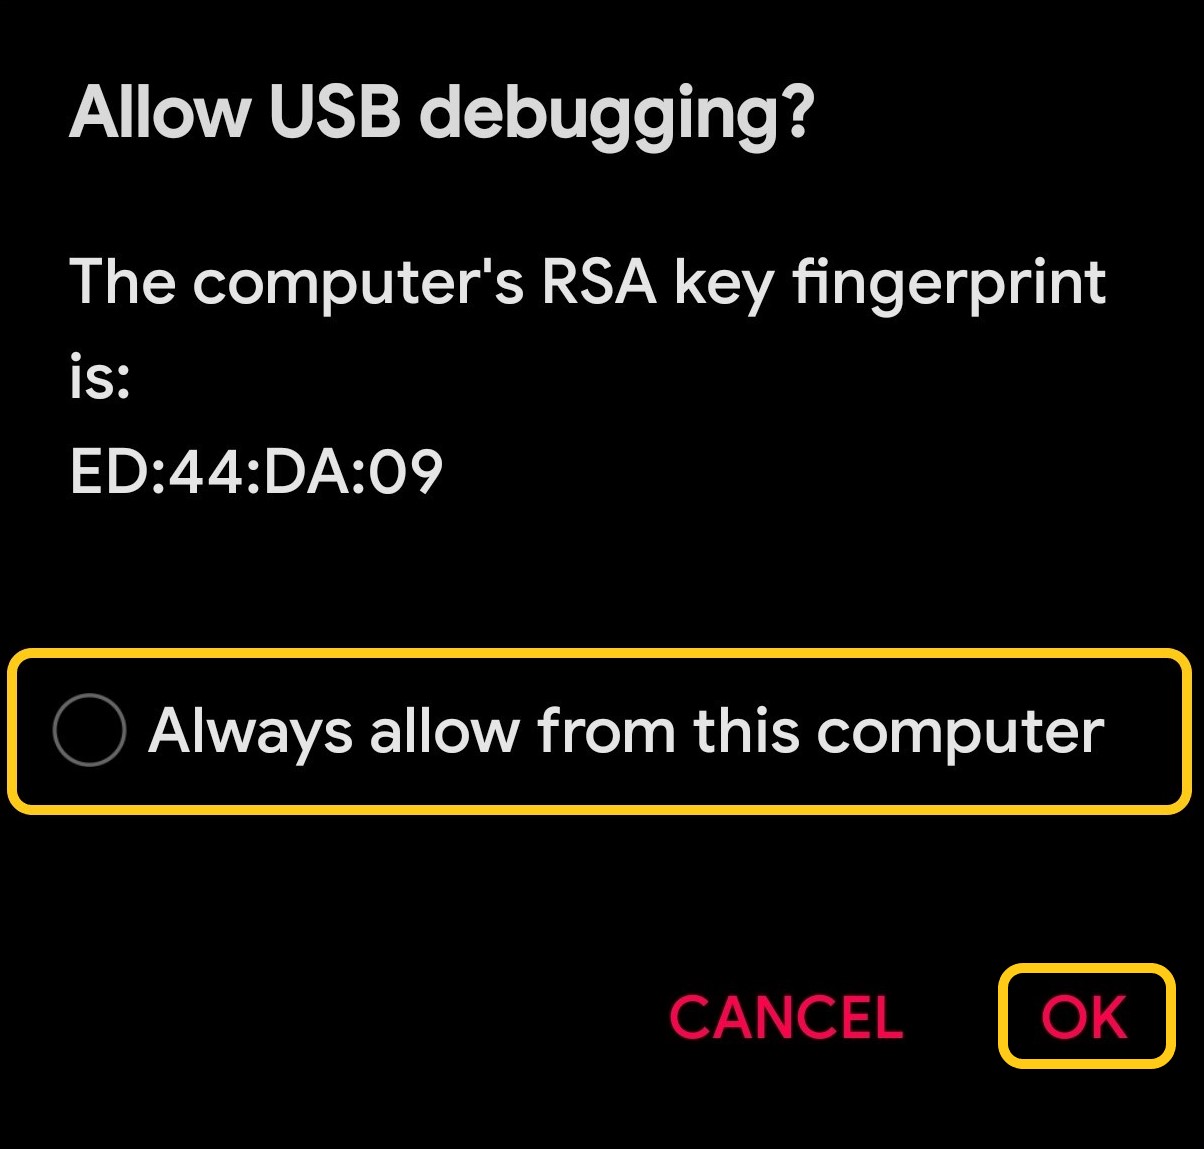
Note that we have highlighted “Always allow from this computer“. Since we want to permanently allow your computer, we’ll check that option before clicking OK. This way, the next time you connect the two together, your smartphone will recognize the key fingerprint and will automatically authorize any command.
That’s it, your PC has been authorized!



Join The Discussion: