Android P Developer Preview 2 was released recently as the first Android P Beta version. You may have already received an OTA update if you were enrolled in the Android Beta program. Android P Beta brings many more visual changes than the first Developer Preview. In fact, Android P looks to be the most ambitious Android update since Android Lollipop. It brings iPhone X like gesture navigation, improved security features, and a redesigned interface in many places to name just a few new things. We always knew that when it came out, users enrolled in the Beta program will be able to install Android P Beta on Google Pixel and Google Pixel 2 devices.
Thanks to Project Treble though Android P beta manages to extend the beta program to devices from may other OEMs as well. These are:
- Nokia 7 Plus
- OnePlus 6
- Xiaomi Mi Mix 2S
- Essential PH‑1
- Sony Xperia XZ2
- OPPO R15 Pro
- Vivo X21
If you have one of these devices enrolled in the Android beta program, you can easily install the Android P Beta via an OTA update like any normal Android update.
How to enroll in Android beta program
This is the simplest way to install Android P on your Google Pixel devices as well as any of the aforementioned devices.
- When you’re ready, the first thing you need is to signup for the Android beta program. To do that, go to google.com/android/beta and sign in with the Google account that you use on your eligible Android device.
- Scroll down to the list of eligible devices associated with your Google account.
- Find the device you want to enroll in the beta and click +Opt in.
- On the pop up select the checkbox next to I agree to the terms of the beta program and tap Join beta. You can now go check your device for an OTA update.
To receive the OTA your device must not have been modified. That is, it should be running the stock firmware from Google and have a locked bootloader. Moreover, while you will be receiving around 5 to 6 beta updates until the final stable Android P release, you will not receive the monthly security updates. If at any time you want to leave the beta program, you’ll find the Opt out button in place of the Opt in button. You’ll similarly get an OTA to roll back to Android Oreo. Keep in mind though rolling back will require a factory reset which will wipe all your data. So you might want to back up everything first.
Flash Android P Beta on Google Pixel and Pixel 2 via bootloader
You can also simply flash the Android P beta factory images to your Pixel devices. This will, in contrast to the earlier method, require an unlocked bootloader. If you don’t know how to, here’s how to unlock the bootloader on Google Pixel devices. The tutorial is for the first gen Pixel and Pixel XL but it works for the Pixel 2 and Pixel 2 XL as well. You’ll also need to enable USB debugging and OEM unlock. You will also need adb and fastboot installed on your PC.
- Download the appropriate Android P Beta factory image for your Google Pixel device from the Developer Preview download page.
- Transfer the image to your platform-tools folder and uncompress or extract the contents of the zip file right there. This ensures that you don’t have to type out the full path to the files in the command prompt.
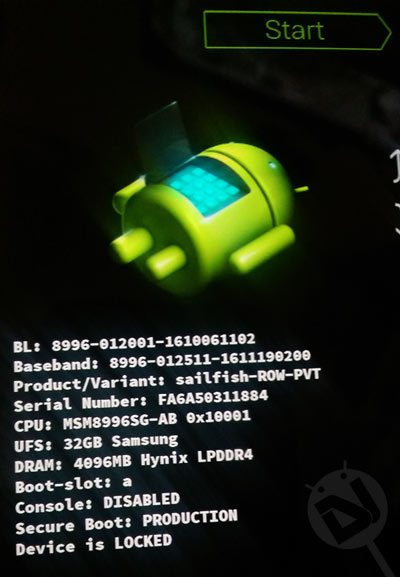
- Turn off your device and boot it into the Bootloader Mode. To do so, press and hold the Volume Down + Power buttons until you see a screen as shown below.

- When in the bootloader mode, connect your Google Pixel device to the computer using a USB cable.
- Launch the ADB interface by launching a command prompt or terminal window inside the platform-tools folder.
- On Windows, you can do this by entering cmd in the address bar while inside the platform-tools folder.
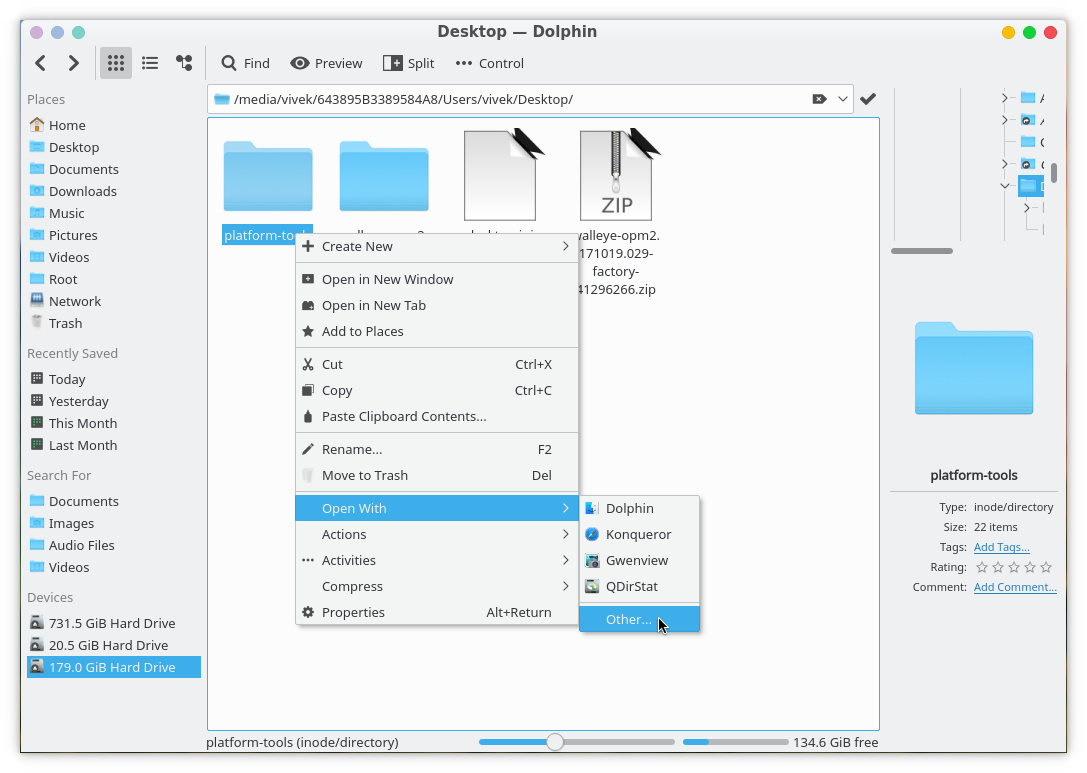
- On Linux, depending on your file manager, the process can differ. A general way would be to right-click on the platform-tools folder and select Open with(Open in another application) and then selecting your Terminal app.

- Now to flash the updated bootloader from the downloaded factory image, use this command.
./fastboot flash bootloader [bootloader file].img - Reboot to the updated bootloader now by pushing the following command through fastboot.
./fastboot reboot-bootloader - Flash the radio images using the following commands once that is done.
./fastboot flash radio [radio file].img - Just to make sure everything is still working fine, reboot the bootloader again.
./fastboot reboot-bootloader - Now flash the actual system image with this command. This will wipe all data on your device.
./fastboot -w update [image file].zip


Join The Discussion: