It was the tech giant Samsung in 2011 that introduced all of us to the world of phablets (larger than a typical phone but smaller than a tablet) with the then immensely popular Galaxy Note smartphone. Back then, the device was considered large enough to handle for most users out there (a 5.3in Super AMOLED display).
The original Note also included a stylus for drawing, jotting down notes and other advanced functions, hence the Note moniker. This device sold like hot cakes and took Samsung to new heights. Moving on, in August 2012, Samsung released the Note II, the successor to the original Note. As expected with every new generation, this device was vastly improved in nearly every way over its predecessor, as in it featured a new and improved design similar to the Galaxy S III, a better stylus, and screen for more precise pen input and usual processor upgrades.
However, with all the usual upgrades, the Note II brought with it a brand new software feature that just recently only made its way to stock Android. Yes, you guessed it right, the multi-window feature that lets you open two apps at the same time at either half of the screen. Samsung called it Split-screen multitasking.
Naturally, in 2013, Samsung unveiled the Note 3. It featured a new and more premium design, in the sense that, the battery cover was made of faux leather with fake stitching as opposed to plain plastic battery cover used in earlier models. Hardware wise, the device featured a 5.7in 1080p Super AMOLED screen, improved stylus and its functionalities, 4K video capture and more. Interestingly, in January 2014, the tech giant released a watered down version of the Note 3 called the Note 3 Neo.
Later that year, the Note 4 was born, featuring a refined and even more premium design (metal mid-frame), a sharp 5.7in QHD SuperAMOLED screen, improved stylus, 16 MP camera with OIS and much more. Alongside, the Note 4, Samsung also introduced the Note Edge that featured a screen that curved towards the right edge (the first smartphone in the world to ever launch with a curved screen), allowing it to display app shortcuts, news, and other vital information. This device evolved to what became the Galaxy Note 8 that we all love today.
In August 2016, the Note 5 was unveiled featuring a super premium glass sandwich design (metal mid-frame), an Exynos 7 Octa octa-core processor, an all-new spring-loaded mechanism stylus compartment (Samsung doesn’t even know how they designed this mechanism…), a screen off-memo feature that woke the phone up automatically upon removing the stylus allowed users to directly jot down important notes and points in a note-taking interface.
Now, time for the Note 6. Sorry, the Note 7 (Samsung skipped the number 6 for its 2016 Note device to bring it in line with the Galaxy S7 and also the iPhone 7 at the time) smartphone that even Samsung doesn’t want to remember or anybody for that matter. Why? well, because you all know that… So leave it, let’s move on and forget it for the good. However, in 2017 Samsung introduced a revised and improved version of the Note 7 known as the Note FE (Fan Edition).
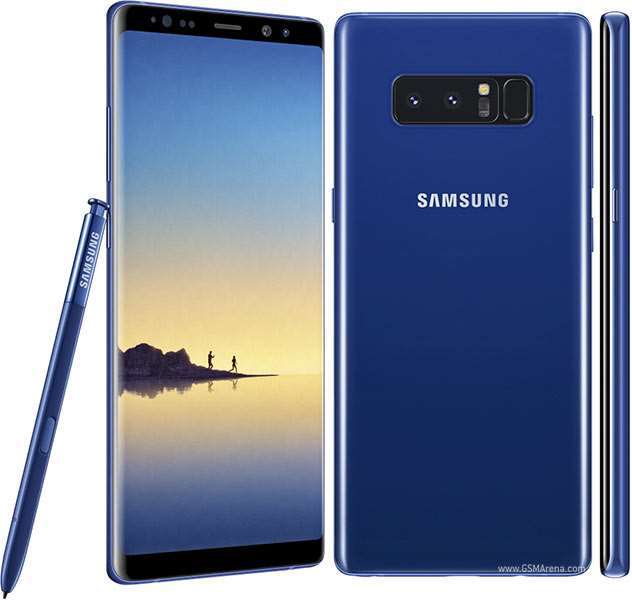
Coming to the main point of this article, in August 2017, the Note 8 was unveiled featuring a 6.3in QHD+ SuperAMOLED Infinity Display (some fancy name for an almost bezel-less screen) with curved edges at either side, a Snapdragon 835/Exynos 8895 SoC, a dual camera system with a telephoto lens, Bixby virtual assistant that debuted on the S8 earlier that year, an improved stylus and much more. Speaking of which, Samsung has released Android 8.0 Oreo for the Exynos variant of the Galaxy Note 8 (SM-N950F).
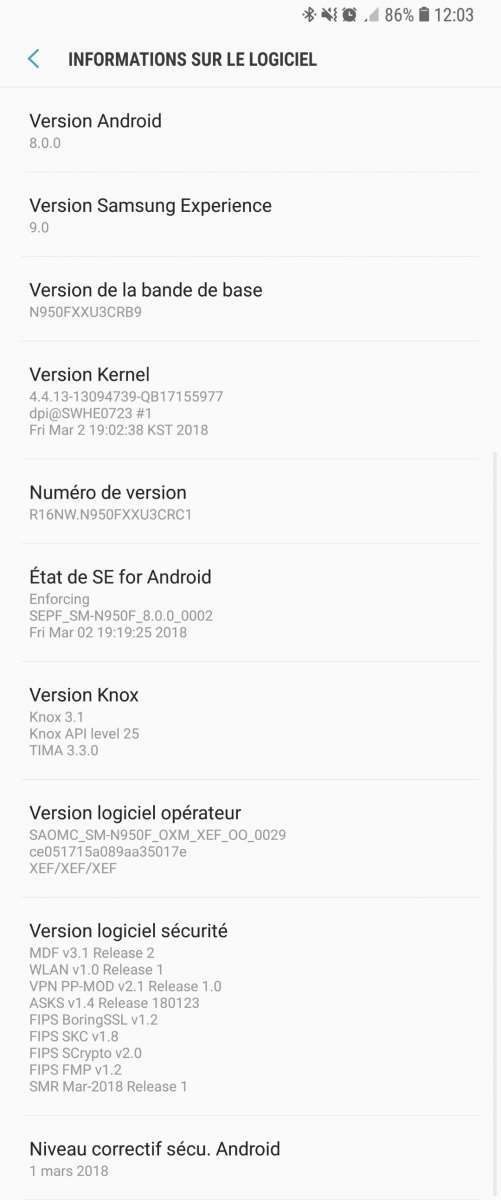
The update brings with it the March security patch along with all of the features that come bundled in Android Oreo such as Notification channels, notification snoozing, Picture-in-Picture mode and much much more. By the way, who would forget the pièce de résistance of this update, the Samsung Experience UI also has some new features and additions up its sleeve bumping up its version to 9.0. Update your devices by following the tutorial detailed below if you aren’t patient enough to wait for the OTA update which will roll out in the coming days and weeks.
Note: This firmware update works on all Galaxy Note 8 Exynos devices except the Korean Exynos model.
Let’s get prepared:
- First and foremost, Download Odin3_v3.13.1 which is the official Samsung flash tool required to flash the firmware on its Galaxy devices.
- Enable USB Debugging
- Make sure you backup all of your important files and data from your Note 8 to your computer or any other storage media of your choice.
- Don’t forget to install Samsung USB drivers on your computer before proceeding.
- Fully charge your device’s battery or ensure your device has at least 50% or higher battery power to avoid any interruption during the update.
Download the Oreo firmware package:
The firmware package is attached below. The package is only applicable to the Exynos variant of the Galaxy Note 8, specifically SM-N950F. Download the firmware package via the link given below.
Download the Oreo firmware package file for the Galaxy Note 8 (SM-N950F): SM-N950F Odin flash file
Install Android Oreo Firmware on Galaxy Note 8 (SM-N950F)
1. Before proceeding to flash the firmware, make sure your device model number is SM-N950F by navigating to Settings > About phone. Do not continue with this tutorial if your device model number is not SM-N950F.
2. Download the Odin flash file linked in the Oreo firmware package section above.
3. Extract the Odin flash file (.zip file) you had just downloaded in step 2.
4. Turn off your device and then hold the Bixby + Volume down + Power buttons simultaneously to enter Download mode.
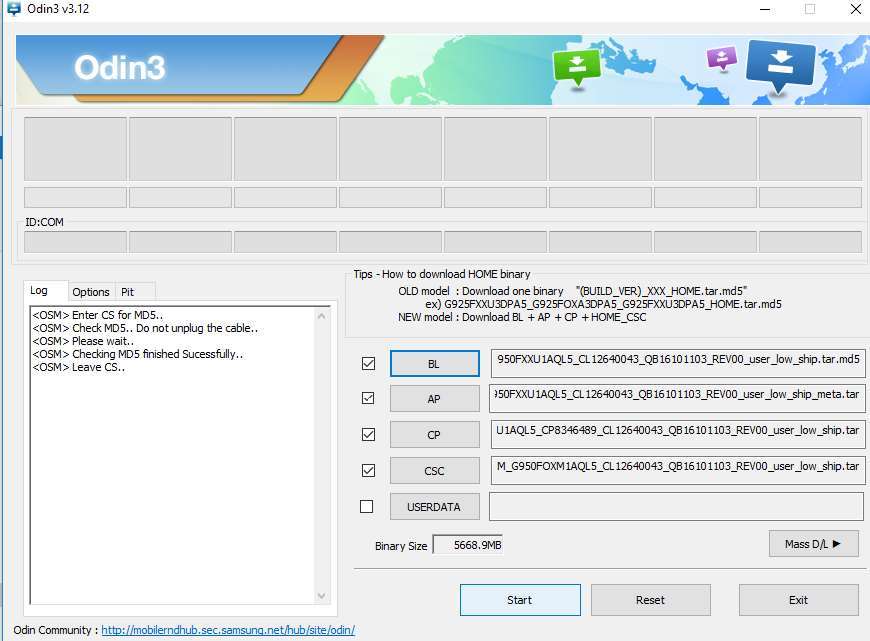
5. Download the Odin flash tool that I linked in the Let’s get prepared section above. Connect your phone to your PC and then launch Odin. Once launched, you will see five sections on the right side of the Odin interface named BL, AP, CP, CSC, and USERDATA. However, for this particular tutorial, we will only use the first four sections.
6. Click the BL button and then go to the Odin flash file folder where you extracted your flash files. Next, select the BL file. Repeat this step for AP, CP, and HOME_CSC (Do not use CSC_XXX as it will erase your data).
7. Now that you have selected all the files, click Start to begin the flashing process. After the flashing process is complete, your phone will reboot and you’re good to go.
Conclusion
So that’s all folks, a detailed guide on how to install Oreo on the Exynos variant of the Galaxy Note 8 mentioned above. Thanks to Max Weinbach over at XDA Developers for this helpful tutorial. Chime in the comments section below on your take and experience with the update. Make sure you all follow the guide carefully to avoid any issues while performing the update. Importantly, please refer to the disclaimer below.
Disclaimer: DroidViews won’t be held responsible for any bricked devices, failure from the user’s part in following the instructions carefully or any other issues that would crop up during or after the update. Flash at your own risk.


Join The Discussion: