The AMD Cleanup Utility is a software that has been designed by Advanced Micro Devices (AMD) to help users out with cleansing their old graphics drivers and related software components from their operating systems.
It is quite promising when the users have difficulty with driver installations, upgrades, or uninstallations. The utility, in turn, carries out a perfect erasing of every AMD driver file, registry record, and system settings relating to the graphics hardware that a troubleshooting process and updates on the features option.
It is built to enable users to find necessary information easily, with such elements as a set of instructions for a user-friendly and convenient process of cleaning. In general, the AMD Cleanup Utility is an important utility for sustaining the AMD graphics drivers environment on computer systems based on Windows operating systems.
This comprehensive guide will provide you with an overview and a short description of the most common problems faced by AMD Cleanup tool users which poses a threat to its merchantability, the use of AMD Hardware, and the right way to run an AMD program.
What Issues Are People Facing With AMD’s Cleanup Tool And What To Lookout For?
Today, people are facing an issue where their PC will not allow them to download any drivers for anything. Mostly when a peripheral device is attached to your PC, it will detect it and begin driver installation accordingly, AMD Cleanup tool is designed to remove this feature.
This means when the PC can’t connect to the internet (even though it has managed to download the drivers manually from a different PC), the error is there.
And in the same situation, if you do reinstall the windows and this issue still exists then the problem must be coming somewhere else and not in the following sections. That could mean that the issue is not with the AMD Utility itself but something else.
Follow these steps and try reinstalling the files again
- From the control panel turn on or off Windows 11 updates of Automatic Driver.
- Type “change device installation settings” in the search bar in the menu and Click Start.
- Check it is set to YES
While every precaution would be taken in the preparation of any document, it may contain technical inaccuracies, omissions, and typographical errors, and AMD is under no obligation and has no liability of any kind to update or otherwise correct this information or even issues caused by intellectual property rights, signed agreement issues, implied warranties of non-infringement, completeness of the contents of this document, the prior state of it, leftover files that are not AMD driver files, the accuracy of facts used for informational purposes and other particular purposes.
Also, make sure that your Windows system does not have any policy against files. If you exit Windows and even reinstalling your system fails to solve the problem, it must be Hardware-related, instead of AMD Software Components or Windows control panel’s programs.
In such a case, even if AMD Driver Uninstall Tool mistakenly detected a driver that it should not delete, on restarting the computer, your Windows will either set a driver from its own Windows’ drivers store folder or an error will be displayed in the Device Manager saying there is a problem (missing or corrupt driver) with that hardware.
Visit the download page for your motherboard’s Support, and download all the drivers for your motherboard, audio, and network. Then try to fix the problem if any.
If you have another problem which is that you can’t install the Motherboard drivers, you need the floppy disks or you can get the drivers from their website. It is very implausible that firmware will brick the motherboards.
However, software that just deletes certain files can’t damage a motherboard. Installing lost files or drivers again is really easy.
Also Read: Steps for Rooting Pixel Devices Running Android 13 via Magisk
How to Use AMD Cleanup Utility
Launch AMDR Auto-Clean Utility for Windows to download the standalone utility. Go to the destination Downloads folder and double-click amdcleanuputility.exe few to run.
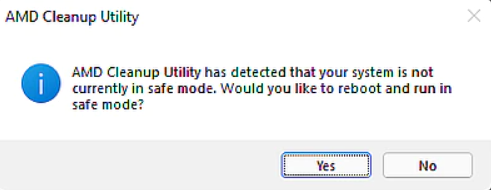
Click Yes or agree to restart the system and run AMD Cleanup Utility in safe mode. Select No to continue running AMD Cleanup Utility in Regular Mode. Note: The best result is achieved if you run AMD Cleanup Utility in Windows safe mode mode.
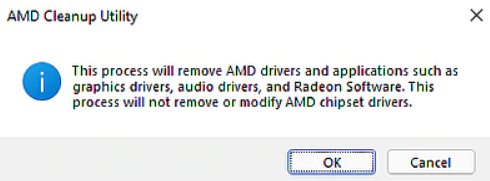
The following prompt will provide a brief explanation of the cleanup. From OK to exit, you can either click OK to proceed or Cancel to abort the process and exit AMD Cleanup Utility.

This banner will be displayed shortly after time settings are set to run the cleanup process behind the scenes. The display normally tends to flicker or turn off for a few seconds, for certain users.

This prompt everyone will see when AMD Cleanup Utility is finished. Click View Report to get the list of components that have been uninstalled. After that, click Finish to close.
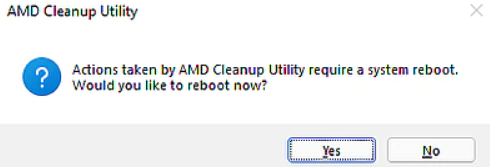
Then on this last prompt, click Yes to reboot the system or No to reboot sometime later. Note: AMD Cleanup Utility executes afterward.
A Set of Solutions to MOST COMMON Problems Faced When Running AMD Cleanup Utility
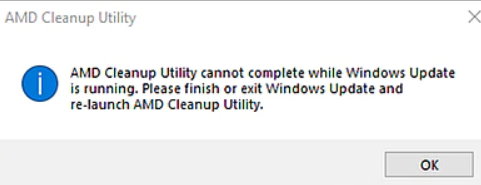
AMD Cleanup Utility closes and the following message is displayed: ‘While running Windows Update.’ The problem can be overcome by simply quitting the Windows update or by waiting until the update is completed before running AMD Cleanup Utility.
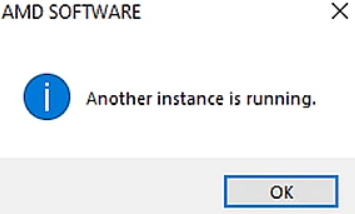
The problem seems to occur with AMD Cleanup Utility, and it will ask whether to launch it again or not. The length of the cleaning process depends on the amount of mess that is required to clean out. It can take up to 15-20 minutes to finish the procedure. This is not a rare case, please wait till the clean-up processes are done.
If the AMD Cleanup Utility causes problems while/after running, consider restoring the system to its former state by using the Windows System Restore Point (BMd Cleanup Utility Restore Point). The CP restores point is created by AMD Cleanup Utility before executing any cleanup process.
Join The Discussion: