Many people do not like to envision themselves in an emergency, but they inevitably happen. Not that an emergency is ever convenient, but some are more inconvenient than others. In these cases, you won’t always be able to rely on your workplace or doctor calling your emergency contact for you. Sometimes, you yourself won’t even be able to search through your contacts to make the emergency call.
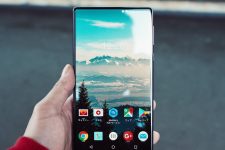
This is why Android has made it easy for you to add emergency contact information on your phone. This way, it can be accessed quickly when the time comes.
What Emergency Information Can You Include?
Outside of adding emergency contact, you can add your blood type, allergies, and other medical information. In theory, if you are in distress and a first responder can access your medical information, they’ll be able to see if you need a specific medication (like adrenaline) or have pre-existing conditions that will affect their medical response.
How to Set Up Emergency Contacts on Android
Because smartphones are almost in everyone’s pockets nowadays, Android has enhanced its safety features to cover more than data privacy. It wants to help keep you safe, as well.
Some Android OS phone manufacturers have even made it so emergency contact information appears as a note on your lock screen. This way, the user or responder doesn’t even have to unlock the phone. They can tap the emergency button.
What if Your Smartphone is Password Protected?
Unfortunately, if you do not have an Android device that allows you to access your emergency contacts from the lock screen, then that password will keep you locked out.
Before you start to panic, most current smartphones come with specific features that allow people to access In Case of Emergency (ICE) data from the lock screen. This includes emergency contacts and relevant medical information. You can check if your device has this feature by locking your phone and tapping on the emergency button located on the bottom left of your screen.
Setting Up Emergency Contact on Your Phone
- Tap on About phone followed by Emergency Information. In case you do not see Emergency Information, go back to Users and Accounts. You may find the emergency info section there.
- Enter the details of the information you would like to store.
- For anything pertaining to medical information, tap Edit Information, followed by Info.
- In order to clear the information, tap on More followed by Clear All.
Using The Contacts App
There are specific settings found in the Contacts app that you can use to add emergency information as well.
- Begin by opening Contacts. This is also known as your address book — it stores your contacts’ phone numbers and other info.
- Tap Menu. This is the three horizontal lines or dots in the left corner of the application.
- If your phone has the Google Contacts app, then you should add an emergency contact in the setting system.
Setting Up Emergency Contact On A Blackberry Cell Phone
You can add your emergency information to the lock screen of your Blackberry device. This isn’t necessarily dedicated space for emergency contact details, but it is a smart way to make this info accessible.
- Glide two fingers from the top of the screen to the bottom. Do this twice.
- Tap on Security Lock then tap on the Lock Screen Message.
- Enter your name.
- You can also enter the message you wish to have displayed on the lock screen before tapping on Save.
Setting Up Emergency Contact On Your Motorola Smart Phone
The lock screen of your Motorola Smart Phone can conveniently keep your emergency contact information accessible to anyone who doesn’t know your password. Unlike the Blackberry, there is a dedicated space for this, so you won’t have to worry about forgetting anything that could be important.
- Tap on Settings and then Users and Accounts.
- Proceed to Emergency Information and then set up the vital information.
- To view the information, the first responder would first swipe up on that lock screen.
- Right below the keypad of the Android Phone, you can touch Emergency.
- Go ahead and touch the Emergency Information twice to view it.
With other Motorola phones, ranging from 6 and above, i.e., Moto g7 and Moto e6, you should first go to Settings and then System, and About phone.
- Tap the Emergency Information option.
- Set up the information.
- To view the information, as the first responder would, swipe up on your lock screen.
- Right below the keypad, tap Emergency, then Emergency Information two times.
Adding Emergency Contact To Your Huawei Phone
- Open Contacts.
- Then tap on My Card, followed by Emergency Information.
- Add your personal information, followed by emergency contacts and medical information.
- Now that you have added emergency contacts, you can go ahead and choose a primary emergency contact.
Adding an Emergency Contact to a Samsung Android Phone
- Similar to the Huawei phone, start by opening Contacts.
- Then go to My Card, followed by Emergency Information.
- Input your personal information, emergency contacts, and finally, medical information.
- Now that you have added emergency contacts from your lock screen, you can head to Emergency and then Emergency Information.
- Tap Emergency Contacts and select anyone to place a call.
Unlike most emergency information apps built directly into your phone, the lock screen on your Samsung will not allow emergency responders to dial directly. Even so, it’s better to have access to some medical information than none at all.
Conclusion
You can’t really predict emergencies, but you can certainly prepare for them. Accidents happen often, and people fall ill suddenly all the time. Having an emergency contact is essential, especially if the person is unconscious or unable to answer critical medical questions.
Fortunately for Android device users, first responders, and other concerned individuals can access our medical data and give our emergency contacts a call. For the most part, all this info can be stored on the lock screen. If your phone does not allow access to your medical data without a password, you can download a third-party app like Medical ID. This app will make that feature for you.


Join The Discussion: