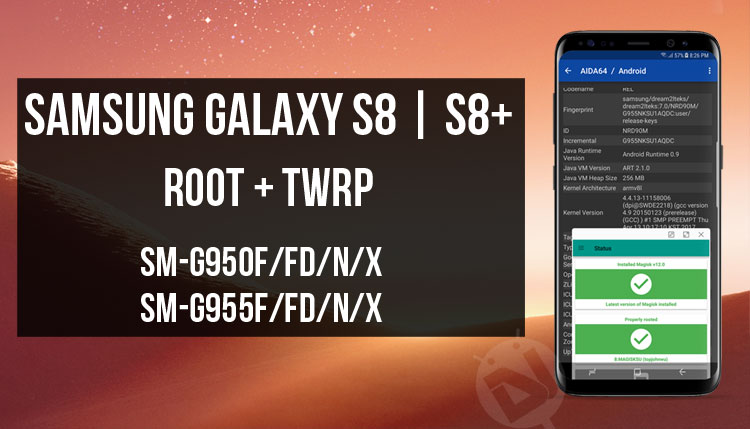
The Samsung Galaxy S8 and S8 Plus are the hottest kids in town right now. With the launch of Samsung’s flagships, the other flagship releases this year seem to have been overshadowed. Of course, that shouldn’t surprise anyone. So much has been said and heard about the device already, and it only began shipping a few days ago. It almost seems like it has been a while. Even more so, when considering the fact that the Galaxy S8 and Galaxy S8+ can now successfully be rooted and equipped with TWRP recovery. Thanks to from jesec from XDA for coming up with a root method that really works.
Due to some copyright infringement issues, Samsung is forced to launch their devices in the US with a Qualcomm chip. For the rest of the world though, a Samsung Galaxy flagship means an Exynos powered beast. It should be obvious then that the Exynos variants are more popular and thus have a slightly better developer support. We’re mentioning this because the rooting method currently available only works for the Exynos variants of the Samsung Galaxy S8 and Galaxy S8 Plus listed below:
Samsung Galaxy S8
- SM-G950F
- SM-G950FD
- SM-G950N
- SM-G950X
Samsung Galaxy S8+
- SM-G955F
- SM-G955FD
- SM-G955X
- SM-G955N
Note: If you’re not sure about your S8/S8 Plus’s model number, you can find it under Settings> About device.
The Galaxy S8 variants are still very new devices, and understandably, their kernel sources haven’t yet been released by Samsung. The result is that the currently available TWRP recoveries are not fully functional. For the most part, they work just fine, except some features such as MTP.
Disclaimer
Rooting a device voids your warranty. You must understand the risks and proceed at your own caution. This guide has been prepared keeping first-time users in mind and thus is as detailed and simple as possible. The procedure described below is also tried and tested. But, rooting and installing a custom recovery are processes that fall on the riskier side of Android customization. Hence, you might end up with a bricked device or one that gets stuck in a bootloop. In any case, DroidViews does not take any responsibility for that.
Must read: Easily Remap Bixby Button on Samsung Galaxy S8 with These Apps
Prerequisites
- An Exynos powered variant of the Samsung Galaxy S8 or Galaxy S8+.
- Make sure your device has enough battery. Preferably, it should be above 50%.
- Install Samsung USB Drivers on your PC.
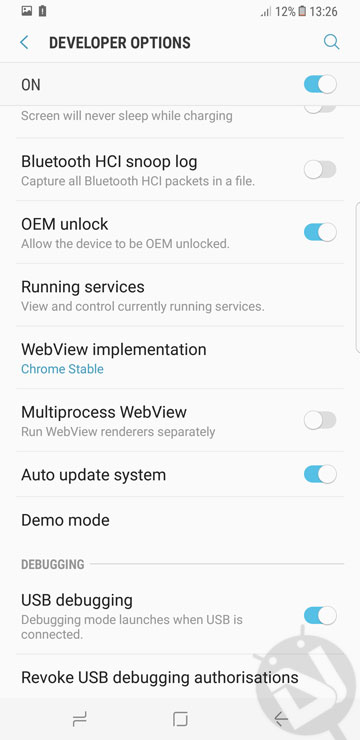
- Enabled USB Debugging and OEM Unlock. To enable USB Debugging, you will first need to enable Developer mode. Go to Settings> About Phone> Software info, and tap the Build number repeatedly until you see a message that says “You are now a developer.” Then go back to Settings, and you can now see Developer mode towards the bottom. Tap on it and scroll down the list to find OEM Unlock and USB Debugging. Enable them both.
- Download the latest version of Odin.
- Do NOT forget to Backup your phone’s data, apps and anything saved on the device’s storage as a precaution.
Downloads
- TWRP Recovery for Samsung Galaxy S8
- TWRP Recovery for Samsung Galaxy S8+
- Download disable dm-verity zip: no-verity-opt-encrypt-5.1.zip
- Latest Magisk: Magisk-v12.0.zip
Don’t miss: Install 1060 Fonts on Samsung Galaxy S8/S8+
Install TWRP and Root Samsung Galaxy S8/S8+ (Exynos)
- Download the TWRP recovery image from above, according to your device.
- Copy no-verity-opt-encrypt-5.1.zip and Magisk-v12.0.zip files to your phone’s external storage (microSD card). In case you are not using a memory card, you can copy these 2 files to your Galaxy S8 later.
- Unzip the ODIN zip file and open the extracted folder.
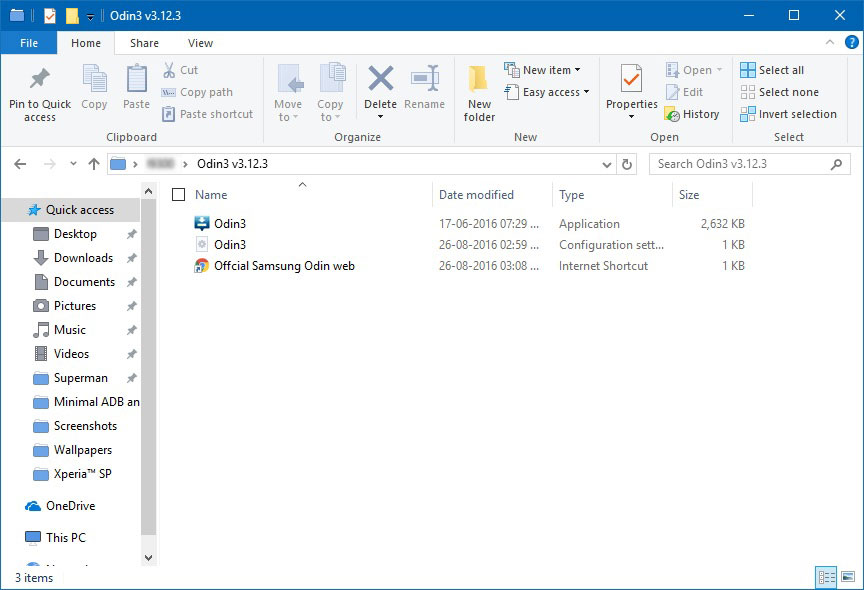
- Double-click the Odin3.exe file to launch ODIN.
- Now switch off your device.
- Press and hold Bixby + Volume down buttons and then press the Power button.
- The phone will boot into download mode quite quickly.
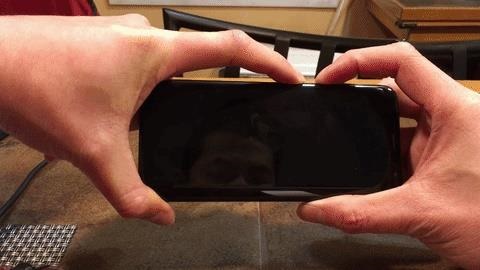
- When in Download mode, connect your phone to the PC with a USB cable.
- If you have the drivers installed, your device should be detected, and you should see Added!! in the ODIN Log box.
- Along with that, the ID:COM port should be highlighted in blue.
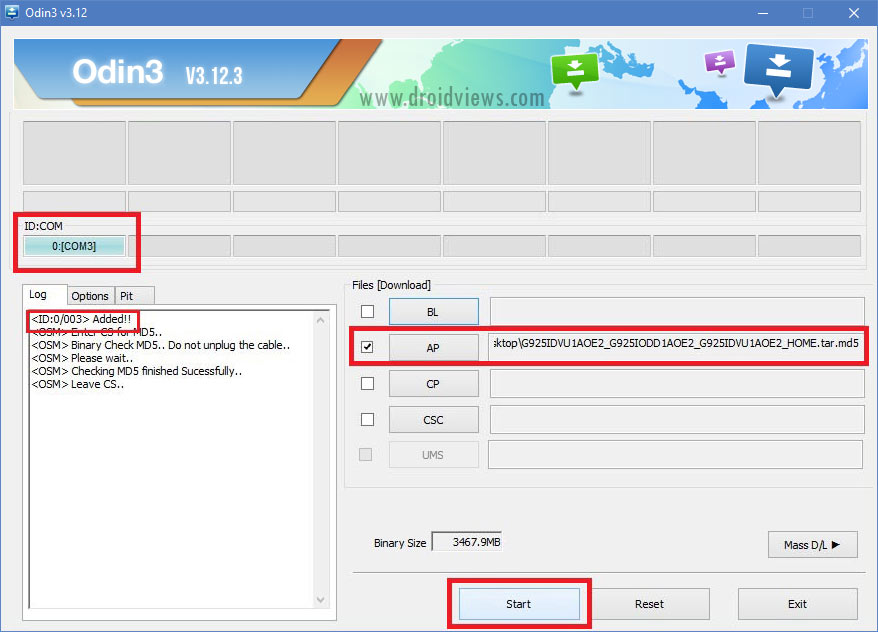
- Now click on the AP tab in the ODIN window and select the TWRP recovery.tar file that you downloaded for your device.
- Click the Options tab on Odin and uncheck the Auto Reboot option.
![How To Install TWRP, Root And Fix OEM Unlock On Samsung Galaxy S9 And S9 Plus [Exynos]](https://www.droidviews.com/wp-content/uploads/2018/03/odin-options.png)
- Now click on Start and wait for the TWRP installation process to finish.
- If the flashing completes successfully, you will see the box above the ID:COM port light up green with a PASS message.
- You can now disconnect the USB cable.
- Having installed TWRP, it is time to root your Galaxy S8 by flashing the latest Magisk via recovery. Therefore, you need to boot your phone into the recovery mode. Now press and hold the Volume Down + Bixby + Power buttons at the same time and immediately swap to Volume Up as soon as the screen goes blank/black while still pressing the Home and Power keys. Keep the 3 keys pressed until you get into TWRP Recovery.
- Select Keep /system RO. Tap Wipe> Format Data and type “yes”.
- Then go to Reboot > Recovery.
- Tap the Install button in TWRP, navigate to the location where you copied the the no-verity-opt-encrypt-5.1.zip and select it. Swipe the installation confirmation slider when prompted. (If you copied the file to the internal storage, you won’t find these files because you’ve already wiped your phone’s data. So, connect your S8 to the computer and copy the no-verity-opt-encrypt-5.1.zip and Magisk-v12.0.zip files to the device).
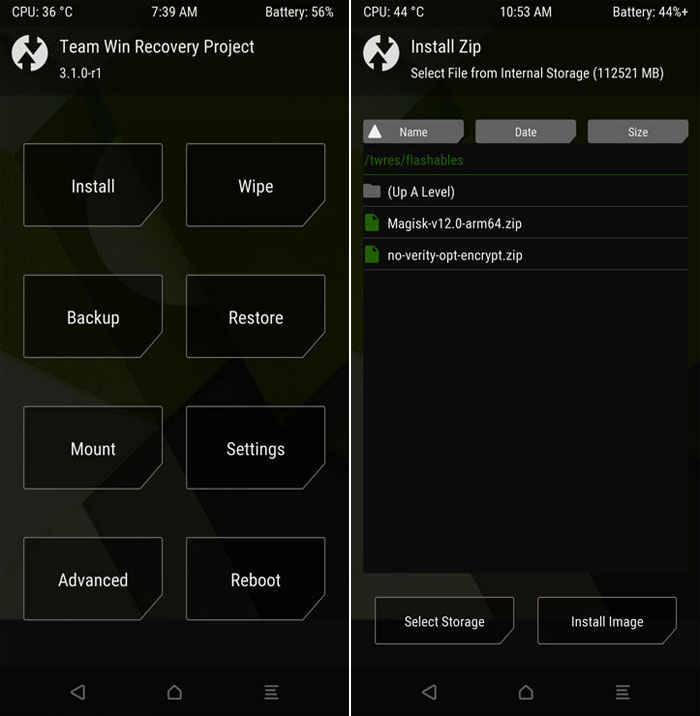
- Now go back to the main menu in TWRP and select Reboot> Recovery.
- When the device reboots into TWRP, tap the Install option, navigate to the Magisk-v12.0.zip and install it.
- Magisk will now be installed on your device and it will be rooted the next time you boot it up.
- When the flashing is complete, tap Reboot> system.
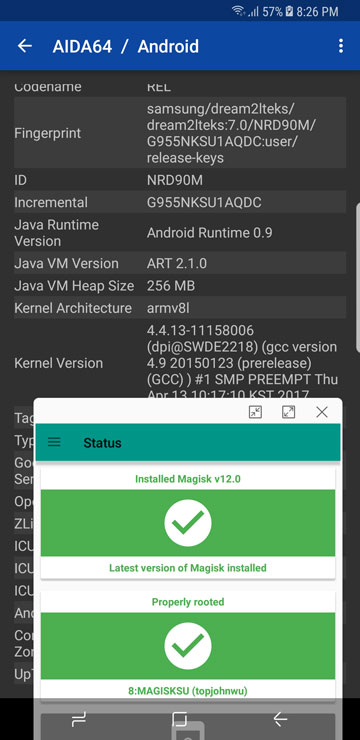
Congratulations! Your new Samsung Galaxy S8 is now out of warranty… err… rooted. Open Magisk to verify if your phone has been properly rooted or not.


one of the step says to wipe>format data. After doing so will the s8 be wiped off all of the data in it? like a new s8 phone? and another question that is it necessary to put the files in SD card in s8? Can’t we just copy it directly to internal storage of s8? what would happen if i do so?
currently on 10/04/2017, 950FD still stucks on identify failure, no matter how many tutorials I allready followed
can use the OTA when select no root on recovery ?
I switched to Android after 8 years of iOS. S8 plus my first android device successfully rooted. I was very confused how to tranfer Magisk and no-verity-opt to my device because I have not a microSD card. But I did it. Thank you very much for your guide!
You can transfer the files to your device by connection it to your PC via USB while it’s booted into TWRP.
Luckypatcher unfortunately not works can you please help me how to install supersu instead of magisk? Is the same process?
After rooting, how do we get OTA updates? If we do it manually, where from?
Hi Nick, you won’t get OTAs after rooting.
This worked for me. Root is showing in magisk. Thanks!!
Glad to know! Enjoy!
Sorry after install File with odin i can’t installed TWRP i have press Volume Up + Bixby + Power but is don’t work i USE samsung galaxy s+ Model SM-G955FFD if you need more information please ask me for more
When TWRP is installed, press and hold the volume down+Bixby power buttons. As soon as the screen goes black, swiftly swap volume down with the volume up key. Keep the 3 keys pressed until you enter the TWRP mode.
I had a bit of a nightmare with this.
Firstly, thanks for the guide, it works fine. I installed TWRP and then rooted the phone with magisk without issues.
However I keep getting this SecurityLogAgent notification “Unauthorised actions have been detected.” which recommends to restart my phone.
This started happening immediately after flashing the latest S8+ rom.
I tried to silence this by installing a package disabler and switching the service off. A bit later, out of nowhere, and for no reason, I started getting non stop pop ups
“process android.process.acore has stopped”
process android.process.media has stopped”
These were popping up constantly, making the phone completely unusable.
I tried so many suggestions online, including wiping dalvik/cache
In the end I had to restore to factory settings.
If anyone has any idea what happened, please do let me know because I don’t know what caused this and I am scared it will happen again.
Also, the SecurityLogAgent notification is still happening! ARghh
Ugh! I received my Samsung Galaxy S8+ today and I am very keen to try this but I am scared. It’s the Exynos variant but I don’t want to brick the brand new phone.
On the other hand all my backups are made with Titanium Backup Pro and I can’t restore them on the new phone unless it’s rooted.
Is it possible to root it, restore my backups and then unroot it?
Hi Nick, you’ll be able to restore your backed up data after rooting your phone but you can unroot it only by restoring the stock firmware.
Which model of the S8+ do you have?
I recommend using this root method: https://www.droidviews.com/root-samsung-galaxy-devices-android-nougat-cf-auto-root/
Can I use still use Smart Switch to restore my data from my old device after root?
Yes. use this method instead: https://www.droidviews.com/root-samsung-galaxy-devices-android-nougat-cf-auto-root/
well it has worked for me i have stock image followed the steps and root is showing in magisk and other root checkers
Glad to know!
Hey Rakesh. After a successful root with Magisk, will Snapchat and Vipps (banking service) work? They have a root-checker. I use those app VERY frequently and I need them to work.. But I also need root :/
There are ways that can hide root detection by certain apps. See this: https://www.droidviews.com/best-way-to-hide-root-on-android-and-pass-safetnet-check/
why have this up when you cant root the s8 its impossible and to prove it i tried it and it took 10 mins to tell me cant root it waste of time.
Try CF-Auto-Root: https://www.droidviews.com/tag/root-samsung-galaxy-s8/
I am having SM-G950FD india samsung s8. I tried and all went successful but after rooting the camera is not working. It says unfortunately camera stopped when we try to open camera.
Tried rooting my S8 edge but no errors so far but when I check from my app Root Checker Basic it says not rooted 🙁
Hi
Unfortunately I tried the method from here but all gone wrong!…
First the TWRP for the 8+ didn’t work as going to recovery the screen is dead (no touch…)
As I couldn’t restart the phone I tried the S8 link and this time the phone responded to touch in the TWRP…
Happy that I just had a wrong link I tried the rest of the instructions flashing the Magisx (in my excitement, without making a Backup…), couple of “red” messages during the root flashing fast enough to make it difficult to read and then automatically reboot to a Samsung message Saying that it need to reset the device as the security check failed and only choice the reset… Unfortunately after click in “Reset” button it din’t succeeded as had many “red” massages when it tied to reset…
Then I tried to flash the “no-verity-opt-encrypt.zip” hoping that it will allow at least the Samsung to reset the phone…
Wishful thinking…
After more “red” messages during the flashing back yo the same Samsung message…
Despaired then I tried to flash again the TWRP and during one of the many tried we had a electricity “spike” in the middle of flashing it and after that I have a phone which I can only go to “download” or the dead/no touch “recovery” and the Odin can’t “see” the device even after I installed “new” windows drivers even the KIES/SMART SWITCH from Samsung…
Do you know any way to make the phone readable by the PC again? I may find a Samsung ROM to flash it then…
Hi Terry, what’s the model number of your S8?
SM-G955F
Australian Vodafone
Don’t panic! Here’s the stock firmware for S8+ Australia (Vodafone): https://www.sammobile.com/firmwares/galaxy-s8/SM-G955F/VAU/download/G955FXXU1AQDD/129382/
Install it and try rooting again with updated steps.
Hey Rakesh
You din’t notice in my message that the phone is UNREADABLE from my PC! I can’t see it through ODIN or from Windows…
I can go to “Download” mode or to “Recovery” which doesn’t respond to touch… Thank you again for trying to help me!
Try these:
Uninstall and re-install the USB Drivers.
Reboot PC.
Reboot phone.
Then try again.
After several install/uninstall reboots etc I manage to see the phone and now I’m d/l the ROM from SAM and I hope will be OK…
I thank you very much for your time an I will report back later… 🙂
Cheers terry
Looks like you had fun 🙂
Yeah! You can call it that!!…. 🙂
Hi Terry, the tutorial has been updated again. The Official TWRP for the S8/S8+ is available now. Please try it again.
Hi Rakesh!
I did it BUT after I had to FORMAT DATA… 🙂
Looks OK as it does restore now but I have a small problem…
Do you know how can I deactivate the “Device Security” (Anti-Virus?) as it find, without say what, an “Unauthorised” activity and want to Restart the phone and “clean it”…
Install a root file manager and disable or remove, all KNOX stuff.
Thanks mate I’ll try…
Hi Rakesh
Thanks again for all your help!…
Can I ask you if you know any way to turn the phone back to full factory default with the Knox untouched so can use Android/Samsung Pay?…
I tried by re-flashing a factory ROM with .PIT but still doesn’t allow “Pay” to work…
Yes, you can restore the stock firmware: https://www.sammobile.com/firmwares/galaxy-s8/SM-G955F/VAU/download/G955FXXU1AQDD/129382/
Follow the steps given here: https://www.droidviews.com/android-7-0-nougat-firmware-on-galaxy-s6-s6-edge-sm-g920f-925f/
Hi mate
I have done exactly this with SAM ROM and didn’t work then I flashed again with re-partition with PIT file and still the same but now in a European ROM…
You are my hero!!! LOL 🙂
I’m restoring backups now and I think I will let 1-2 days pass before I re-try to root it!!! 🙂
Thank you very much again my friend!
Glad to know I could be of any help to you, Terry! I was worried too! My S8 will hopefully arrive tomorrow.
I think I may have make something wrong…
First, I didn’t make a backup…
Second, after I saw that the S8+ TWRP wasn’t working I should have checked and not try blindly the link in S8 which worked btw but probably not 100%…
Thirdly, the ODIN takes A LOT OF TIME to finish and used to flashing much faster in so many ROMS previously I think I stop it in RESET and NOT in PASS… 🙁