With more than 86% of the worldwide smartphone market share, Android is undoubtedly the more popular choice among smartphone users. No wonder Android lovers have been making attempts at finding ways to install Android apps on desktop PCs. Today we show you how you can install Android apps on Mac OS. If you want to, that is. In case you are a developer who doesn’t own an Android device or just a crazy enthusiast like me.
There are two ways to get this done. Install Android as on your machine in Virtual Box. This means you get the pure Android made for touchscreen mobile devices. The other way involves installing an Android emulator, which depending on the emulator can have slightly modified versions of Android to better work with a keyboard and mouse. We will cover the pure Android x86 version here. This is the best way to run Android on your Mac in my opinion.
Downloads
- First of all, you need to download the from Oracle. Here’s the currently latest version – Virtual Box 5.1.18 for OS X.
- Then you will need to download the also free x86 version of Android. This is Android made specifically (but not by Google) to run on computers with Intel processors. Here is the latest version based on Android 6.0 Marshmallow – android-x86-6.0-r1.iso – as of now.
The downloads can take a while depending on your Internet connection since these are both big files.
Install Virtual Box on Mac OS
- Run the Virtualbox.pkg package and follow the on-screen prompts to install the app on the Mac. The process is straight-forward but it does include quite a few steps.
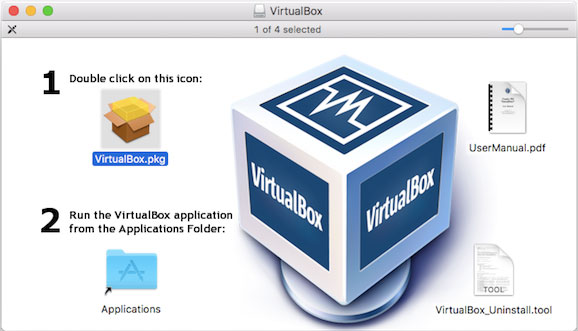
- Once installed, launch Virtual Box.
- Click New in the top left corner of the Virtual Box window. Type in a name for your Virtual Machine. You can name it after your pet or your wife or anything really. But it’d be wise to name it after the OS and the version of it. For instance, Android 6.0, as is the case here.

- As for Type, select Linux from the drop down menu, and for Version, select Other Linux (64-bit). In case you are going fora version of Android older than 5.0 Lollipop, for whatever reason, choose Other Linux (32-bit).
- Click Continue.
- Let the defaults stay as they are over the next few screens for Memory Size, Hard Disk, and Hard Disk File Type settings and click Continue.
- This virtual machine will run as a standalone Android machine so it is better to allocate memory accordingly. You won’t be able to access your files inside this machine.
- Select Fixed Size under Storage on Physical Hard Disk. This ensures the system resources wouldn’t be wasted in real-time determination of how much memory to allocate. As a result, you may gain a little performance boost.

- Click Continue. On the next screen (above), you can select a location on your hard disk to store your virtual hard disk, which will be used as the internal storage for your virtual Android machine. Change the size of the virtual disk if you want to, but the default value is good enough.
- Click Create. Creating a virtual hard disk can take a while so if your mac starts to beach ball, it is perfectly fine.
Install Android on Mac OS
- Now that your Android VM is all set up, it is time to install the OS it is named after. Select your Android VM back in the main window and click Start.

- Navigate to and select the Android x86 iso that you had earlier downloaded. Click Start.
- The installer gives you a few choices two of which are to either run Android without installing, or install Android. If you run Android without installing, it will be slower than it should be and anything you change or download will be lost as soon as you quit.
- If you plan to use the OS more than once, select Installation – Install Android x86 to hard disk using the arrow keys on the keyboard and press Enter.
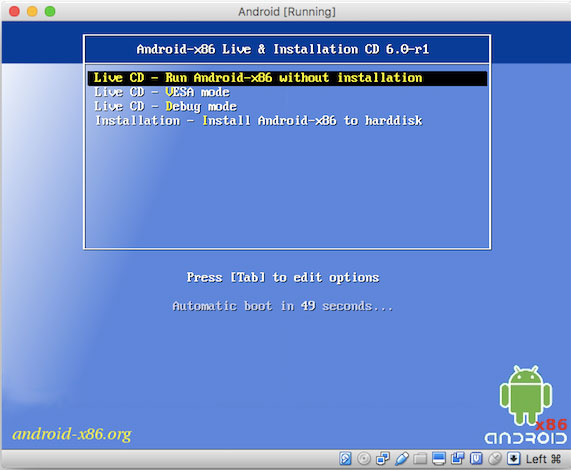
- On the next screen, select Create/Modify partitions and then select No.
- Then select New>Primary and hit Enter to create a new primary partition.
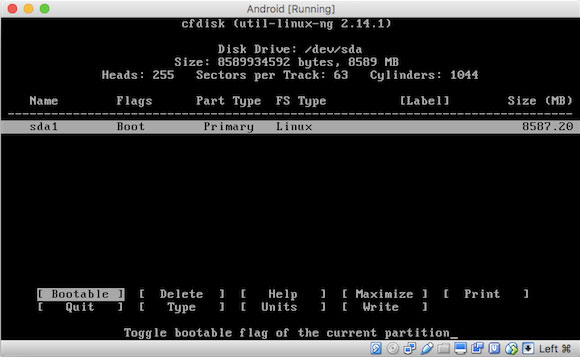
- Highlight Bootable at the bottom left and press Enter. Check the heading Flags, which should have the word Boot under it now.
- Scroll to Write and hit Enter again.
- Ignore the warnings about losing data, since you are not creating an actual partition here. Type in Yes and hit Enter. Then highlight Quit and hit enter again.
- Select your newly created partition on the top now and choose OK.
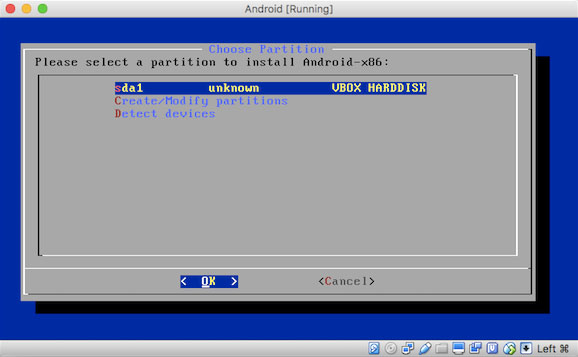
- Select ext4 under Choose File System then and hit Yes.
- When asked if you want to install the bootloader select Yes and then skip on the next screen.
- Choose Yes when prompted to install the /system directory as read/write. Installation will finally begin now.
- When the installation is complete you will be prompted to run Android. Hit Enter to boot Android into its own Window.
Install Android Apps on Mac OS
- From here on, it is basically just the Android you know and love, running on your Intel powered Mac machine.
- Hit Cmd + F to go full screen. Sign in with your Google Account and start installing apps from the Google Playstore.
- You can use your track pad or mouse to control Android as you would on a touch screen. Go to Input > Mouse Integration and disable it.


nice share, thanks