Yesterday, we brought you 9 awesome ways in which you can use your Android NFC capability (with NFC tags together) to make your life a little easier. With just a tap of your phone, you can do amazing things like – automatically switching on and connecting your phone’s Bluetooth with your car’s stereo or radio system and much more. To do that, you need to make use of ‘NFC Tags’. Today, we will tell you how you can write on NFC tags to automate various tasks.
Necessary Downloads
To do this, we are going to make use of a free app called ‘Trigger – Task Launcher’. You can get it from Google Play Store by clicking below:
[googleplay url=”https://play.google.com/store/apps/details?id=com.jwsoft.nfcactionlauncher”/]Instead of writing standard information to the tags to be read by any NFC app or device, Trigger writes shortcodes that, upon reading the tag, is interpreted into nearly any action on your device that you can imagine.
Write on NFC Tags to Automate Tasks
For the purpose of keeping this tutorial simple, we will create and write a simple task today. By the time you are comfortable with the steps in this tutorial, you’ll be able to create your own complex tasks.
We are going to create a task that will help you sleep peacefully. The task will:
- Turn off your phone ringer (ringtone and notification tone)
- Set the phone’s display brightness to minimum.
Once we create and write the above task on an NFC tag, you’d be able to simply tap your phone on it and go to sleep without any disturbance.
Assuming you have successfully installed ‘Trigger’ app, follow the below:
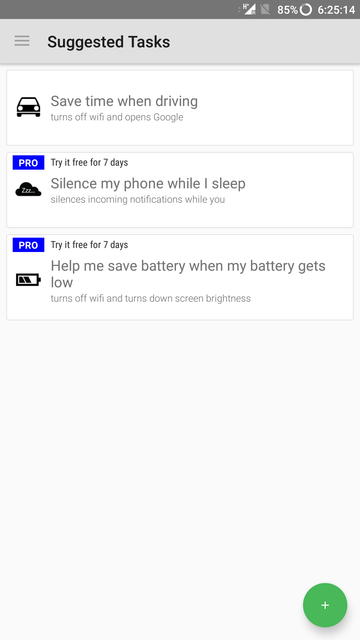
- Open the App.
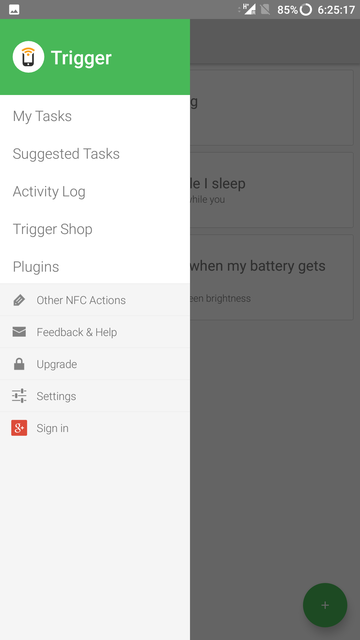
- Swipe from the right and tap on ‘My Tasks’.
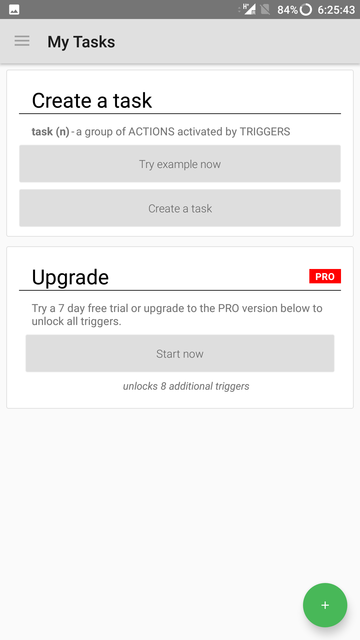
- Tap on the ‘Create a task’ button on the Create a task screen.
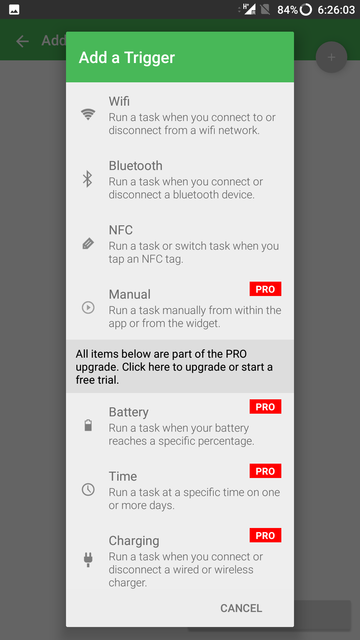
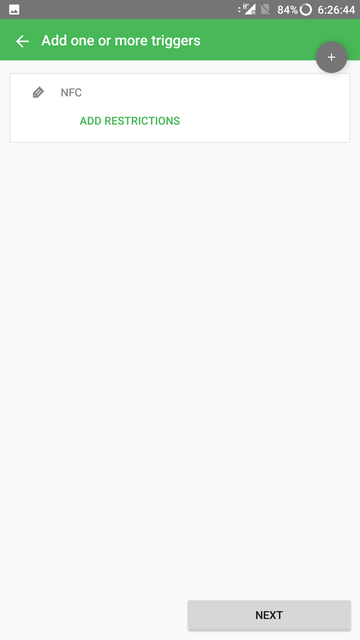
- From the ‘Add a Trigger’ pop-up, select ‘NFC’.
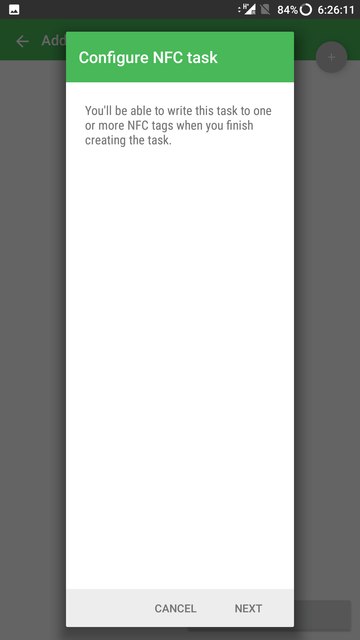
- Click Next.
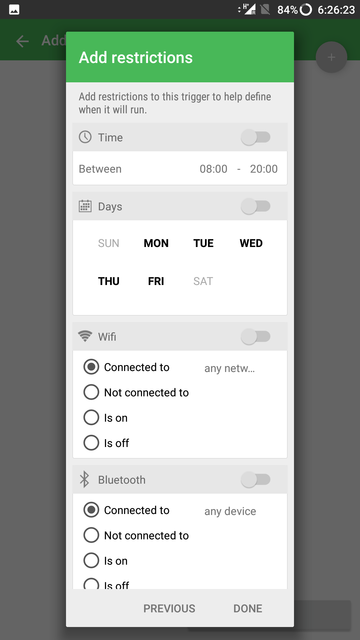
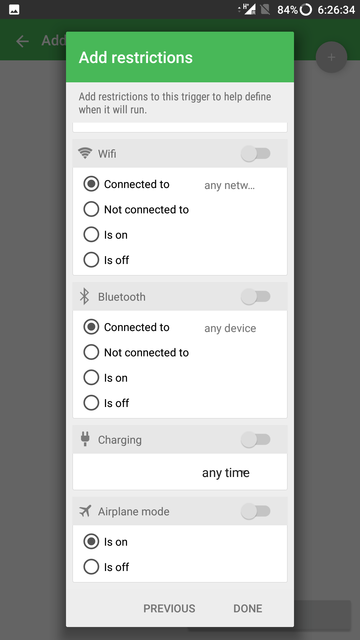
- You will be shown the ‘Add restrictions’ screen. Here you can define a set of conditions that need to be met in order for the NFC tag to work. You can choose the specific time, days, Wifi/Bluetooth status as restrictions. Again, keeping simplicity in mind, we will skip this. Simply tap on ‘Done’.
- In the next screen, you will be shown your newly created task named ‘NFC’. Tap on ‘Next’ at the bottom to add an action. Action is nothing but a task that you want to be done when the NFC tag is tapped.
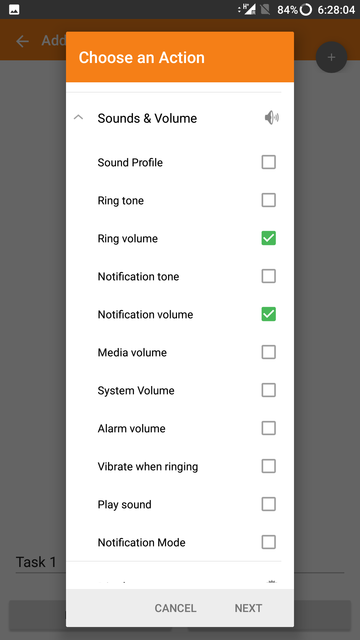
- From the ‘Choose an Action’ screen go select Sounds & Volume > Ring Volume, Notification Volume, and Display > Brightness. Tap Next.
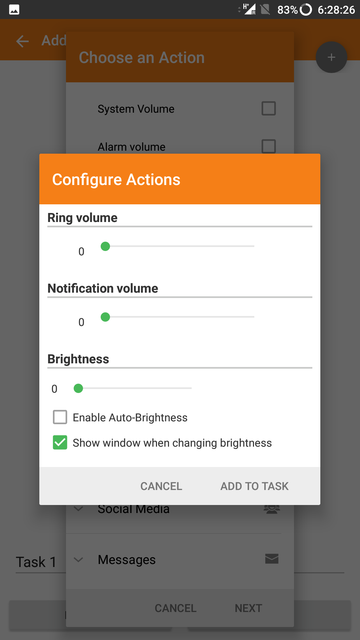
- Set the values for Ring Volume, Notification Volume, and Brightness as per your need (all values to the minimum, in this case) and tap on ‘ADD TO TASK’.
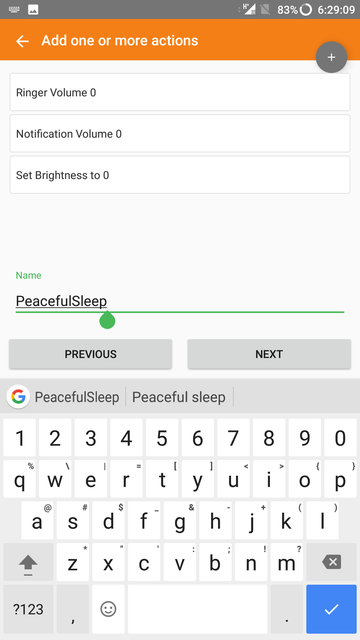
- Give a name for the task/trigger you just created. Let’s name this one ‘PeacefulSleep’. Tap on Next.
- ‘Switch tasks’ screen will be shown next. As it states, if you create Tasks here, then your NFC Tag will toggle between firing your above Tasks and the ones you assign here. This is great if you want to use the same NFC Tag to toggle on and off certain settings. We’re going to skip this option today as well.
- Tap on ‘Done’.
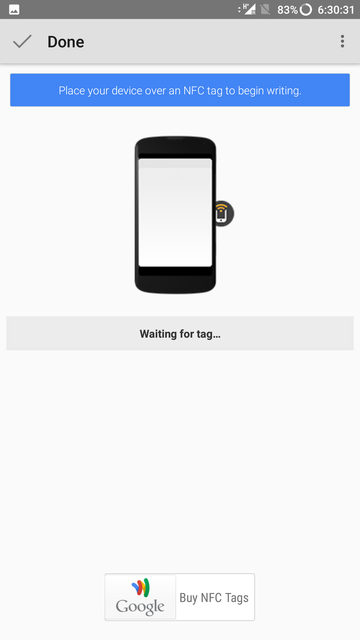
Now you will be taken to a screen where you will write the task/trigger you just created into the NFC tag you have. Simply bring your NFC tags close to your phone and tap on it. The task you created will be automatically written into it. Congratulations, you have successfully written your first NFC Tag!
Visual Guide
If reading ain’t your forte, then below are the images for every step mentioned above:
Things to keep in mind
The Trigger app needs to installed and the tasks you create in Trigger must be in ‘Active’ state for the task/trigger you created to work when you tap your phone on the NFC tag. Please keep in mind that uninstalling the app or deactivating the task inside Trigger will render the NFC tag useless.
Need any help with any of the steps above? Fire them in the comments section below!




Join The Discussion: