The Galaxy J1 Ace Neo was released last year and has made its name in the budget segment. Although having a super AMOLED screen and 4G Support, it doesn’t fare well when it comes to displaying resolution or performance. It also runs on Android Lollipop v5.1.
In this post, we will look at various methods to root this device. Rooting will help you get the most out of your phone, by customizing your OS, removing unwanted bloatware, or even installing custom ROMs, if you install a custom recovery as well. Moreover, many utility apps in Play Store need root access to do their jobs best (take Greenify or Tasker as an example).
Before You Start
Warning: Rooting is an inherently risky procedure. Apart from voiding your warranty, your device may get bricked anytime during the process. Developers do their best to reduce chances of mishap, but there’s no guaranteed safety. Moreover, it is possible to permanently damage a rooted phone by not being careful enough. As the saying goes, with great power comes great responsibility.
Before rooting your phone, ensure the following:
- Backup all your important data in an SD Card, or your PC.
- Enable Developer Options (Open Settings-> About Device-> tap Build Number 7 times).
- In Developer Options, enable USB Debugging and OEM Unlock.
- Download Odin v3.12.3 from this link.
- Install all relevant device drivers in your PC.
- Charge your device to at least 50% (80% recommended).
Procedure to Root Samsung Galaxy J1 ACE Neo
In this article, we will use the Root Tool by hernankano.
XDA Member hernankano has developed a script to ensure hassle free rooting. No need to install ADB separately, or fumble with long strings in the command line. Nevertheless, all the required files come in a neat zip package. The tool will replace your stock boot partition with an insecure boot image file. The boot partition contains programs which work before android is loaded. An insecure boot is simply a modified boot partition image with ro.secure property set to 0. This allows you to install su into your android, which basically provides root access.
The steps to use this tool are simple enough:
- Connect your device to your PC via a USB cable.
- Download the zip file to your PC from this link (mirror).
- Extract the contents of the zip folder in any suitable location.
- Run Root-En.exe.
- If you haven’t installed drivers already, type yes (y) and press Enter. Otherwise type no (n).
- A dialogue box will appear in your mobile. Tap the check box and select Accept.
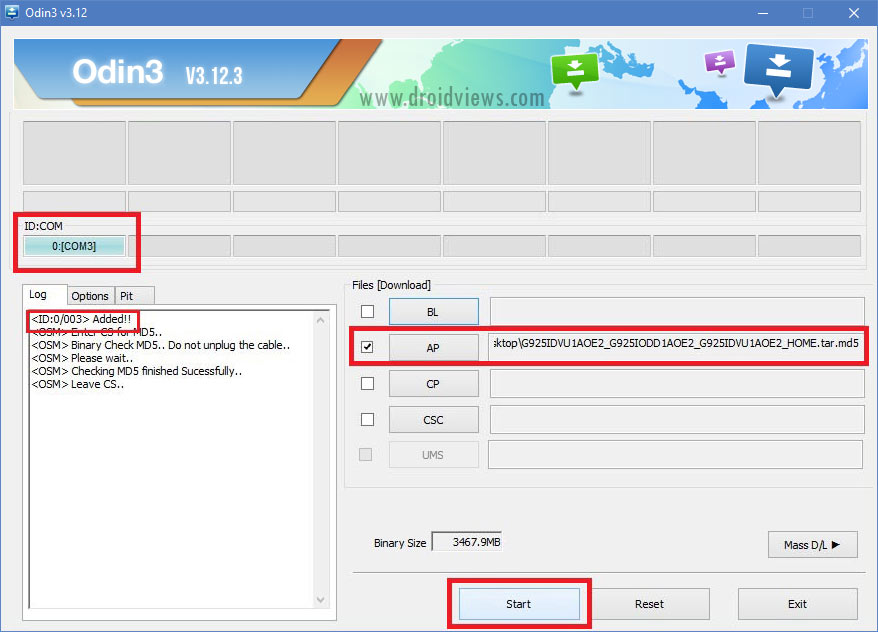
- After successfully detecting your Device, the tool will open Odin.
- Select AP.
- Navigate to the extracted zip folder contents, and select the boot.tar file.
- Select Start.
- If successful (PASS!), the phone will reboot.
- Sit back while the program does a few more things, and when prompted, press any key to reboot your device again.
- In your device, open Apps-> SuperSU.
- Press Accept in the prompt. You will then be asked to update binaries. Press update, and when the process is finished, reboot your device once again.
You’re done! To check root status, you can download and run the Root Checker app from Play Store.
Unrooting
If you want to unroot your device for some reason, open SuperSU-> Settings-> Full Unroot. Then tap on Continue, and after the process is finished, your device should be unrooted once again. However, this doesn’t remove the insecure boot image file. To remove this boot image file, follow the following steps:
- Download boot-stock.tar (mirror) file.
- Run Odin.
- Boot your device into the Download mode.
- Switch Off your device.
- Press Power, Home, and Volume Down buttons together.
- A screen with a warning message will appear.
- Continue by pressing Volume Up button.
- Connect your device to your PC via a USB cable.

- Run Odin, select AP.
- Select the downloaded boot-stock.tar file and press Start.
- After the process is finished (PASS!), reboot your device.


Join The Discussion: