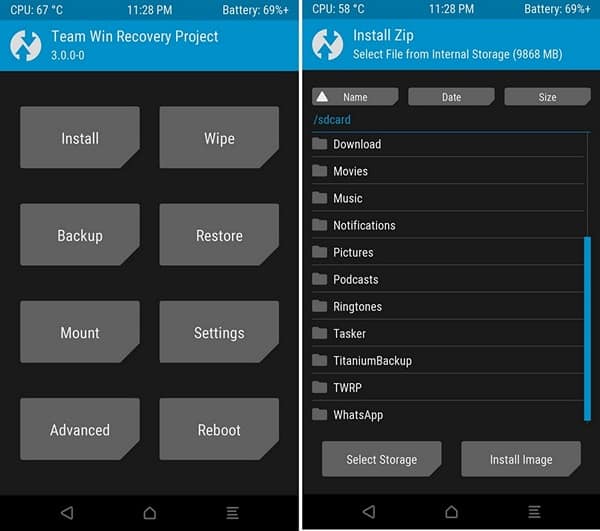
The official nightly build for CM 14.1 for OnePlus 3 has been released. If you are eager to install it on your smartphone then you came to the right place. Now you can enjoy Android Nougat on OnePlus 3 via CM 14.1 ROM. Here we will guide you through the easiest possible method for the installation of the CM 14.1 ROM on the OnePlus 3. Yes, I tested it and didn’t find any issues with the procedure. Users might be worried because the device is expensive but let me assure you that if you follow the steps perfectly then there is no chance of your device getting bricked. Let’s kick in.
A brief introduction for those of you that don’t know. CM (CyanogenMod) is a custom ROM based on AOSP (Android Open Source Project). Benefits of this ROM includes better customization, Xposed, custom kernels and mods. However, flashing mods, Xposed or custom kernels is not recommended as the ROM is in the nightly build and can get highly unstable.
Right now the ROM possesses a lot of minor bugs. So whether or not to use this ROM as a daily driver is at your own risk. However, if you really want CM 14.1 it is recommended to dual boot this ROM.
Prerequisites
- LineageOS ROM
- Gapps (Open Gapps ARM64 7.1 Pico)
- Unlocked Bootloader and Compatible Recovery (Check the link for unlocking bootloader and installing TWRP)
- NANDroid backup is recommended to backup your current ROM (In case anything goes wrong).
Warning- The device’s warranty will be void. This procedure is fully tested and works. However, we at DrodiViews will not be held responsible for any actions you take. We can ensure you that if you follow the steps correctly then you will land in no issues.
Steps for ROM Installation
- Turn off your phone.
- Boot into bootloader. (Hold the Volume + Power Button at the same time until OnePlus logo).
- Then, boot into recovery. (Use the Volume Buttons to navigate and Power Button to select).

- From recovery select the Wipe option.
- Then, select Advanced Wipe.
- After that, select all the options except Internal Storage and swipe right to wipe the system.

- Then, head back to TWRP’s main menu and click on Install.
- From there navigate to the directory where you placed the ROM.
- Select the ROM and swipe right to flash the ROM.
- Wait for the process to complete and then head back and flash the Gapps.
- Clear Cache and Dalvik Cache from the option at the bottom-left corner of the TWRP.
- Finally, reboot into the system.
First boot may take 5-6 minutes, have patience. If you face any problem or have any queries related to this post. Let me know in the comments section below. I will try and reply as fast as I can.


Join The Discussion: