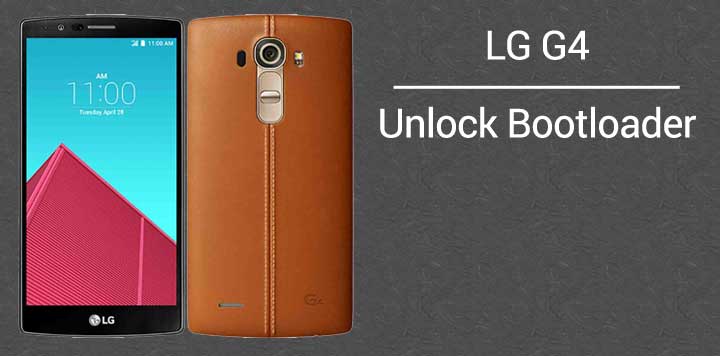
The G4 is the latest entry into the flagship scene by LG and as always its one to savor. Marking its territory with a Snapdragon 808 SoC, Adreno 418 GPU, a stunning 5.5 inch IPS LCD Quad-HD display with a pixel density of 538ppi (pixels per inch) and an amazing 1/2.6” 16MP rear camera capable of capturing photos of resolutions up to 5312 x 2988 pixels. Such features will make one drool over this device.
For a while now LG has always looked for new innovations to stay ahead of the competition, and it continues the trend with the G4 also. Along with the massive 5.5-inch QHD screen, there is also a slight curve given to the screen to improve one-handed usage and protect the screen when the device falls face down. This way it risk of the glass shattering is reduced massively.
LG usually doesn’t promote unlocking of phones for development, but recently they started officially unlocking bootloaders of their devices, starting with the G4.
If you have recently purchased the G4 (H815) and want to use root apps, a custom recovery, installing custom ROMs and other modifications you will first need to unlock your bootloader, otherwise you won’t be able to perform any of the above.
Follow this tutorial step by step and you will end up with a fully unlocked LG G4. Let’s get started.
Preparations
First of all, you will need to ensure a few things before we start the unlocking process.
- Confirm you are using the LG G4 model no. H815
Note: Any carrier-specific model might not work with this method. The user is to perform this at their own risk.
- Ensure that you have the necessary LG USB device drivers installed (Download here).
- Check if you have at least 80-85% of battery charge. We don’t want the phone dying in the middle of the process.
- If you have done this process before on other devices then you must be familiar with adb and fastboot. Ensure that you have it installed.
For those who aren’t familiar with adb and fastboot, Please refer to our detailed guide on How to Setup ADB and Fastboot on Windows within Seconds
- Enable USB-Debugging from Developer Options in the Settings menu.
- If you cannot find Developer Options, then you’ll have to first enable it by going to Settings -> About Phone -> Build Number and tap it 7 times until you see a small notification that you have enabled it.
- Then return to the Settings menu, you should find Developer Options there. Open it and enable USB Debugging.
- Make sure that you have backed up all your personal data and apps as all data will be erased!
- For Contacts, Calendar and People details use Google Accounts Sync to backup
- For Apps and App Data check out our detailed post here.
- Enable the OEM Unlock. It’s under Settings -> Developer Options -> check ‘OEM Unlock’.
Disclaimer: The following procedure is highly risky and there are chances that you may brick your phone of not performed correctly, DroidViews cannot be held responsible it that happens. So the user should tread cautiously and at their own risk.
Warning: Unlocking the bootloader will void your warranty.
Unlocking the Bootloader
Once you have confirmed and met all the above requirements we can start the unlocking process.
Step 1 – Connect your LG G4 to your PC using the USB Data Cable.
Step 2 – Open up a command prompt and type the following command.
adb devices
You should be getting a message saying ‘List of devices attached’ along with your device name. This will confirm that adb has recognized your device.
Step 3 – Next enter this command in Command prompt
adb reboot bootloader
This will reboot your G4 into fastboot/bootloader mode
Step 4 – Get your Device ID by entering the following command:
fastboot oem device-idYou will receive an output similar to this:
(bootloader)—————————————————————–
(bootloader) Device-ID
(bootloader) CD58B679A38D6B613ED518F37A05E013
(bootloader) F93190BD558261DBBC5584E8EF8789B1
(bootloader)—————————————————————–
Step 5 – Form a single line code out of the two lines you received, removing all spaces and the “(bootloader)” to get something like this: ‘CD58B679A38D6B613ED518F37A05E013F93190BD558261DBBC5584E8EF8789B1’.
This is your Device ID.
Step 6 – Next, visit LG’s official unlock bootloader page, scroll all the down to the bottom till you see ‘Start Unlocking’.
Enter your LG account details, or sign up to create a new one. Once logged in they will ask for your IMEI and Device ID. We have already gotten our Device ID from Step 5. To get your IMEI, just enter *#06# in your dialer.
Step 7 – After entering Device ID and IMEI, confirm it and an email will be sent to your registered email address with the ‘unlock.bin’ file.
Step 8 – Download that ‘unlock.bin’ file from your email onto your Desktop.
Step 9 – If your device is already in fastboot mode then proceed below otherwise just repeat Step 3 to boot it into fastboot mode again.
Type the following command to Change your directory to your Desktop:
cd Desktop
Next, with the device in fastboot mode type the following command:
fastboot flash unlock unlock.bin
This will unlock the bootloader of your LG G4.
Step 10 – Finally reboot your device by typing:
fastboot reboot
And that’s it the bootloader on your LG G4 is now unlocked! You are now free to install a custom recovery, root, custom ROMs among other things.
If you had any problems during the procedure, let us know in the comments section below.


Thank you so much!
i really appreciate that
This article is totally outdated and only true for a very few selected international versions. Most of us are reporting that the h815 is not availible to be unlocked from LG own website page for develepers. I will NEVER BUY ANOTHER LG so long as they refuse me access to my own device. I’m going back to the Nexus phones for now. “F” “U” “LG”!
No. There should be an option in developer options to unlock the phones boot loader.
I agree. The consumer must be provided a way to unlock the bootloader easily whenever he/she wants it.