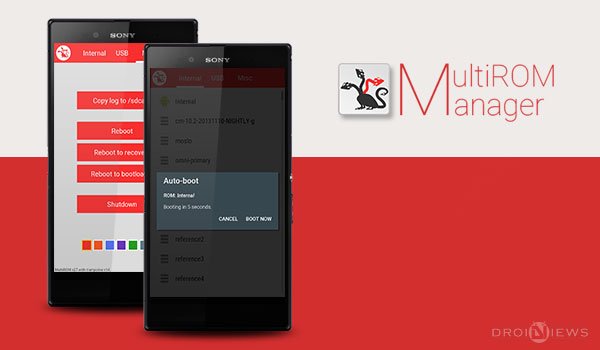
We’re never satisfied with what we have, and so it does follow with our Android devices. We can’t settle on one single ROM for a long time, we see something new and we make the shift towards it. But, MultiROM has provided us with the privilege to enjoy more than one custom ROMs on several devices. MultiROM initiated its first few steps on the LG Optimus One P500 and moved its way through many different devices like Galaxy Note 2, HTC One M8, OnePlus One and Galaxy S4, which has turned this innovation into a legacy. Today, we turn our heads up to a new device in the line, we will be using MultiROM on Xperia Z Ultra to enjoy different ROMs at the same time by multi-booting.
Earlier setting up MultiROM was a hard job and if done wrong, could lead your device into a brick. But now, the developer (tassadar) has worked out an easy solution for everyone. This very solution is the MultiROM Manager app released by the developer and is available for free on the Google Play Store. The app offers native MultiROM installation, related recovery and even the available kernels. MultiROM also lets its users to boot a ROM from a USB drive using an OTG cable. In case you have a backup of an old ROM that you would like to restore without risking the current ROM, this mod will help you restore the backup as the secondary ROM.
The mod also uses a pre-boot manager interface which is much more interactive now and provides some really helpful options besides choosing which ROM to boot into. You can now use MultiROM on Xperia Z Ultra to test ported ROMs or experimental ROMs without causing any harm to the primary ROM. To use this mod, your primary OS will require to run a kernel having the kexec-hardboot patch. Most of the custom kernels now do have this patch integrated or if it isn’t, you can use the MultiROM Manager app itself to install a supported custom kernel on your Xperia Z Ultra.
Visit the original XDA thread for more information and show appreciations to the developer Garcia98. Also view the developer’s Github. Now, lets learn how we can easily setup MultiROM on Xperia Z Ultra.
Warning!
DroidViews or any of its community members shall not be held responsible for any damage to your device. Perform everything on your own risk. Make sure to take a backup of your current ROM, so if anything goes wrong, you can pull yourself back from the trouble.
Setup MultiROM on Xperia Z Ultra
STEP 1: Install MultiROM App & Recovery
Installing MultiROM requires your device to be rooted, for the app to operate. You can use our Root Sony Xperia Devices (Xperia Z/ZR/ZL/S/T/V and More) Easily with Easy Rooting Toolkit guide to root your Xperia Z Ultra. Once you have gained root, you can go ahead and install the app by clicking the app box below.
Initiate the app from the app drawer, it will ask for root permissions, grant them. Once the app has started it will display the MultiROM status of your device, for now which will be “MultiROM is not installed“. Following the next Install/Update card, check the MultiROM and Recovery checkboxes and tap on INSTALL. The installation screen will appear showing the progress of download and installation, once it has completed, you will be prompted to reboot into recovery, tap on REBOOT. The device will reboot into recovery and perform the necessary operations.
STEP 2: Manage New ROMs
Now when everything has been set up, your device is ready to support more ROMs side-by-side your primary ROM. To manage a ROM, you will need to reboot into recovery mode on your Xperia Z Ultra. To do so, power off your device completely, power it on again, when the pink LED lights up, press the Volume up or down key a couple of times and the phone will be in TWRP recovery mode.
Initially, the menu is clean for you since you do not have any secondary ROM already setup. Go to Advanced > MultiROM, in here you will have several options: Add ROM, List ROMs, Inject boot.img file, Inject curr. boot sector, Settings and Swap ROMs. These options are explained a little below for your own reference.
- Add ROM: This option will let you add new ROMs to your device and will let you choose from which location you want your secondary ROM to boot.
- List ROMs: This is where you can have a look at all the custom ROMs set up currently on your device and manage them. In here, you can flash zips and alter other ROM settings.
- Inject boot.img file/ Inject current boot sector: This options are related to meddle with the kernel installed on your several ROMs. Try and not use this if you don’t know what to do.
- Settings: These are the complete MultiROM settings. You can enable ADB, hide internal ROM, configure autoboot time, rename the internal ROM, adjust brightness and animations etc.
- Swap ROMs: You can swap your current ROMs using this option. Swap your internal ROM with secondary, copy secondary ROM to primary slot, copy primary ROMs to secondaries or move them permanently.
STEP 3: Using USB Drive For ROMs
If you don’t have enough space in your device internal storage, you can use this MultiROM feature to boot your secondary ROMs from a USB drive, this could be a pen drive, thumb drive or even a large external HDD. While you are installing a new ROM using Add ROM option, you will be asked to choose the install location, make sure to connect your USB drive to your device via OTG cable for it to be detected. Wait for the few seconds, if the device doesn’t show up, tap on Refresh. Only ext, NTFS and FAT32 partition drives are detected.
Installing or managing ROM on USB drive could take a lot of time, since these devices are slow and building images and transferring data is a lengthy process.
Uninstall MultiROM
This is a highly unlikely choice that you may make, but then there should always be a way to roll back. In case of MultiROM, it is way to easy and could be done with a few taps, directly from your Xperia Z Ultra.
- Open the MultiROM Manager app.
- Now, beside the Status card, you will see the bin icon.
- Tap on it and select Uninstall MultiROM.
- A warning prompt message will appear, stating that all the secondary custom ROMs and their related data shall be removed permanently.
- Press on CONTINUE to start the uninstall process.
- The installation screen will show up, displaying the progress.
- The app will download the uninstaller zip.
- Once it has been downloaded, it will prompt you to reboot into recovery to continue the process.
- Press on REBOOT.
- The procedure will complete and the device will reboot normally.
If you’re a developer and want to contribute to the app or port this to your device, you can view the app source code on Github. And to show your appreciation to the developer, you can buy the Donate version of the MultiROM Manager, but don’t worry, its just a donation, the free version already comprises of all the functions. Tell us how you have been benefited with MultiROM on your Xperia Z Ultra.
Provide us with your feedback, it is valuable to us and will help us build a better community.


Join The Discussion: