Google left a little disappointment to the Nexus 4 users who had waited for 2 long days before they got the Lollipop factory image. On the contrary, the legendary developer Chainfire had been so generous and released the root tool for the Nexus 4 devices running on Android 5.0 Lollipop even before the factory image got to the shelves. The root comes in the form of the popular Chainfire Auto-Root tool (CFAR) which is a light-weight tool which roots a device with no more than a single click from the user. Isn’t cool?
The CFAR tool is an automated script that uses the fastboot commands to root your device while you sit back and relax on your couch. The tool works with both locked and unlocked bootloaders with the only exception that all the user data will be wiped on locked bootloaders as the tool attempts to unlock the bootloader before it squeezes some magic on your device. This might look like a little tricky for the first-time rooters but this is ultra-normal in the Android world, so don’t sweat the shirt and get on with the simple but effective guide.
Warning
This guide is intended only for the Nexus 4, so it’s advisable not to try it on other devices. The below provided guide is well accepted and has a high success rate but there might be still a chance for misfortunes, so it’s wholly the user’s choice to follow the guide. You alone are responsible for any consequences that might occur during the process, we shall not be held responsible for any damage to your device.
Prerequisites
- Make sure that your battery is charged to above 60% to prevent it from unexpected shutdowns leading to corrupt partitions.
- Locked Nexus 4 devices will be wiped clean, so make sure you have proper backups of everything on the device.
- Download and install Google USB Drivers.
- Turn on USB Debugging on you Nexus 4. Here’s how you can do it.
- Finally, download the CF-Auto-Root tool from here.
Root Nexus 4 on Android Lollipop
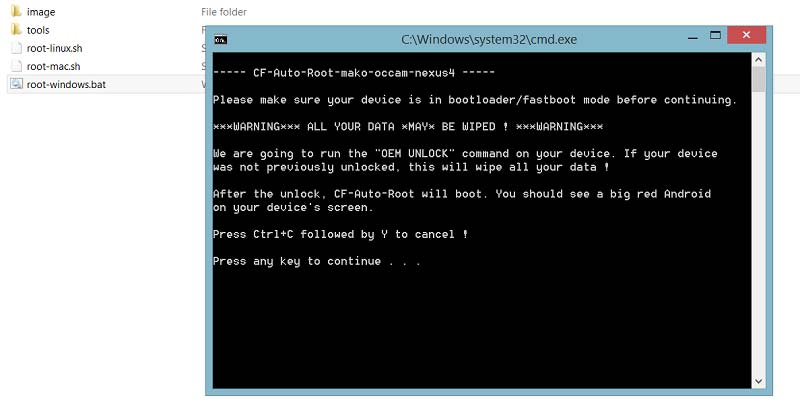
- Download and extract the Nexus 4 CF-Auto-Root zip file. You’ll get the following files:

- Boot your Nexus 4 into bootloader mode. To do this:
- Turn off your Nexus 4.
- Now turn it back on by press and holding down the Volume Down + Power keys together until you enter the bootloader mode.
- Connect your device to the PC using an USB cable and make sure the device is detected.
- Double click the root-windows.bat file. A command window will open up asking you to press a key to continue with unlocking the bootloader and rooting the device.

- Wait for the process to complete and click any prompts on your phone that come up when asked to.
- You will observe some weird scripts running on your Nexus 4, but don’t panic. The device will reboot once everything is done.
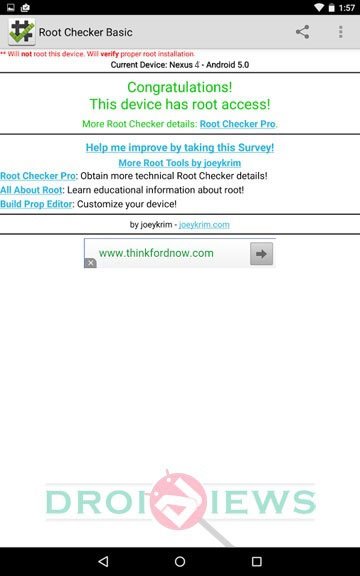
That’s it, upon booting you will find the SuperSU app in the app drawer. You can verify the root using the Root checker app from Play Store.
[googleplay url=”https://play.google.com/store/apps/details?id=com.joeykrim.rootcheck”]Share how you’re planning to use the root permissions on your Nexus 4 in the comments section below.


Join The Discussion: