Exciting times these are, don’t you think? Factory images of Android Lollipop for existing Nexus devices are already out. Users in some regions are still waiting for Google to roll out the OTA updates on their devices. Although it shouldn’t take long, most of us were too excited to have our Lollipops sooner rather than later, and hence couldn’t really afford to wait for the OTA updates. This is definitely the most exciting version of Lollipop after all! Those eye-popping animations, that fluidity and that colorful yet subtle new UI — who wouldn’t want to get his hands on that immediately? But there are some users whose needs are different. They don’t just want the stock ROM, they want it ROOTED! And in that case, we’ve got your back covered guys, read on to Root your Nexus 7 2013 WiFi using One Click CF AutoRoot Tool.
Rooting any new version of Android requires a lot of patience on the developers’ part as they have to deal with newer OS level patches and security fixes. Android 5.0 Lollipop was no different in this respect, and in fact, it went a step or two further! But the tried and tested name of Chainfire did it again by making a One-Click batch file for the Nexus 7 2013. So without much ado, let’s talk about the tool.
Warning!
Do not forget that flashing your device, rooting it, or any other similar customizations thereof can sometimes have adverse repercussions. Also, these processes are not for the faint-hearted since none of these are full-proof. But we do assure you that they work in most normal scenarios if you correctly follow the guide. If anything does happen to your device, the responsibility of that solely lies with you, my friend.
Requirements and Precursors
- Download the CF-AutoRoot Tool for the Nexus 7 2013 WiFi from here.
- You will have to setup the ADB drivers for Android on your PC by referring to these guides. ADB drivers are needed for connecting your device correctly to the PC for the purpose of flashing or installing stuff via fastboot mode.
- Now download Minimal FastBoot tool from here and then extract the contents to a folder. This is for quick fastboot setup, which requires Android developmental SDK otherwise. If you have that already setup, no problem, skip this step!
- When you are done with setting up ADB and FastBoot, you’ll have to install your device-specific drivers by connecting it to your PC via a USB cable. Download these drivers which are in a zip, and manually install them by opening your PC’s Device Manager and clicking on the ‘Other Devices’ button. Then, right-click on Nexus 7 and select ‘Update Driver Software’. In the pop up screen that appears, browse to and select the zip drivers you just downloaded. You can also refer to this post if you want your device specific drivers.
- Enable USB debugging on your device in the ‘Developer Options’ menu by referring to the comprehensive guide in this post.
- Don’t forget to backup your data and charge your device to at least 60% of battery juice beforehand.
Installation
- Firstly, open the downloaded Rooting Tool zip file and extract its contents to a folder of your preference.
- Now, turn off your Google Nexus 7.
- Turn On your device in bootloader mode by holding down the Volume Down + Power keys altogether while it boots.
- Connect your device to your PC via a USB cable.
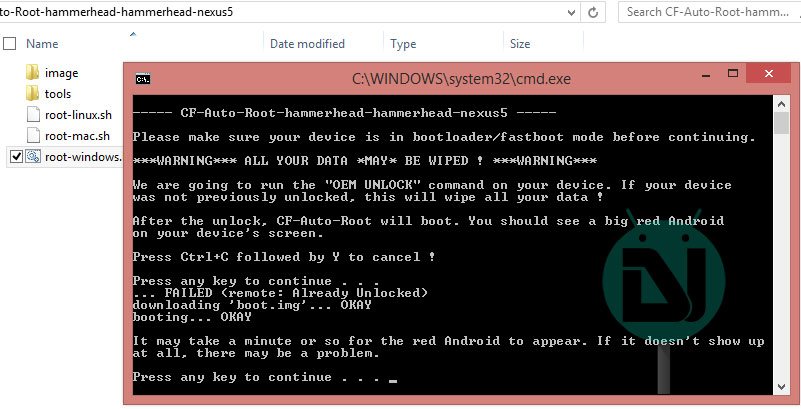
- Now, simply run the script file by double-clicking on it.
- A cmd-like command prompt will pop-up with the prompts to continue with the Rooting process.
- Just follow the prompt with positive key-presses, and you shall be automatically led through it.
- After this, a red Android bot will appear on your Nexus 7 and you’ll see certain root scripts running on the device.
- At the end of the process, your device will reboot.
- And that’s it! as and when your device boots up, it will be rooted!
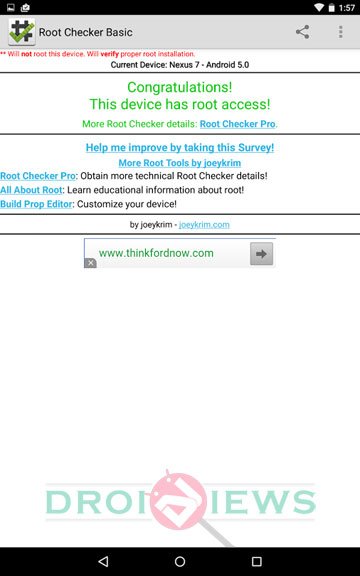
And finally, when the dust will settle, you will find yourself with a Nexus 7 2013 WiFi running the latest version of Android, and rooted! to verify root access, you can use Root Checker app from the Play Store.
[googleplay url=”https://play.google.com/store/apps/details?id=com.joeykrim.rootcheck”]It’s amazing how the devs capitalized on the update roll-out and could make an easy to apply Rooting method available within a day. But then, this is what Android is all about, ain’t it?
Oh, and don’t forget to share your experience of using this tool. We’ll be glad to hear back!


Join The Discussion: