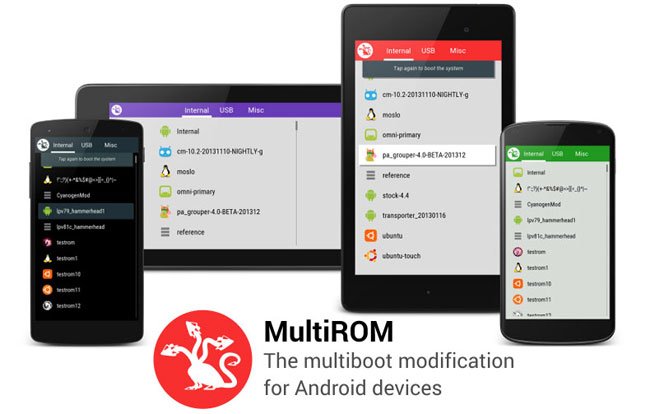
Android is an OS which spoils its users with a plethora of choices for customization. While stock android in itself is more customizable than any of the competing mobile OSes, advanced users can look elsewhere too for getting a freehand over the way their device looks and behaves. And well, the best way to do that is by installing a custom ROM on your device. No no, hold on! Our problems don’t end there! The biggest confusion arises afterwards when we have to choose one from the numerous custom ROMs available out there. But what if we don’t really have to choose? The answer to that is the MultiROM on Galaxy Note 2.
MultiROM is a boot manager for Android devices which allows you to install and boot-up multiple ROMs on your device. The idea here is to do away with the recurrent need of installing or replacing your present ROM altogether. This is exciting for app/ROM testers as well as users who like to live on the bleeding edge otherwise. Quite similar in functionality to the way we can handle different Operating Systems on our PCs, this mod is quite a charm to use. This was originally meant for Nexus devices but the recent few weeks have seen the inclusion of quite a few other devices via ports from dedicated developers. And well, the Galaxy 2, even after being an ‘old’ device by today’s standards; has aged quite well to say the least. Now XDA Senior member tilaksidduram has come up up with a port of MultiROM for the device, and things have got a lot more exciting for end-users.
Let’s cut to the chase and first focus on how to get MultiROM working on your device rather than blabber about what it does. We will get you started, and later help you with its usage too.
Warning
You are basically changing the nature of your device with MultiROM. Our OEM (here, Samsung) never meant for the device to run multiple ROMs on a single system. So essentially we are hacking it and applying a workaround. Keep in mind that this whole procedure is no less risky than Rooting or flashing your phone. Discretion is advised
Requirements
- First of all, you will have to make sure that your device is not encrypted. (If you didn’t knowingly encrypt the device, it wouldn’t be encrypted anyway.)
- You must have a custom Recovery like CWM or TWRP installed on your device.
- Download MultiROM v28 zip file for your device from here.
- And Modified TWRP Recovery from here.
- Also get hold of this Kernel with ‘kexec hardboot patch’ for AOSP ROMs — Download Kernel.
- Backup your data and don’t forget to charge your Note 2 to at least 60%.
Installation Instructions:
- Firstly, put the downloaded MultiROM zip, modified TWRP Recovery and Kernel on your device storage, and boot-up into your existing Recovery.
- Now, firstly flash the MultiROM zip file by selecting ‘Choose zip from SD card’ and browsing to the zip file.
- Afterward, flash the modified TWRP via the existing recovery you had. This modified Recovery is made to work with MultiROM and hence is essentially needed.
- Finally, install the patched Kernel on your device similar to the way you did the above two installations from Recovery.
- Done! MultiROM installation is now complete!
Using MultiROM
Always remember that the primary ROM has to have a kernel with the kexec-hardboot patch in it. Not all ROMs and/or Kernels currently have this. You will also have to keep in mind that this MOD currently works only with AOSP based KitKat ROMs. The Samsung Touchwiz-based stock or custom ROMs are NOT supported because of the absence of above-mentioned kexec-hardboot patch in them.
Once all the anomalies are out of your way, you might want to fiddle with your device by installing various ROMs.
- To install any of the custom ROMs out there, you just have to go to recovery, and select Advanced -> MultiROM -> Add ROM. Select the ROM’s zip file and confirm.
- During the above step, Recovery will allow you to select the install location. Here, you can select a connected USB drive’s extX, NTFS or FAT32 partitions for the ROM installation.
- You can even install Firefox OS or Ubuntu Touch on your device since those too are just other Linux based OSs which the Android device or MultiROM doesn’t differentiate. Now, that’s what we call an unbiased approach!
- All the installed ROMs have separate apps and storage, except the /sdcard location. This is shared between all the installed Android ROMs.
Once you have installed and setup MultiROM and want to alter any of the secondary ROMs, you can do it easily by deleting the ROM you want to get rid of and add a new one. If an update for an existing secondary ROM is available, follow these steps:
- Go to Advanced -> MultiROM -> List ROMs and select the ROM you want to update.
- Now select ‘Flash ZIP’ and flash the ROM’s updated ZIP file.
- To flash GAPPs (the zip package with all of Google’s apps) for any of the Secondary ROMS, go to Advanced -> MultiROM -> List ROMs and select the ROM you want to flash the GAPPs package on.
- Finally, select ‘Flash ZIP’ to install the GAPPS zip file.
- You can have as many ROMs as you want depending on the free space in your /sdcard. The ROMs are stored in /sdcard/multirom/roms or on a USB drive.


Join The Discussion: