LG’s latest flagship, the G3, is already out and has quickly become one of the most desirable devices among smartphone lovers. The LG G3 houses top-notch features like 5.5-inch Quad HD display with an astounding 538ppi resolution, lightweight metallic design, 13MP main camera with OIS (Optical Image Stabilization), laser auto-focus and dual LED flash, an amazingly smart keyboard, Snapdragon 801 quad-core processor clocked at 2.46 GHz, 2/3GB RAM, 3000 mAh removable battery, a micro SD card slot and so on.
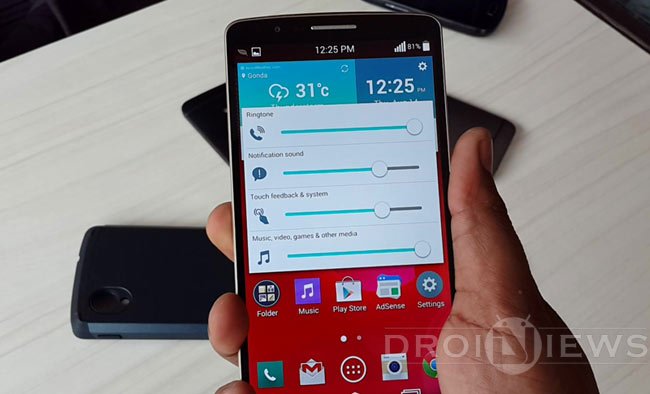
The LG G3 really sound like an ultimate phone but there are still some departments where it the device thrives for improvements. Just a while ago, we wrote a handy tutorial on fixing the lag issue on the LG G3. If you own the LG G3 and feel that its headphone and speaker volume is not up to your expectations, we have come with a volume mod that lets you boost LG G3 volume significantly.
The LG G3 volume boost mod by spiderio targets the speaker and headphone volume and requires root access in order to modify system volume configuration file to get desired volume intensity on your device.
Requirements
Before you attempt the mod on your LG G3, here are a few prerequisites you must have:
- A rooted LG G3. You have not rooted your device yet, we have one-click methods for rooting it here.
- A root file manager installed on your device. We recommend any of the following apps: [googleplay url=”https://play.google.com/store/apps/details?id=com.jrummy.root.browserfree”]
Method: Boost LG G3 Volume
Having taken care of the prerequisites described above, here’s what you have to do to get louder volume on your LG G3;
- Open Root Browser/Explorer app on your phone.
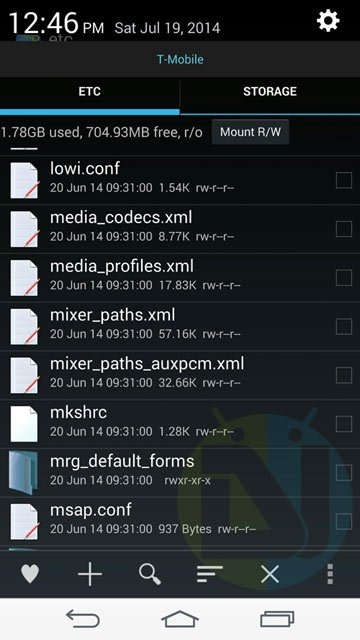
- Navigate to /system/etc directory and open it.
- Now look for the following XML file depending on your phone model:
- mixer_paths_qcwcn.xml (D855)
- mixer_paths.xml (D851 and other US Models)
- The first thing to do is to backup this file to the external storage. In case the mod does not work for you, or you wish to restore volume value to stock later, you can copy the original files back and fix file permission.
- Now tap and hold the XML file and select Edit option.

- Now change the value of strings (highlighted in red) that determine speaker and headphone volume. You can play with several volume values to get desired volume.
29  |   <ctl name="RX1 Digital Volume" value="65" />
30  |   <ctl name="RX2 Digital Volume" value="65" />


779 |    <path name="speaker">
780 |        <ctl name="SLIM RX1 MUX" value="AIF1_PB" />
781 |        <ctl name="SLIM_0_RX Channels" value="One" />
782 |        <ctl name="RX3 MIX1 INP1" value="RX1" />
783 |        <ctl name="RX3 Digital Volume" value="65" />
784 |        <ctl name="RX4 Digital Volume" value="65" />
785 |        <ctl name="RDAC5 MUX" value="DEM3_INV" />
786 |        <ctl name="LINEOUT1 Volume" value="22" />
787 |        <ctl name="LINEOUT3 Volume" value="22" />
788 |        <ctl name="RX3 HPF cut off" value="MIN_3DB_150Hz" />
789 |        <ctl name="SPK Amp Volume" value="3" />
790 |    </path>


854 |    <path name="headphones">
855 |        <ctl name="SLIM RX1 MUX" value="AIF1_PB" />
856 |        <ctl name="SLIM RX2 MUX" value="AIF1_PB" />
857 |        <ctl name="SLIM_0_RX Channels" value="Two" />
858 |        <ctl name="RX1 MIX1 INP1" value="RX1" />
859 |        <ctl name="RX2 MIX1 INP1" value="RX2" />
860 |        <ctl name="CLASS_H_DSM MUX" value="DSM_HPHL_RX1" />
861 |        <ctl name="HPHL DAC Switch" value="1" />
862 |        <ctl name="HPHL Volume" value="20" />
863 |        <ctl name="HPHR Volume" value="20" />
864 |        <ctl name="RX1 Digital Volume" value="65" />
865 |        <ctl name="RX2 Digital Volume" value="65" />
866 |        <ctl name="COMP1 Switch" value="1" />
867 |    </path>


998  |    <path name="speaker-and-headphones">
999  |        <path name="headphones" />
1000 |        <ctl name="COMP1 Switch" value="0" />
1001 |        <ctl name="HPHL Volume" value="15" />
1002 |        <ctl name="HPHR Volume" value="15" />
1003 |        <ctl name="RX1 Digital Volume" value="58" />
1004 |        <ctl name="RX2 Digital Volume" value="58" />
1005 |        <ctl name="RX3 MIX1 INP1" value="RX1" />
1006 |        <ctl name="RX3 MIX1 INP2" value="RX2" />
1007 |        <ctl name="RX3 Digital Volume" value="65" />
1008 |        <ctl name="RX4 Digital Volume" value="65" />
1009 |        <ctl name="RDAC5 MUX" value="DEM3_INV" />
1010 |        <ctl name="LINEOUT1 Volume" value="20" />
1011 |        <ctl name="LINEOUT3 Volume" value="20" />
1012 |        <ctl name="RX3 HPF cut off" value="MIN_3DB_150Hz" />
1013 |    </path>
- Having made the changes, save the new configuration, close Root Browser/Explorer app and reboot your phone.
When your LG G3 boots up, play some audio/video file to check the difference. Enjoy!


I must say, I have been running a custom rom of Lollipop on my Verizon G3 (Illusion 5.0.2) for over a week now, and have had a very quiet life! For some reason, the volume slider on screen would NOT move, and when I would turn it to the max volume with the buttons, it was VERY VERY quiet. After your amazing tutorial, and some good old logic (as a few of the fields you provided to modify are different on the Lollipop rom I am using) I now have a loud and clear G3 as it was with the KitKat stock rom. Thank you very much good sir, and keep up your good work!
Thanks for the appreciation, Josh!
I have now read that permissions must be changed on the file to prevent a boot loop. Any insight into how I may get out of this?
Since you have a custom recovery, boot into CWM/TWRP, go to advanced options and tap fix permissions.
Thanks Rakesh. I did try that method to correct the permjssions but it did not end the boot problem. I ended up flashing the rom and that got me up and running starting from scratch.
Hmm, but you should have restored your ROM backup instead!
I also am now stuck at the LG Boot Screen. I’m running Cloudy G3 on an LG G2.
my phone wont start up now .. help
There is nothing in this mod that leads to a bricked device. You might have made some mistake. What’s the exact condition of the device currently.
Have you found a fix vicky?
Great thx