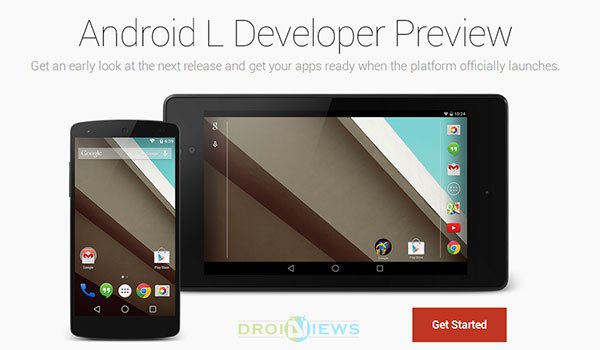
Android L was previewed just a day ago at the Google I/O 2014 event that held in San Francisco. The long-awaited and rumored Android L is a preview showcase of what ‘s coming in the next Android version. For now, it has been released as a developer preview for those who are ready to run the long race of experimentation and is made available for the Nexus 5 and Nexus 7 2013 Edition in the form of Factory Images. We as always will put up our hands and help you Install Android L Developer Preview on Nexus 5 & 7. The process is simple as we’re going to Install the factory image, which requires a piece of basic knowledge about Window’s Command Prompt.
Tons of new changes were added and displayed during the event, which were definitely appealing. These are mentioned below:
- Completely revamped User Interface also known as Material Design is making its entry in this new version of Android, which is considered as the major re-design in Android till now. New animations, widgets, highly-customized drawables, etc.
- DO NOT DISTURB function that definitely will come in handy, enabling its users to block calls, messages from a specific user or a complete group of such. It is an essential utility that has finally made its way to Android and can be accessed directly from the Quick Setting Toggles, tapping on which will take you to the DND mode configuration.
- Project Volta is a drastic move by Google towards the improvement of battery life, more detailed and user-friendly view of battery stats, which will ultimately turn out to an efficient and managed battery. It also includes multi-level battery saver modes for better management.
- Full ART runtime integration is what will accompany as the default runtime in the next version of Android, which means Dalvik will no more be present. It includes advantages like Improved GC, Improved Debugging support and Ahead-Of-Time (AOT) compilation.
- Contacts, Dialer, Calculator, Gallery, and several other Apps have been given a complete overhaul, looks more attractive and feels swifter.
This is a little, we really mean a very little of what is coming ahead for us. Get to know more about it Android Developers website.
Disclaimer
This is an early preview of Android L and is meant for those who can risk their daily stability. Bugs might be encountered and may harm your device’s functionality. DroidViews or any of its members shall not be held responsible for any damage to your device in any circumstances.
Prepare your device
- Backup your device Internal storage, SMS, Contacts and everything as this will erase your device completely.
- You will need your device’s bootloader to be unlocked, you can do it for Nexus 5 here and the Nexus 7 2013 here.
- Install appropriate USB drivers. These could be downloaded here.
- Enable USB debugging using this guide.
- Charge your battery to at least 60%.
- Setup ADB, follow this guide
When you’re done with all the above, you can proceed below.
Install Android L Developer Preview on Nexus 5 & 7
- Download Android L Developer Preview factory image for your device:
- Nexus 5: hammerhead-lpv79-preview-ac1d8a8e.tgz
- Nexus 7 2013: razor-lpv79-preview-d0ddf8ce.tgz
- Extract the downloaded factory image and extract it. You will have a folder namely hammerhead-lpv79 in case of Nexus 5 and razor-lpv79 in case of Nexus 7 2013.
- Connect your device to the PC via USB data cable.
- Open the folder where the factory image is available. Press SHIFT key and Right-Click on an empty space inside that folder and select Open Command window here from the pop-up menu.
- Enter the following command to reboot your device into bootloader/fastboot mode:
adb reboot bootloader
- Type the following command to check if the device has been connected successfully. If an ID is displayed, it means the device has been successfully connected or else, you either have not setup Android SDK properly.
fastboot devices
- Time to wipe the device partitions, enter the commands one after the other:
fastboot erase boot
fastboot erase recovery
fastboot erase userdata
fastboot erase system
fastboot erase cache
- Flash the bootloader on Nexus 5:
fastboot flash bootloader bootloader-hammerhead-hhz11k.img
- Flash the Bootloader on Nexus 7 2013:
fastboot flash bootloader bootloader-flo-flo-04.02.img
- Reboot the device bootloader, this step is extremely essential:
fastboot reboot-bootloader
- Flash the Radio on Nexus 5:
fastboot flash radio radio-hammerhead-m8974a-2.0.50.2.08.img
- Also flash the recovery file:
fastboot flash recovery recovery.img
- Reboot the device bootloader once again:
fastboot reboot-bootloader
- Flash the factory image on Nexus 5:
fastboot -w update image-hammerhead-lpv79.zip
- Flash the factory image on Nexus 7 2013:
fastboot -w update image-razor-lpv79.zip
- The process will take a few minutes to complete and then the device will reboot itself.
This way, you will finally be running Android L Developer Preview on Nexus 5 and Nexus 7 2013. Tell us about this new experience via comments.
Do Not Miss!
Root Android L Developer Preview on Nexus 5 and Nexus 7 2013


Mate you forgot the part where you flash the new recovery
Thanks for pointing to the mistake. It has been added! 🙂