Bokeh or Portrait Mode gives a kind of blur effect to your background. This makes your subject stands out from the image. Nowadays many stock camera comes pre-loaded with portrait mode. However, not all of them give a satisfactory outcome. In these cases, the photo-editing app from Google will definitely come in handy. In this guide, we will show you the steps to apply a perfect bokeh mode to any of your images via the Snapseed app. Let’s begin. You could even apply the color pop effect using Snapseed on to your images. Refer to our guide to know more.
Bokeh Mode via Snapseed
There are two different methods through which you could apply a bokeh mode via Snapseed. The first one is a relatively easy and simple one, but the end results leave a lot to be desired. Whereas the second method requires quite a lot of effort and patience but churns out the best portrait mode images. We will be discussing both the modes here, beginning with the former. Follow along. Also, enjoy powerful image editing with the Iudesk photo editor.
Portrait Mode via Lens Blur
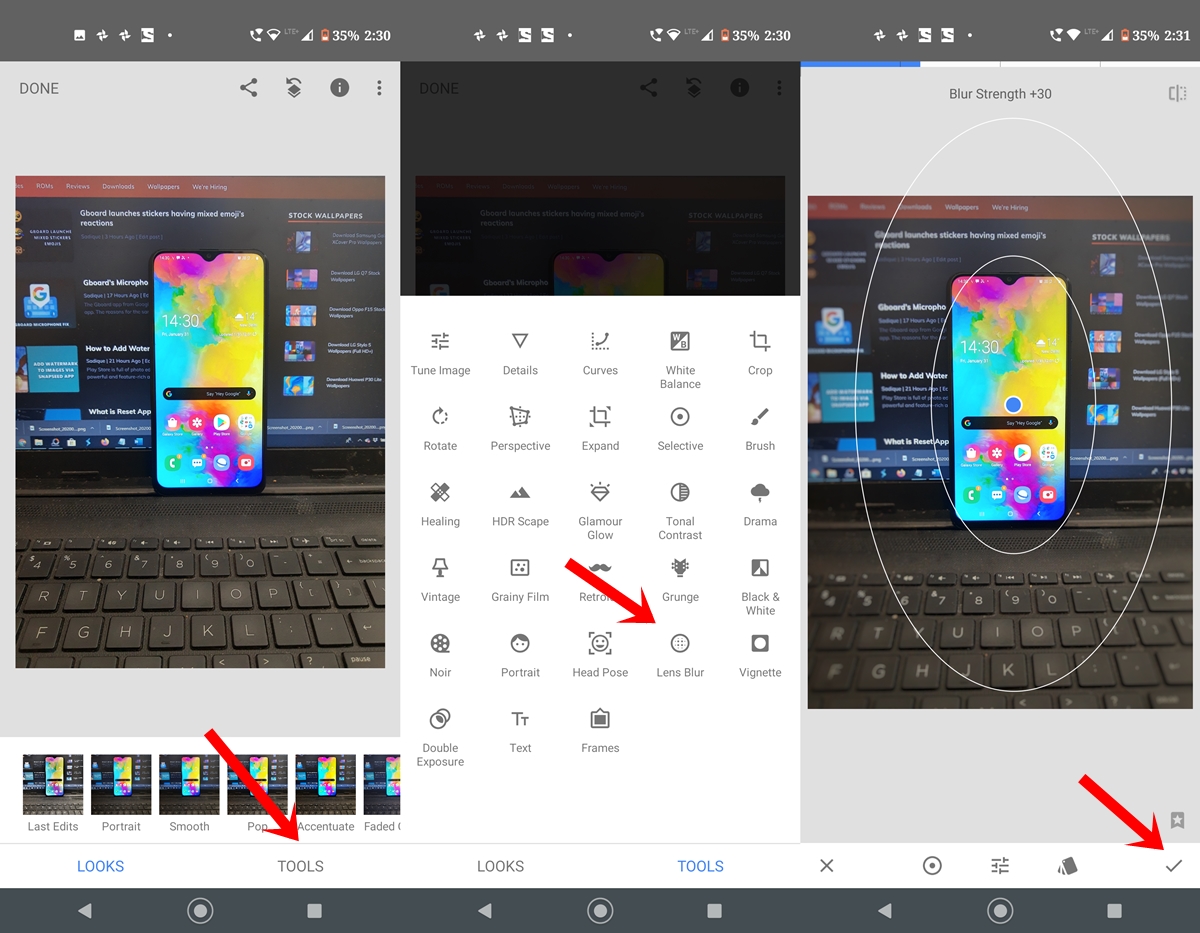
- Open the desired image in Snapseed to which you need to add a bokeh mode.
- Next, tap on Tools and select the Lens Blur option.
- Select the desired shape of the blur functionality. The same could be selected from the bottom menu. You could either choose the Linear Blur or Circular Blur option.
- Now, adjust the blur region using two-finger gestures. To move it, drag the central dot and place it at the desired region.
- Once you are doing applying the blur over to the desired region, tap on the tick mark.
Don’t Miss: Manage and edit your photos with Photo Editor app for Android
That’s it. You have successfully applied the bokeh mode over to your image via the Snapseed app. Although the steps were pretty simple, the results more often than not aren’t quite satisfactory. For example, the said effect isn’t applied near the edges and corners. To overcome these issues, you could try out the next method mentioned below.
Via the Manual Method
- Once you have opened the image in Snapseed, tap on the Tools icon.
- Select the Lens Blur option. But you will now have to perform the pinch-in gesture as small as possible so that it turns into a single circle (rather than the default two circles). Have a look at the image for reference purposes.
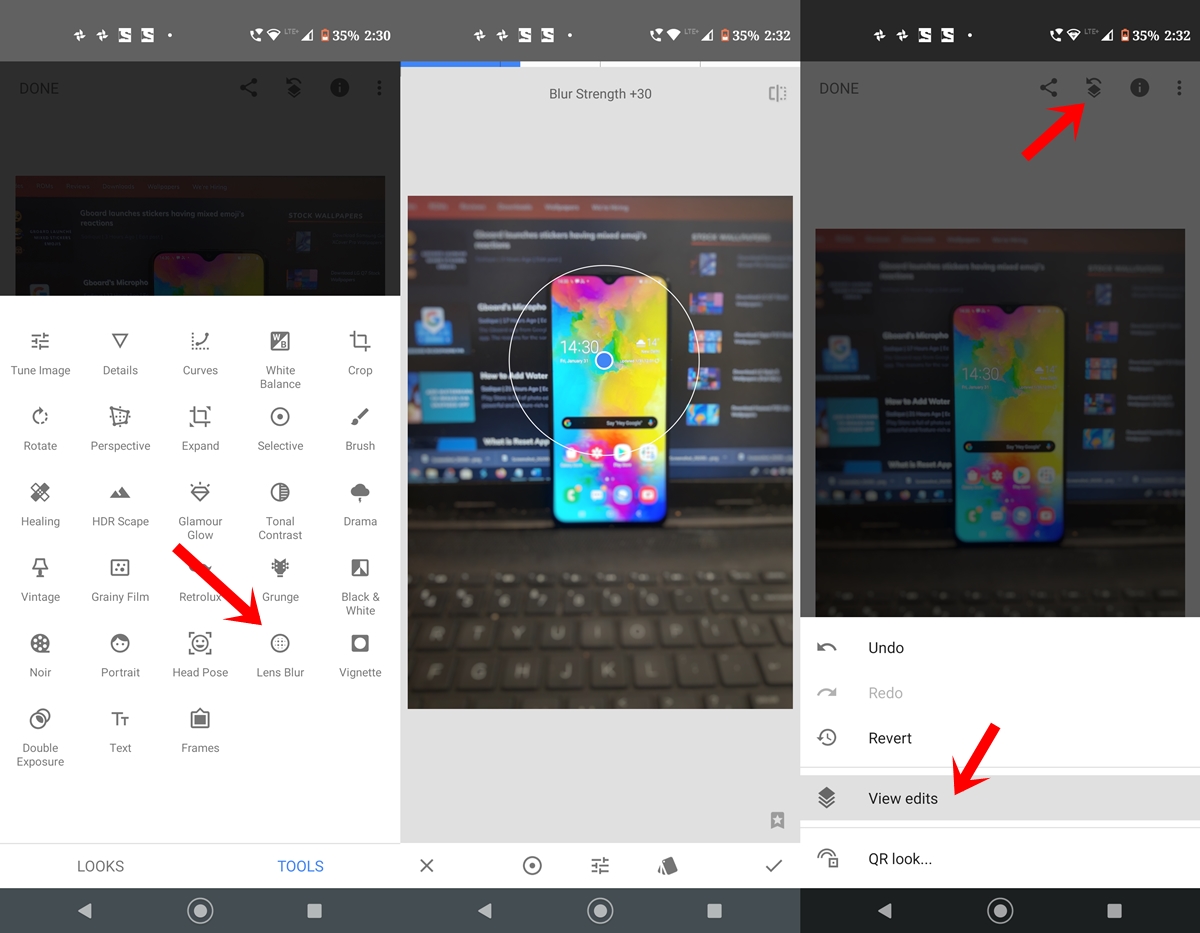
- Once done, tap on the tick mark and subsequently on the Edit Stack option. This is right next to the Share option.
- Now from the menu that appears, tap on View Edits.
- Next tap on Lens Blur and then the on the middle icon, as shown. This is the option that helps in adding a bokeh mode to your image in Snapseed.
- You will now have to highlight the entire subject with the highlighter. Make sure you don’t leave any corners whatsoever. To make the process easier, you could use the pinch-out gesture, zoom into the image and then highlight the desired region.
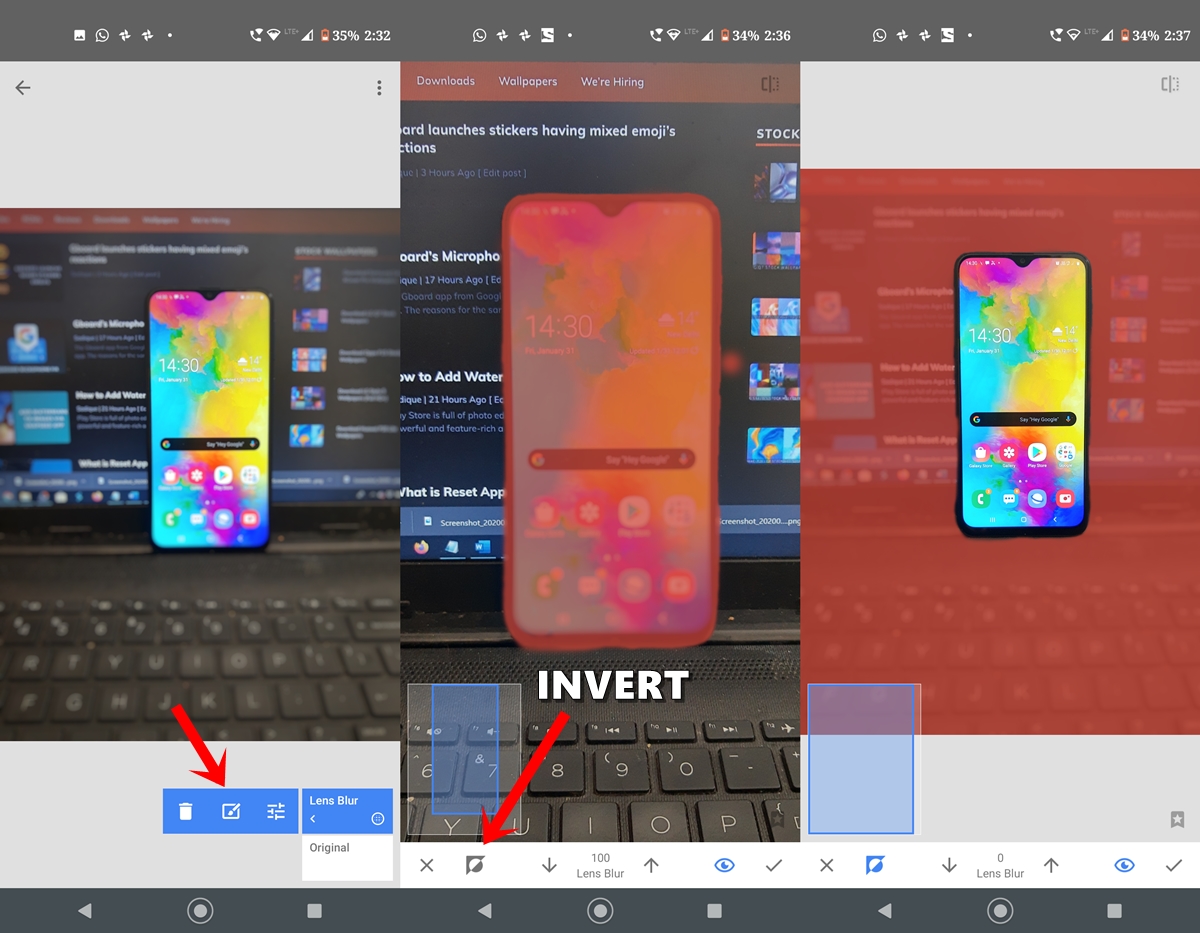
- Once done tap on the Invert icon (the icon right next to close). Doing so will reverse the highlight effect and will make the background red. make any adjustments accordingly, if needed and tap on the tick to confirm.
- Wait for a few seconds and you will see the bokeh mode perfectly applied over to the said image via Snapseed app.
So these were the two different methods of applying the portrait mode. Thes second method does require quite a lot of effort and a few moments of patience, but the results are definitely much better than the former. Which method will you end up choosing for applying the bokeh mode via Snapseed? Do let us know in the comments section below.


Join The Discussion: