In this guide, we listing the steps to customize the Android 10 Gesture Navigation pill. In Android 9.0, you had a central navigation pill to carry out certain tasks like long-pressing to launch Google Assistant, singe tap to go home, etc. Beginning with Android 10 all this changed, and not everybody seems to be a fan of the same. For example, to go back, you have to swipe from the edges of the screen. This more often than not causes conflict while opening the hamburger menu on most apps.
Also, the usual long press to open Assistant has been replaced with edge gestures. And if you have just jumped ship over to Android 10, you might have a hard time getting used to these gestures. Therefore, in this guide, we will show you the steps to customize the Android 10 gesture navigation as per your requirement. Let’s see how this could be done. Also, check out our guide to try new gesture navigation on any Android launcher on Android 10.
Customizing Android 10 Gesture Navigation Pill

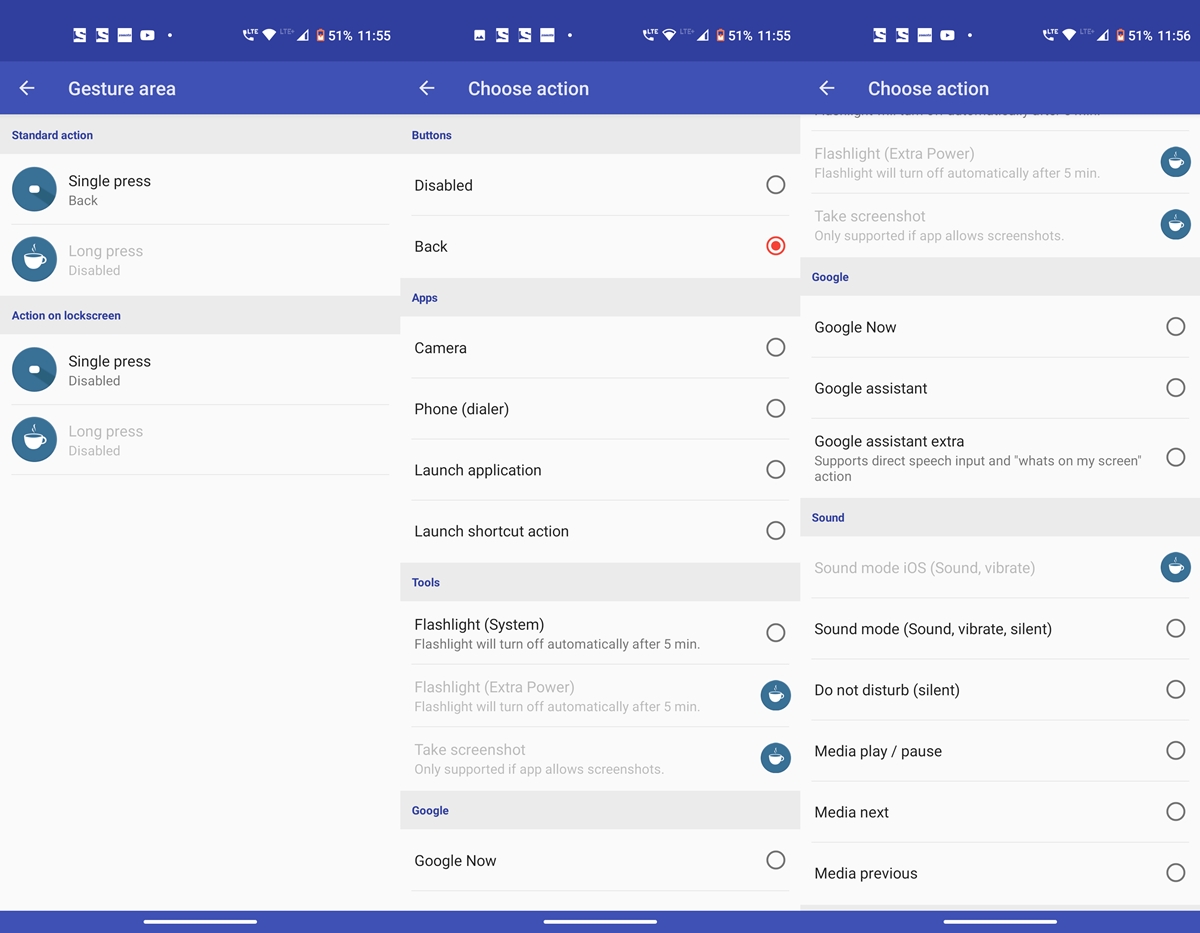
To carry out the above-mentioned task of customizing the Android 10 gesture navigations, we will be taking the help of the Gesture Plus app. Here is what all the actions this app provides. On Single pressing the navigation pill, you could perform the Back action, launch camera, dialer, any-third party app or a shortcut action. Apart from that, you could launch Google Assistant, Google now and other related Assistant actions like the ‘What’s on my screen’. You could also bring up the Volume menu, enable DND, pause/play media or play next/previous song.
Other customizing options related to the Android 10 gesture navigation include some system actions. These include bringing up the Power menu, Notification center, Settings tray or launching the flashlight. All these are available in the free version. Purchasing it unlocks some other functionalities like taking screenshots, etc. With that said, here are the required instructions.
Don’t Miss: Get One UI 2.0-like Gesture Navigation on Samsung Devices
Setting up the App
- Head over to Play Store and download the gesturePlus app (no space between gesture and plus).
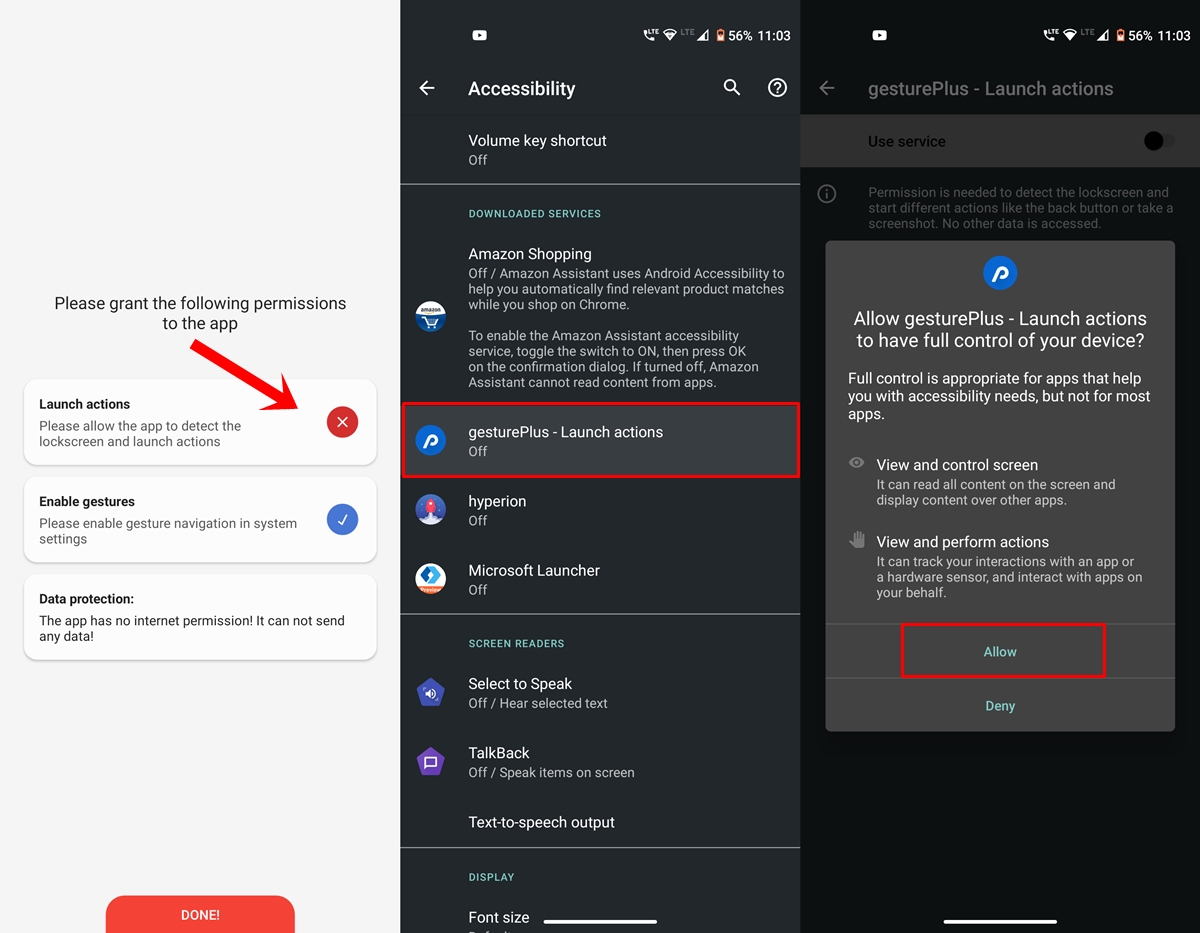
- You’ll then have to grant it permission to read all the content on your screen in order to customize Android 10 gestures. Only proceed ahead if you’re ready to grant it these permissions.

- To grant these app permissions, tap on the ‘Launch Actions‘ option in the app. You’ll be taken to the Accessibility screen, select gesturePlus and tap Allow in the next dialog box that appears.
- Go back to the app and tap Actions and either tap on Standard action or Lockscreen, depending on where you wish to carry out these actions. Finally, select the desired action and that’s it. Pretty simple, isn’t it?
So with that, we conclude the guide on how to customize Android 10 gesture navigations. What do you think of this app? Share your opinions in the comments section below.
Read next: How to Enable Notification Snooze feature in Android 10


Join The Discussion: