
FTP or File Transfer Protocol is the standard of sending files between client and server over a network. Using this feature, you could wirelessly send files between two devices. And various Android browsers have this FTP system embedded within itself. Once you enable it over the correct TCP/IP network, you could easily access the files remotely. In this guide, we would be trying the FTP feature of various Android file explorers and would be detailing the steps to enable the same. So without further ado, let’s jump right into the instructions. Also, check out Cabinet, a lightweight and feature-rich file explorer.
Use FTP on Android Browsers
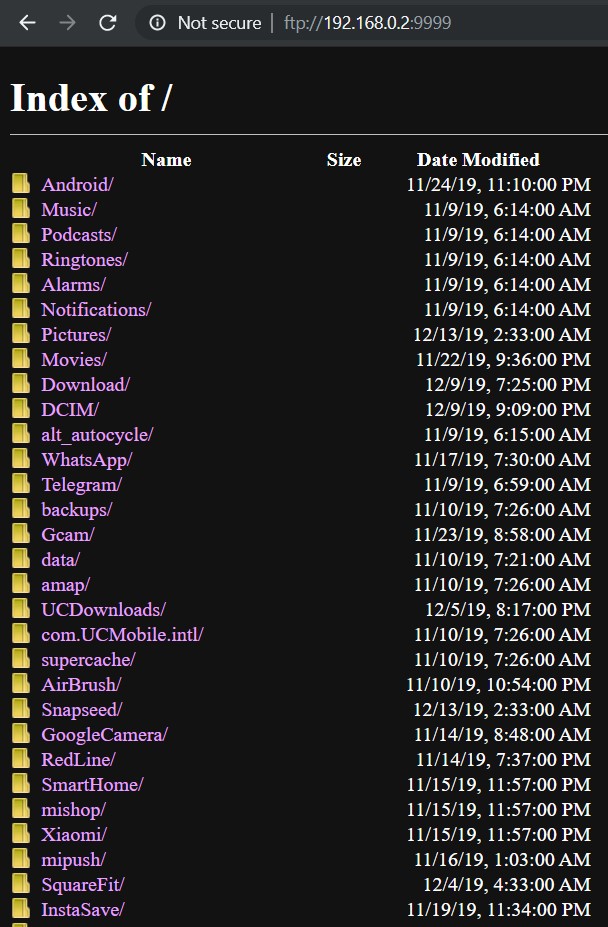
No matter via which file explorer you end up using the File Transfer Protocol, the end result is the same. Upon entering the required IP address and port number, all your device files will be visible over at PC. You could then easily take action on those files like downloading it directly onto your PC. The only requirement is that your PC and smartphone should be connected to the same WiFi network.
Moreover, as soon as you establish an FTP connection using any Android file explorer, you will be given a server IP address. All you have to do is simply enter that address over to your PC’s browser. Just make sure to replace https:// with ftp:// (see above image for reference).
But here arises a privacy issue. Couldn’t other members on the same WiFi enter the required IP Address and access your smartphone files? Well, they definitely can. Therefore it is recommended to create a password-protected FTP server, rather than an anonymous one. Every major Android browser supports this password protect file transfer server.
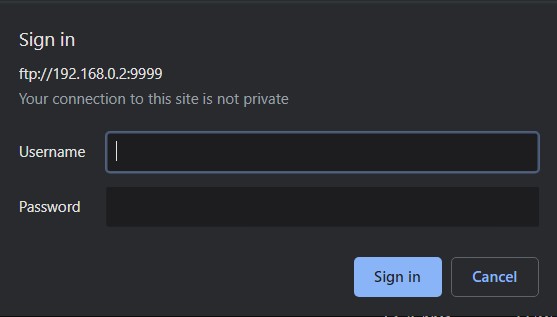
All you have to do is create a secure server with a random username and password. Then when you enter the FTP IP Address using any Android file explorer, you will have to enter that ID and Password. Then only you would be able to access the device’s files. All this might sound complicated but in fact, that’s really isn’t the case. We would be detailing all the steps to enable the FTP using different Android file explorers.
Don’t Miss: Browse Files on Android Device without a File Explorer
Enable FTP on Solid File Explorer
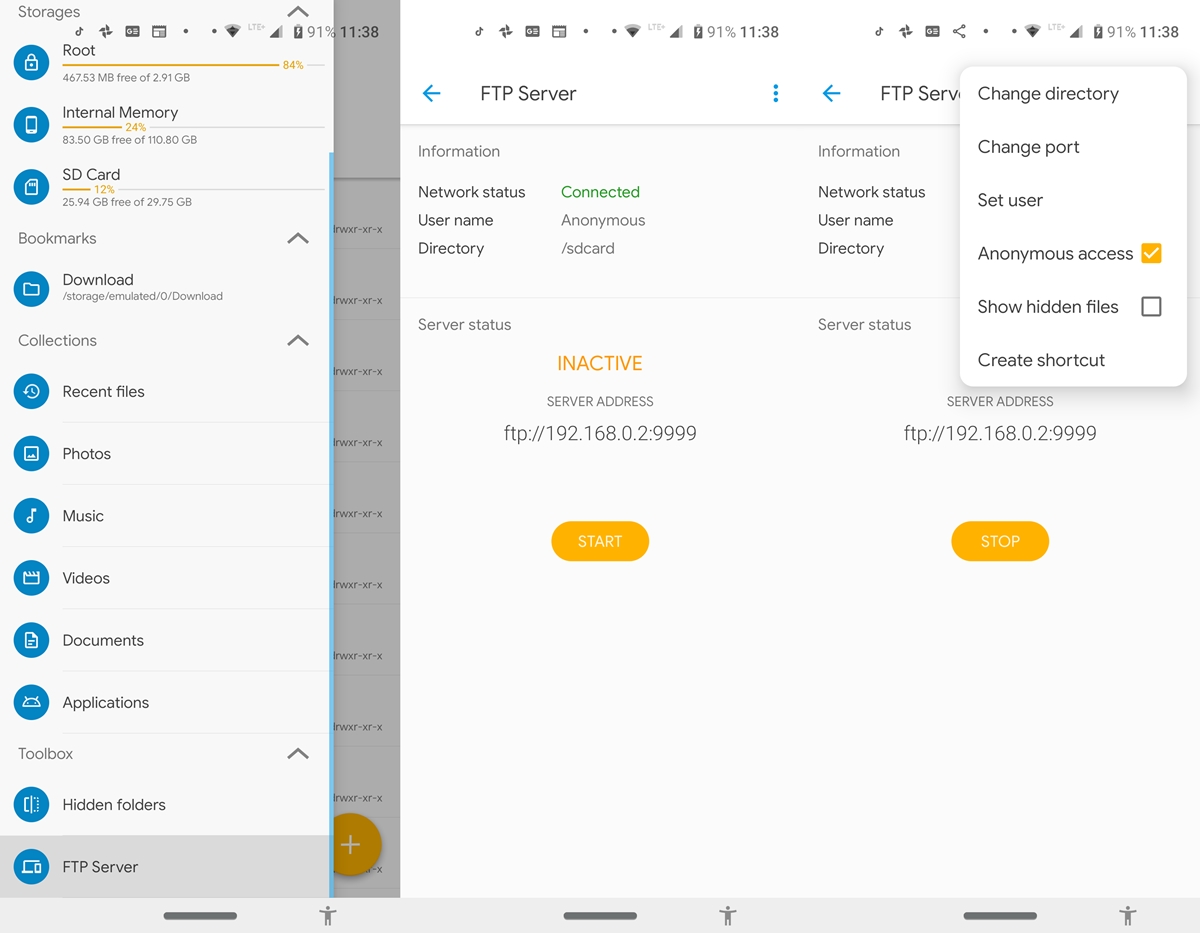
- Open the Solid Explorer File Manager and tap on the hamburger menu.
- Scroll to the bottom and select FTP Server.
- Next, tap on the overflow menu. Untick Anonymous Access if you wish to create a secure FTP connection using Solid File Explorer.
- Finally, tap on Start. This will create the desired connection. Just enter the given IP Address over to your PC and you may start accessing your files present on the device.
Enable FTP on Mi File Manager
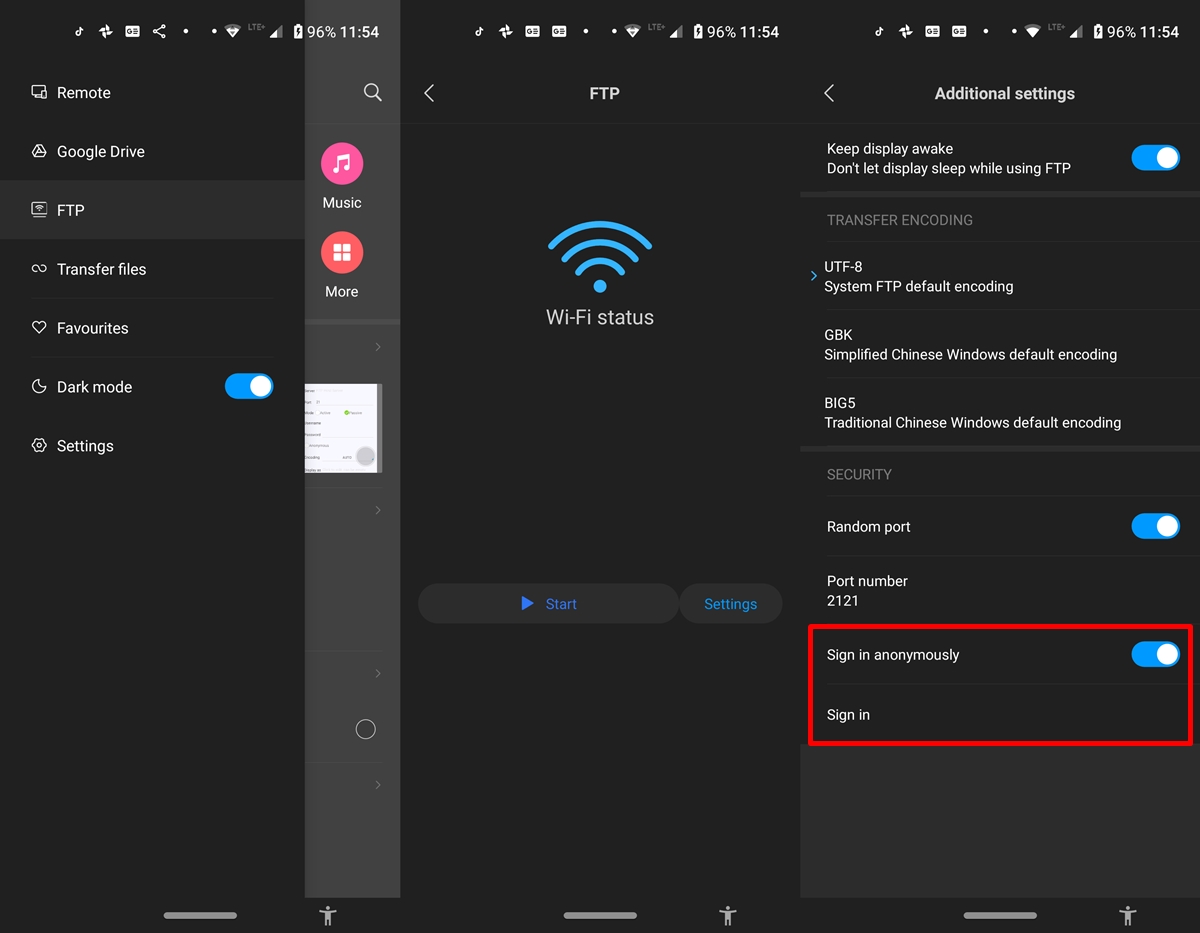
- Open the Mi File Manager and as before, tap on the hamburger menu.
- Tap on FTP and then Start to begin the process of creating the FTP server.
- To further modify the Settings, tap Settings. Under Security, disable the Sign in anonymously toggle and tap on Sign in.
- Enter the desired username and password and start browsing privately. Leave all other options as they are. That’s it. You have successfully created an FTP using one of the most famous Android file explorers. Also, check out the browser’s Mi Drop feature.
Enable FTP on ES File Manager
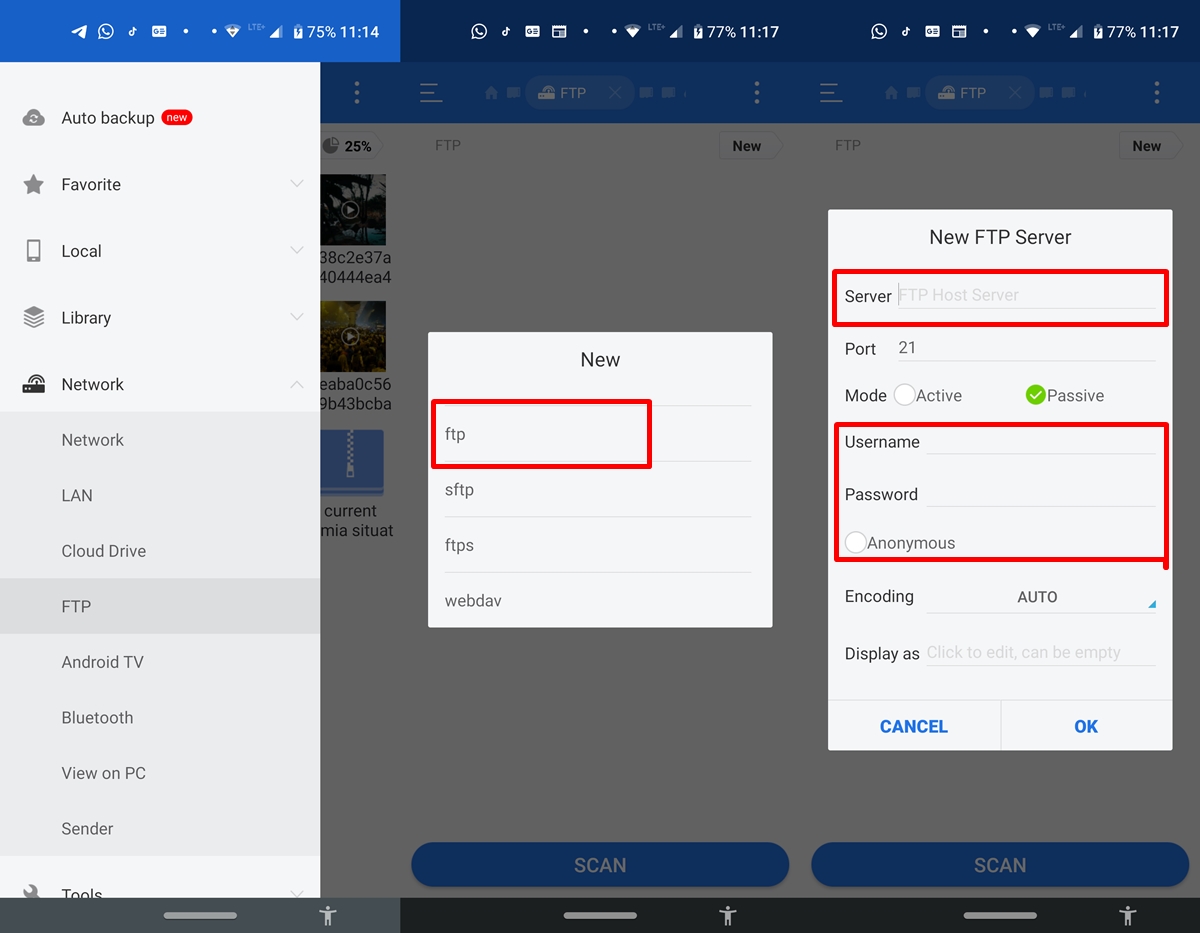
Although ES File Explorer isn’t available on Play Store yet many users might still be using it on their devices via the sideload process. if you are among one of them, just follow the below instructions to enable the FTP on the said file manager.
- On the ES File Explorer, tap on the hamburger menu.
- Under networks, select the FTP option.
- Tap on Scan and wait for the process to finish.
- You might even manually set up the process by tapping the overflow menu and selecting the FTP option from the list provided by Android’s ES File Explorer. Now enter the desired server IP Address and Username and Password. Or you may leave those two blank and browse anonymously using the said feature.
Enable FTP on File Manager (Asus)

- As with all the other browsers, tap on the hamburger menu present at the top left.
- Next, tap Network Place and wait for the scan to finish. By default, the Asus File Explorer doesn’t have permission to show the contents of the SD card over the FTP Server. To make the SD Card’s content visible, tap on the overflow menu. Or, to fix your SD Card, refer to the mentioned steps in that guide.
- Now select Request access to operate SD Card, skip through the instructions and give it the desired permissions. That’s it. FTP will now be established via one of the most used Android’s file explorer. You could now view the contents of the SD Card on your PC as well.
Enable FTP on Astro File Explorer
- Open File Explorer by Astro and tap Add. This should be present under the Storage Locations option, which is present in the home screen itself.
- Now, select FTP from the available options. Enter a username, Server IP Address (like 192.168.0.2) and the desired Port (for example 9999).
- Once you do so, tap Save. This should create a new FTP address under Storage Locations. Tap on it, enter the required password and that’s it. You have successfully created an FTP server using Astro File Explorer.
With this, we conclude the guide on how to use FTP via various Android File Explorers. Do let us know if you face any issues while creating the FTP server using any file manager app.
Read Next: Execute ADB Commands over WiFi without USB or Root

Join The Discussion: