Google’s strong Artificial Intelligence helps in automatically detecting faces in photographs. You could then find these faces under the Albums section of Google photos. Within the Peoples section, you could find all the albums of individual peoples that the AI has created. But till now it was under the sole discretion of the app to identify peoples and tag them under the album it deemed to be appropriate. This is about to get changed. With the latest update, you could now perform manual face tagging operation in Google Photos. However, to manually add a location to Google Photos, head over to our separate guide on that topic.
Manual Face Tagging in Google Photos
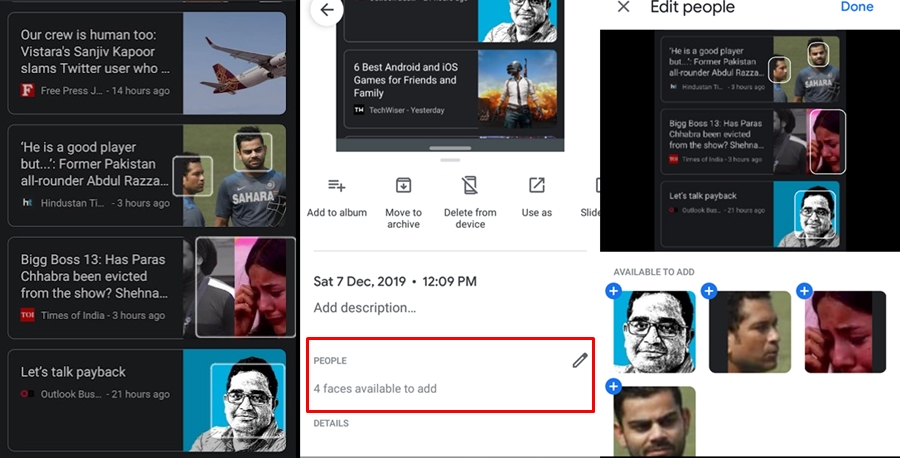
- Head over to the Google Photos app on your Android device.
- Navigate to the desired image on which manual face tagging is to be performed.
- Perform an upward swipe or tap on the overflow menu.
- Under the People section, Photos will notify you about the number of unknown faces.
- Tap on the Pencil icon. the app will then automatically highlight all the faces available to perform a manual face tagging in Google Photos (which has recently been updated with a markup tool).
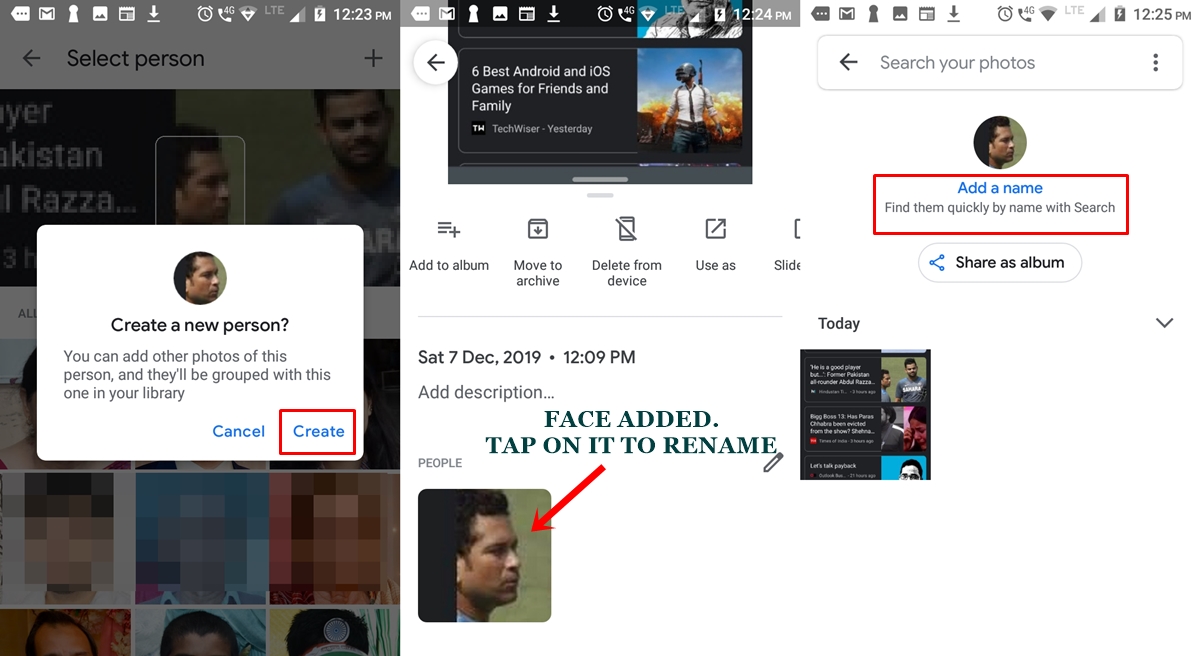
- Next, tap on the desired face that you wish to add and then tap on the plus icon present at the top right.
- Now tap on the Create > Done. That’s it. The selected face will now be added. Just head over to Albums > People and search for that person.
However, since you haven’t given that face any name, it might be difficult in searching for it from the long list of faces. So what you could do is head back to that photograph which you used for manual face tagging in Google Photos and perform an upward swipe. Now the app will recognize that face. Just tap on it and subsequently tap on Add a name. Give it a name and the next time you could easily search through it.
Don’t Miss: 5 Best Google Photos Tips and Tricks
Availability
Although this feature has been live for a week or two (in Google Photos v4.32.1), yet not every device seems to have got this update. On one hand, I am part of every Google Beta program possible whereas my friend always stays away from all these testing. But in fact, it is the latter that got this update, right in the first day itself. So as before, this is also a server-side update, with no definite timeline insight. However, I found another method to make this manual face tagging working in Google Photos. This is how it could be done. Also, don’t forget to check out the latest Google Photos chat feature.
Another Method of Manual Face Tagging
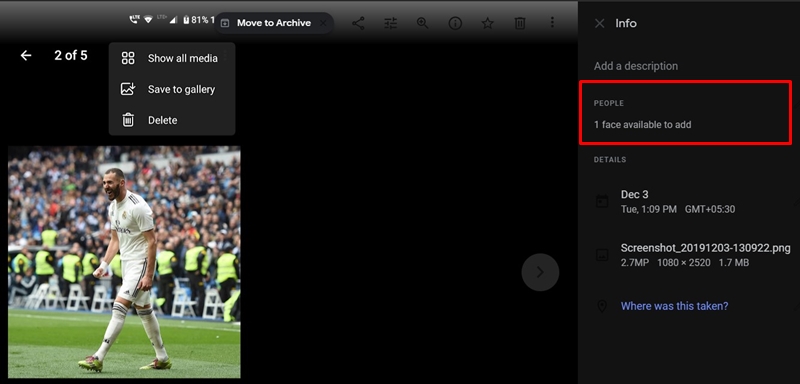
- Head over to the Photos website and look out for the photograph on which face tagging needs to be done.
- Next tap on the Info icon. Photos will now show you the number of faces available to add. Tap on x faces available to add.
- Now just click on the identified face. Photos will now display all the available albums. You could either add that face to an existing album or create a new album altogether. You may even crop an existing image before uploading it to Albums, using the Crop Document feature.

- To create a new one, click on the plus icon situated at the top right and click Create in the dialog box that appears.

- Finally, tap Done to finalize the manual face tagging in Google photos. Tio name it, head over to Albums > People and Pet, search for the newly added face and name it.
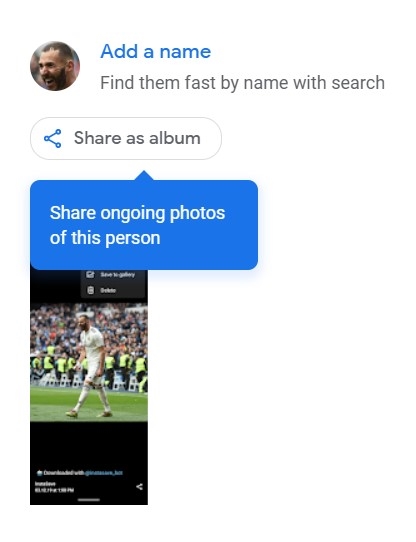
- Or head over that same photo, click Info and photos will now show that added face. Simply click on it and then click Add a name and save it.
With this, we conclude the guide on how to perform manual face tagging in Google Photos. Do let us know in case you face any issues while tagging faces using any of the two given methods.
Read next: How to Remove Location from Images in Google Photos


Join The Discussion: