Google silently rolled out the Ramping Ringer feature to Pixel 4 and some Pixel 3 devices. For the unaware, this feature lets your device vibrate for the first 5 seconds before gradually increasing the ringer volume for the duration of 10 seconds. This is the newer addition to the already available ‘never vibrate’ and ‘always vibrate’ options and could be accessed via Settings > Sounds > Vibrate for Calls > Vibrate first and then ring. As mentioned before, this is only a Pixel exclusive feature. Thanks to the Ring Master apps, you could now try out the Pixel’s Ramping Ringer feature on any Android device, even on an un-rooted device. Just follow the below instructions for the same. Apart from this, you may try out some of the Pixel 4 exclusive apps on your device.
Ramping Ringer feature on any Android Device
To try out this Pixel exclusive feature, all you have to do is head over to Play Store and download the Ring Master app. I tried it out on a couple of Android devices and it worked pretty well. Once you have installed it, here is how you could try out the Ramping Ringer feature via this app. It goes without saying that the app requires permission to make and manage phone calls. This is because it will be dealing with incoming calls. Only go ahead if you are fine with this permission. On that note, do check out all the necessary app permissions required for your Android device.
App Setup for the Ramping Ringer Feature

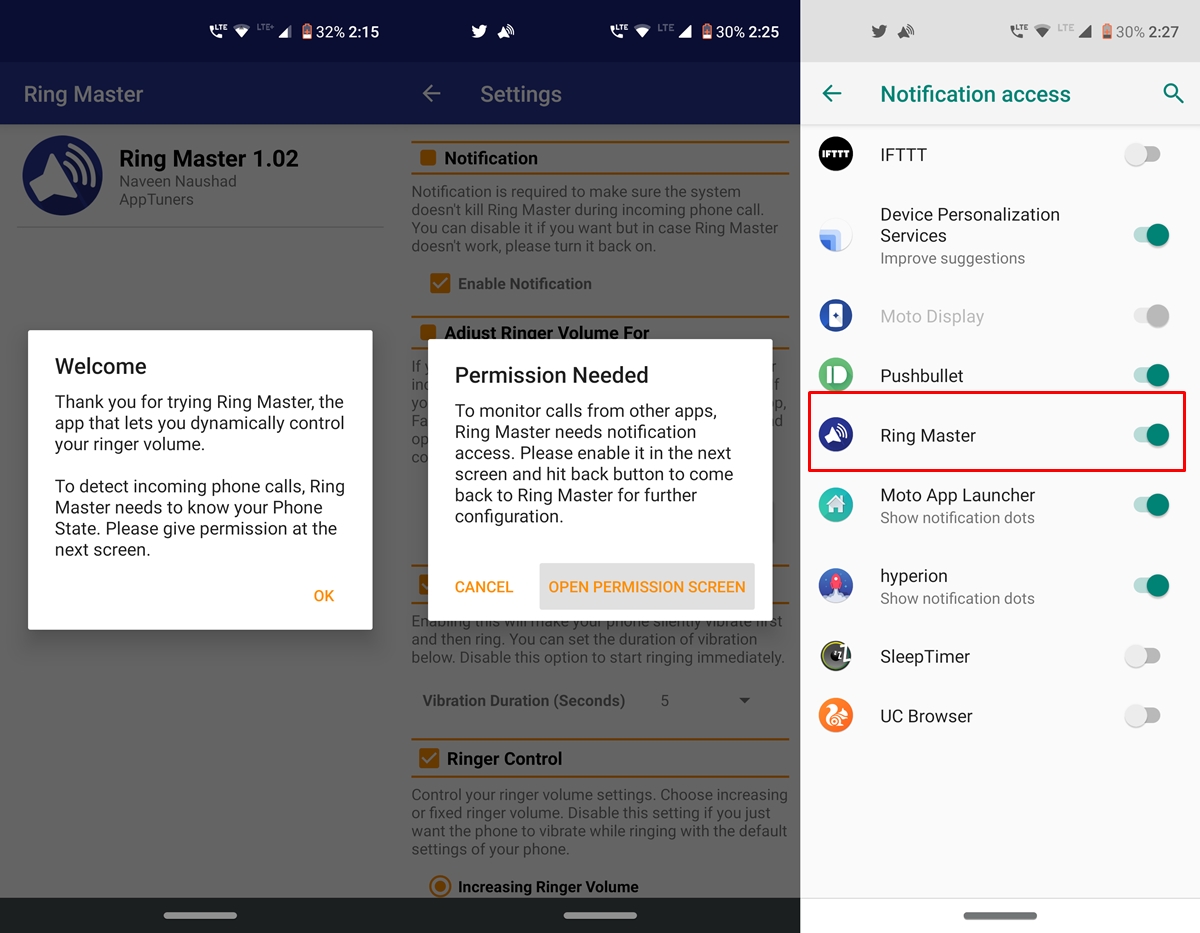
- On the welcome screen, you will have to allow the app to read your phone state.
- Once you do so, you will be taken to the app’s Settings page.
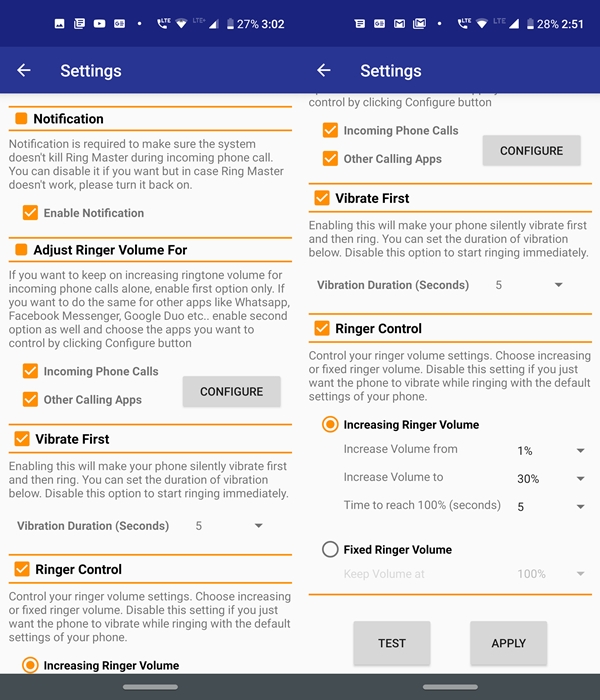
- Apart from incoming phone calls, it could enable the Ramping Ringer for other calls via third-party apps like Google Duo, WhatsApp, etc. This is one area where it manages to outdo its competitor (the stock Pixel-only feature).
- To do so, check the Other Calling Apps feature under Adjust Ringer Volume for option and tap Configure.

- For that, you will have to give the app access to your notifications as well. You should automatically be taken over to the Notification access page. Just enable the toggle next to Ring Master and tap Allow. However, if you are having issues like notifications not showing up, do check out our fix for the same.
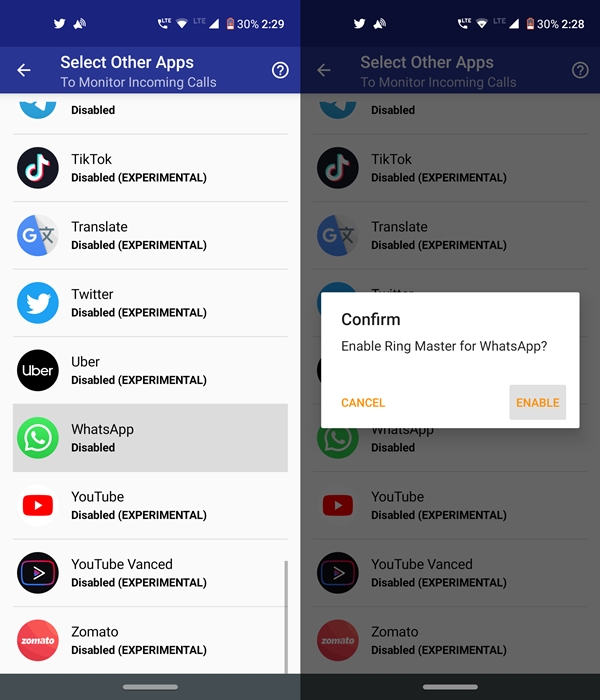
- Next, under the apps selection page, choose the desired third party apps and tap on Enable. That’s it. you have successfully set up the app. Now follow the below steps to try out this Ramping Ringer feature on your Android device.
Don’t Miss: How to Make a WhatsApp Voice or Video Call via Google Assistant
Customizing Notifications and Vibrations

Now that you have set up the Ring Master app and gave it the necessary permissions, have a look at the below steps to customize the ringer and vibrations as per your need. Likewise, check out our guide to customize WhatsApp notifications.
- Start by setting the time (in seconds) for which the vibration should happen before your device plays the ringing sound. By default, it is set to 5 seconds. This is similar to what the Ramping Ringer feature has to offer. However, you could customize it any value from 1 to 10 seconds. the option to do so is present under Vibrate first.
- Moreover, it also gives the option to go ahead with an increasing ringer volume rather than a fixed one. You could set up the volume percent from which the ring should start and up to the desired end limit.
- Finally, go ahead and try out these customizations via the TEST option situated at the bottom. If you are satisfied, tap on APPLY to confirm these changes. Just make sure the battery saver is disabled otherwise the app would fail to start the vibration and would directly throw in the ringer volume.
With that, we conclude this guide on how to try out the Ramping Ringer feature on any Android device. If you are having trouble executing the above steps, do drop in your queries in the comments section below.
Read Next: How to Stop Infinite Scrolling in Websites on Android


Join The Discussion: