Motorola Moto G7 Plus was one of the devices in the Moto G7 family launched in February 2019. It gives you a clean Android experience out of the box, something Motorola built its image around with the start of the G series. The device now has a TWRP recovery build. Here is how you can install TWRP Recovery and root Moto G7 Plus.
Warning
All rooting methods, no matter how simple or successful are risky. As a general rule of thumb, don’t root your device if you can’t handle a few bugs and glitches that may or may not appear after rooting. Furthermore, rooting voids your device’s warranty so you won’t be able to take it to the service center for a free repair. If you do decide to go ahead with this guide and root your Moto G7 Plus, make sure that you take responsibility in case things go south. DroidViews cannot be held responsible under any circumstances.
Requirements
Now that that’s out of the way, there are a few things you’ll need to take care of before you begin with the process.
- A Motorola Moto G7 Plus with an unlocked bootloader.
- You’ll need a Windows, Mac or Linux computer with Android SDK Platform-tools. We do have a dedicated, detailed guide on how to do just that for all the three platforms, linked below.
- Download Android SDK Platform Tools for Windows, Mac & Linux
- Make sure you have installed the necessary Motorola USB drivers on your Windows PC. Linux and Mac users don’t need any special drivers.
- Ensure that your Moto G7 Plus has at least 50% battery left so as to prevent any accidental shutdowns.
- Since you’ll need to connect your phone to your PC with a USB cable, be certain that the cable isn’t loose.
- Enable USB Debugging and OEM unlock found under Developer Options.
Download Moto G7 Plus TWRP Image and Magisk
- twrp-3.3.1-0-lake.img: This is TWRP recovery image which will have to be saved to your PC, preferably inside the platform-tools folder on your computer.
- twrp-installer-3.3.1-v5.1-lake-jlb.zip: This is the installer file that you’ll need to transfer to your phone’s storage.
- Magisk v19.3: Magisk installer to root the device.
Install TWRP on Moto G7 Plus
- With the platform-tools folder is open, type cmd in the address bar and hit Enter to launch a command prompt window within the folder. Linux and Mac users can simply right-click inside the folder and select Open in Terminal to launch a Terminal and use adb.
- Once the command prompt or Terminal is open, connect your Moto G7 Plus to your PC.
- On your phone, you will be asked to grant USB Debugging permission to the PC. If it doesn’t come up yet, enter the following command in the command prompt/terminal to force it.
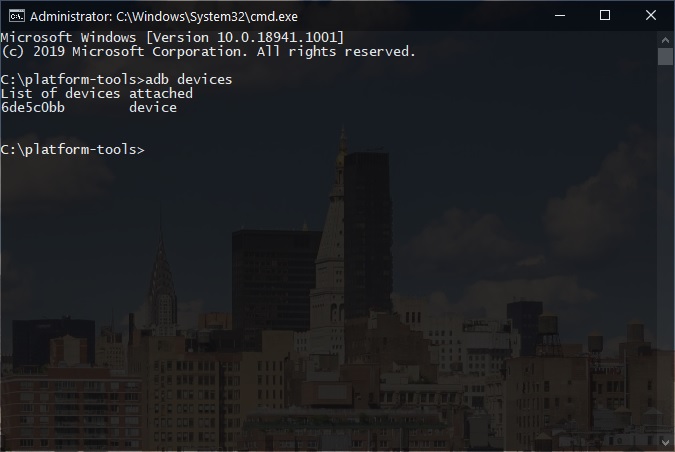
adb devices

- Once the permission is granted, you will see your device’s serial number returned as shown below.

- On your phone, you will be asked to grant USB Debugging permission to the PC. If it doesn’t come up yet, enter the following command in the command prompt/terminal to force it.
- Now use the following command to boot your phone in fastboot mode.
adb reboot fastboot
- Then flash the twrp image onto your device using this command.
fastboot boot twrp-3.3.1-0-lake.img
- If you’ve not placed the twrp file inside the platform-tools folder, you will need to enter the complete path before the file name.
fastboot boot /path/to/twrp-3.3.1-0-lake.img
In the command above, replace /path/to/ with the actual path to the twrp file.
- Your phone will then boot into TWRP recovery.
- In TWRP, select Install, then navigate to the twrp installer zip file and select it.
- Swipe at the bottom to flash the file.
- Once done, go back to the main menu and select Reboot > Recovery.
Root Moto G7 Plus
- Once in TWRP recovery, it’s wise to first take a full NANDroid backup of your device, just in case you may want to revert your device back to a working state. To do this, go to Backup and select all the partitions. Swipe at the bottom to begin the backup process.
- When you have a backup, or you have decided to skip it, select Install from the TWRP main menu.
- Navigate to and select the downloaded Magisk file and select it.
- Swipe at the bottom to flash the zip.
- When it is done, you will see a Reboot system button at the bottom, tap on it and your device will reboot.
When your device comes back on, you should find Magisk Manager among all your other apps.
Read Next: Setup Universal or System-Wide ADB and Fastboot on Windows 10


Join The Discussion: