Samsung’s latest Galaxy S flagships, the Galaxy S10, Galaxy S10+, and the Galaxy S10e have been widely appreciated. Although Samsung has gone quite behind in the camera game, the Galaxy S10 and its siblings are well-rounded flagships. Together they even provide options at various price points all the way from $750 to $1000+. It hasn’t been long since the launch but the devices can already be rooted, thanks to Magisk. Here’s how to root Samsung Galaxy S10, Galaxy S10+, and Galaxy S10e.
Magisk developer John Wu (@topjohnwu) has updated Magisk to add support for the aforementioned Samsung Galaxy flagships. He announced the news on Twitter.
Welcome to the game, S10 😏 pic.twitter.com/K2kciv9MPg
— John Wu (@topjohnwu) March 19, 2019
Warning
The root method described below is only meant for the Exynos variant of the Galaxy S10, Galaxy S10+, and Galaxy S10e. It will trip Knox, and thus void your warranty as well. Tripping KNOX counter also means you will lose features like Samsung Pay and Secure folder as well as the ability to use some banking apps. There are workarounds, of course, but we won’t be discussing those here. Once Knox is tripped, the effects are permanent and unrooting will not help. Furthermore, OTA updates will also stop working. The process also requires that your device be formatted so make sure you have a backup of everything important, even files on the internal storage.
Do not try this with any of the Snapdragon variants, unless you really want to risk bricking it. Rooting your device is always risky, even if you do have the Exynos variants that this method works on. Nobody can guarantee that you’d follow the instructions exactly, or that things will always happen as expected even if you do. You must take responsibility for the risk that you’re taking. DroidViews cannot be held responsible for any damage to your device. Before you root Samsung Galaxy S10, Galaxy S10 Plus or Galaxy S10e, keep in mind that…
- Installing Magisk WILL trip KNOX
- Installing Magisk for the first time REQUIRES a full data wipe, backup before continue
- You have to have your bootloader unlocked before following the instructions
- Magisk has to be installed to the recovery partition of your device, which is very different from what you used to know about rooting in general
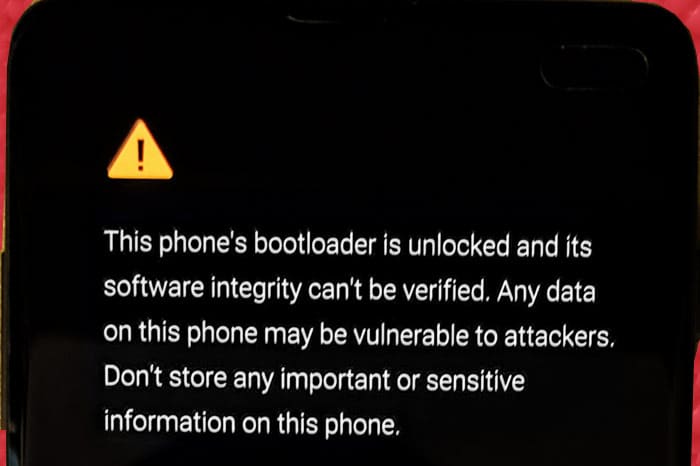
Also, remember that once you have unlocked your Galaxy S10’s bootloader, you’ll get a bootloader unlocked warning every time you reboot your phone.
Requirements to root Samsung Galaxy S10 Plus, S10, and S10e
- Rooting the Galaxy 10, S10+, and S10e would be a three-step process and would require the use of Odin, and thus, a Windows PC.
- The bootloader should be unlocked.
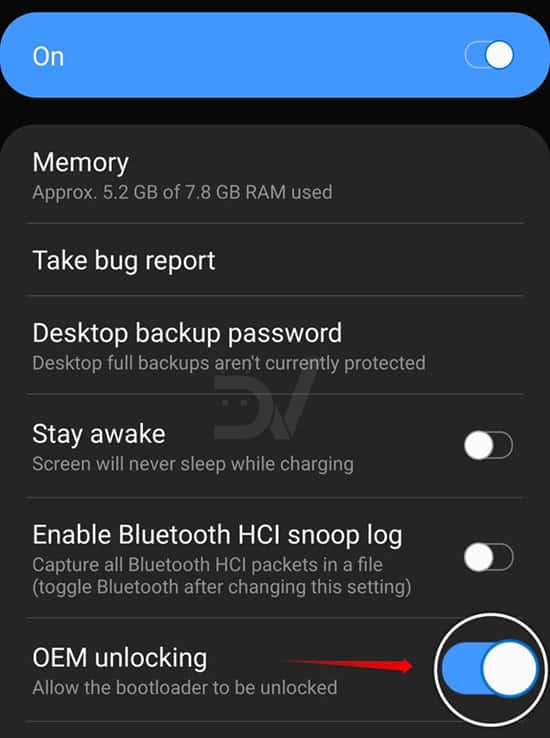
- Enable USB debugging and OEM unlock from the Developer options.

- Make sure the latest Samsung USB Drivers are installed on your PC.
- External microSD card or USB OTG.
- Ensure that your phone has at least 50% battery left.
Note: Since things have changed a little with the Galaxy S10, S10+ and S10e, simply following the standard bootloader unlock procedure won’t really unlock it. After you’ve unlocked the bootloader, sign into the device again. Make sure you connect the device to the internet during the signup process. In the developer options, make sure the OEM unlock option is grayed out.
Downloads
Patch AP tar file
- Download the firmware for your device using Samfirm tool.
- Unzip the firmware file once it is downloaded and copy the AP tar file to your device. This file is generally named as AP_[device_model_sw_ver].tar.md5.
- Download the Magisk Manager APK. Remember this is a canary build which means it is expected to be highly unstable.
- Once the app is installed, select Install > Install > Select and Patch a File.
- Browse to the downloaded AP tar file on your device and select it. Magisk Manager will then patch the firmware file and the patched file will be saved in the Download folder on your internal storage as magisk_patched.tar.
- Copy the patched magisk_patched.tar file to your PC.
How to root Samsung Galaxy S10, S10+, and S10e
- Now that you have the patched file, reboot your Galaxy S10 (or Galaxy S10+ or Galaxy S10e) into the Download or Odin mode.
- Launch ODIN on your PC. If you don’t already have it, download it from the link provided above and extract the zip.
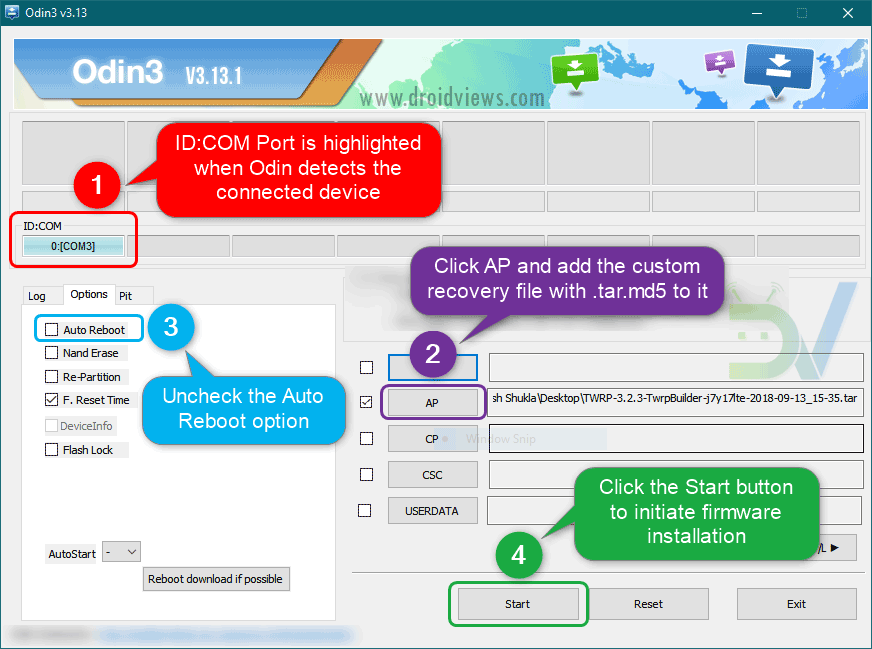
- Connect your device to the PC with a USB cable. You will see Odin display Added!! when your device is detected. The ID:COM Port should also turn blue. If this does not happen, you may need to check your USB drivers or the cable.
- On Odin disable everything but F.Reset Time under the Options tab. Make sure that Auto Reboot is not selected.

Flashing “magisk_patched.tar” in AP (Odin) - Click on the AP button and select the patched file (magisk_patched.tar).
- Magisk will then be flashed onto your device.
Boot to recovery
- Once Magisk is flashed, exit download mode by pressing Power + Volume down.
- As soon as the screen turns off, press Bixby + Volume Up + Power key to boot to the recovery partition. Continue pressing the Volume Up button until you see the stock recovery menu.
- In the stock recovery menu, use the volume buttons to highlight Wipe data/factory reset then use the Power button to select it.
- After that, select Reboot system now and press Power + Bixby + Volume Up immediately.
- Release the buttons when you see the boot logo. The device will automatically reboot again.
- After that, complete the initial set up again, and make sure you connect to the internet during the process.
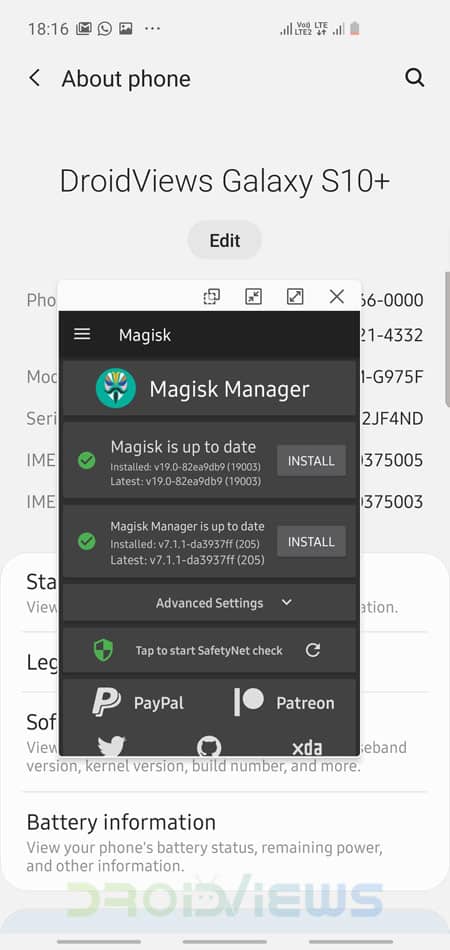
When you get to the home screen, launch the Magisk Manager app from the app drawer. If it’s not already installed, download and install the APK from the link above in the Downloads section. The app will automatically upgrade itself to the full Magisk Manager app. It will then guide you through some additional setups after which it will reboot the device again.
When that happens, you’ll finally have a rooted Galaxy S10, S10+ or S10e.


Join The Discussion: