The HTC U12+ launched only a few weeks ago and it is the most exciting HTC device in a while. It doesn’t bring a lot new to the table, in that the most remarkable feature it has is the pressure sensitive bezels which we’ve seen before. However, it is the extent of this feature that makes the HTC U12+ exciting. It’s probably the first mainstream smartphone with no buttons. HTC U12+ may have broken the mold with a lack of buttons altogether, but it still got rooted pretty quickly like many other Android smartphones. There’s no official TWRP recovery for the phone yet, but there’s a way to root HTC U12 Plus without TWRP.
The HTC U12+ is not just another 2018 flagship though. It’s the only other 2018 flagship so far after the Galaxy S9 to not sport a notch. There’s still no headphone jack here but that’s expected given that HTC dropped it pretty quickly after Apple did. For the uninitiated, the rest of the specs are pretty standard. A Snapdragon 845 SoC paired with 6GB of RAM, 6-inch Quad HD+ (2880×1440) 18:9 display, dual cameras, Bluetooth 5.0, etc. It comes in two storage options of 64GB and 128GB.
The method to root the HTC U12+ without an official or even unofficial build of TWRP available for the device was found by Freak07. While you may not need TWRP recovery, you’ll still need some other things in order to achieve root access on the device.
Warning
Rooting your HTC U12+ will void your warranty. You may even end up bricking your device. Even if you follow all the steps mentioned below correctly, there is still chance that things may go south for you. Make sure you know what you’re doing and do everything at your own risk. DroidViews or anyone else cannot be held responsible under such circumstances.
Requirements
- Unlock the bootloader on HTC U12+. You will need to sign in with your HTC ID on HTCdev website. After that, head over to the bootloader unlock page. Select All Other Supported Models from the drop-down menu on the right and click Begin Unlock Bootloader. Follow on-screen instructions after that or follow our HTC One M8 bootloader unlock guide. The steps are same for any HTC device launched after 2011.
- A PC with ADB and Fastboot installed. If you’ve never heard of ADB and/or don’t have it installed, you can refer to our guide on installing it for Windows, Mac, and Linux.
- Ensure that your device is at least 50% charged.
- Enable USB debugging on your phone.
Downloads
- Download the latest Magisk Manager APK from the Magisk Manager Github page. As of this writing, the latest version is 5.7.
- You’ll need to the correct boot image for your device based on the current firmware version. You can download the firmware zips from the links below. The boot image is inside the zips named boot_signed.img. (source: 5m4r7ph0n36uru)
How to HTC U12 Plus without TWRP
- Move the extracted boot image file to your HTC U12+.
- Install the downloaded Magisk Manager APK.
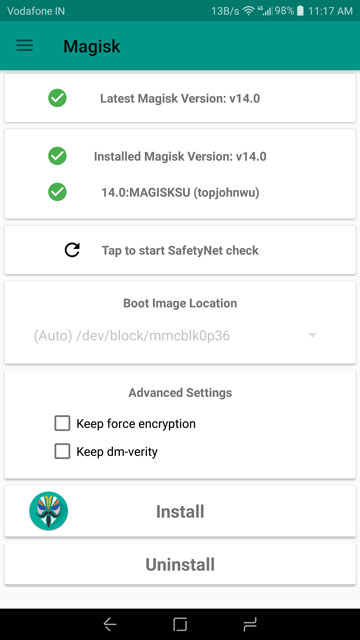
- Once installed, run the Magisk Manager app on your phone and tap Install on the main screen.
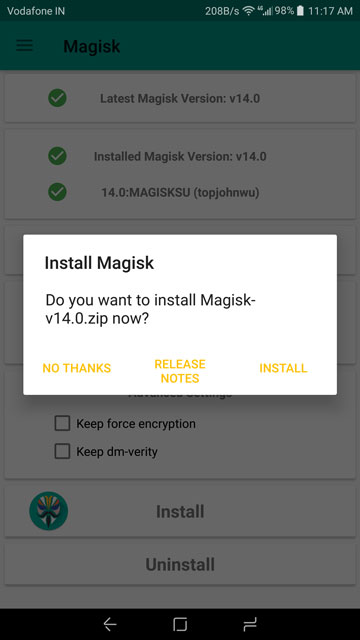
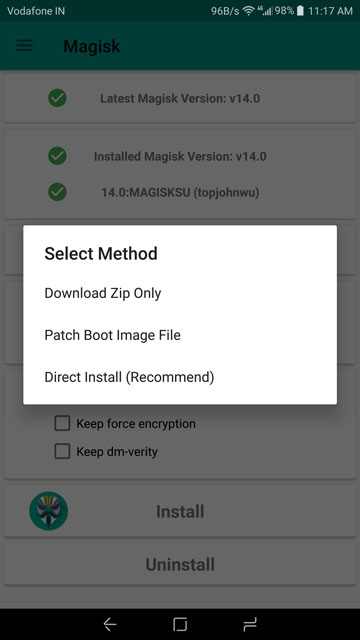
- A popup will appear, select INSTALL again and then select Patch Boot Image File.
- Navigate to and select the extracted boot_signed.img file. The app will take a few seconds to patch the boot image file.
- Connect your phone to your PC now with a USB cable and launch the ADB command interface.
- Use the following ADB command to pull the patched boot image.
adb pull /sdcard/MagiskManager/patched_boot.img
- Reboot your phone to bootloader then using this command:
adb reboot bootloader
- On your phone, check the active bootloader slot and then depending on the active slot, enter either of the following commands.
- If slot a is active:
fastboot flash boot_a patched_boot.img
- If slot b is active:
fastboot flash boot_b patched_boot.img
- If slot a is active:
- After the flashing is successful, reboot your device manually or using the command below.
fastboot reboot
When your device reboots, you should be able to make use of root access.


Not bad