Despite not selling in numbers as huge as a Samsung Flagship, Google’s devices, even the Nexus line earlier, have enjoyed enthusiastic third-party developer support. This is the reason why the Nexus 5, released in Q4 2013, can be updated latest Android 8.1 Oreo, 5 years later. Google Pixel devices are not very different in this regard. With such a strong community behind them, Google Pixel devices have a number of ROMs and other mods some of which probably get ported to other devices much later. If you’ve ever done things such as installing mods and custom ROMs, you would know things can always go wrong. You may have created a backup before, but what if you did not or could not? Well, here’s how you can restore Google Pixel devices to stock firmware.
Requirements
- An unlocked Google Pixel device, of course. You probably already have an unlocked device because how else could you have screwed it up really.
- The appropriate stock factory image for your Google Pixel device. You can download this from the Downloads section below.
- Google SDK Platform tools are required. You can download this from the Downloads section below, depending on your desktop OS.
- Enable USB debugging on your phone.
- Make sure you backup your complete internal storage, messages, contacts, and other necessary data pre-hand. The process will require formatting your device. However, this can be prevented if you prefer.
- If you’re using a Windows PC, you will also need to install the latest Google USB drivers.
Downloads
- SDK Platform-Tools – Extract the downloaded archive and you should get a folder named platform-tools.
- Official factory images from Google developer website
How to restore Pixel devices to stock firmware (flash-all script)
- Download the correct factory image for your Google Pixel device from the link provided above.
- Extract the zip file and you should have a folder containing another zip file and a few image files.
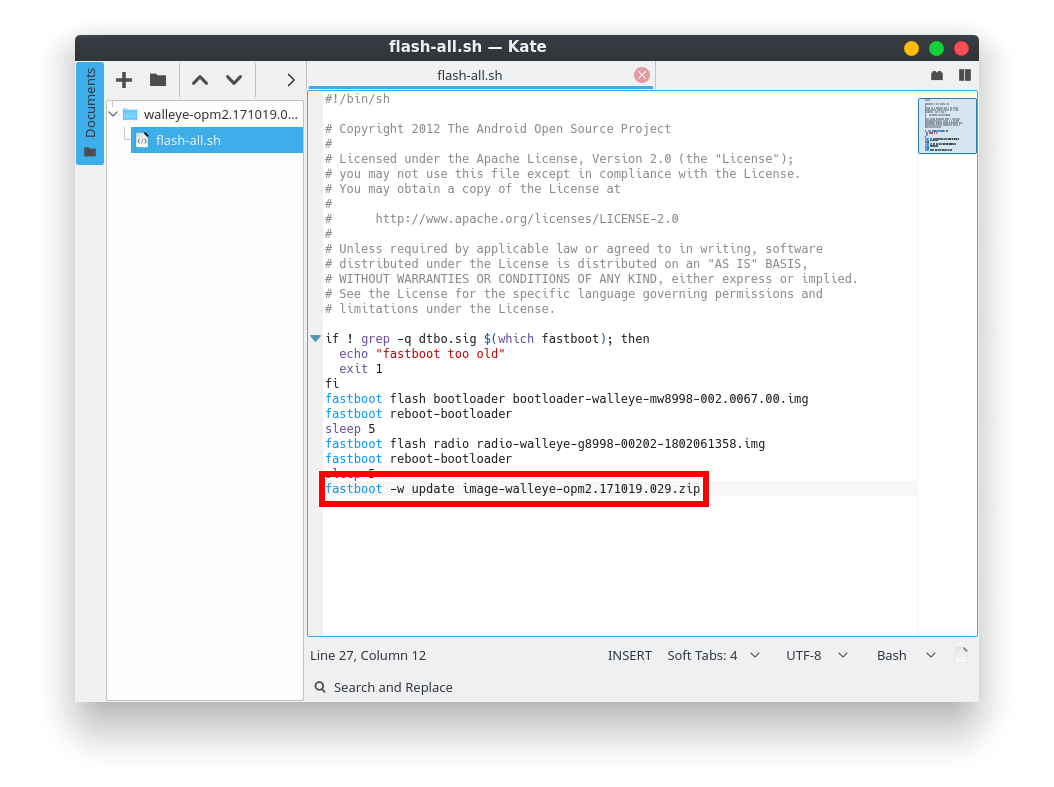
- If you wish to prevent your device from being wiped clean, right-click on the flash-all file and open it with a text editor of your choice (flash-all.bat for Windows, flash-all.sh for Linux).
- Find the line that reads fastboot -w update image-walleye-[version].zip and remove -w. The -w is the wipe user data switch. Thus, removing it prevents the user data from being wiped during the process. Close the file but make sure you save the changes. el

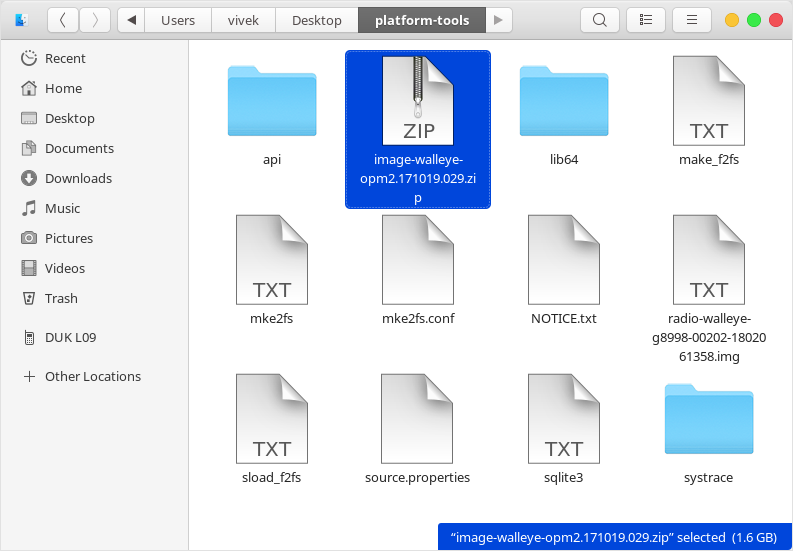
- Move all the files in the extracted folder now into the previously extracted platform-tools folder.
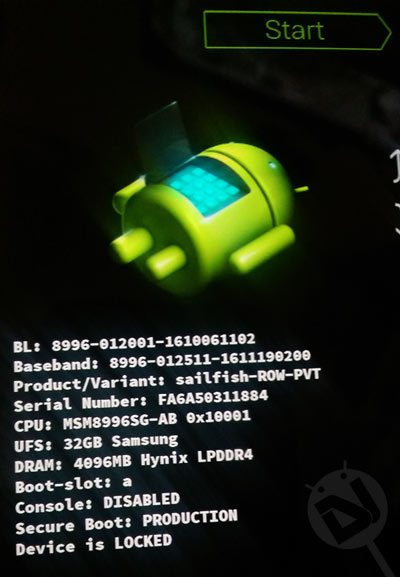
- Turn off your device and boot it into the Bootloader Mode. To do so, press and hold the Volume Down + Power buttons until you see a screen as shown below.

- When in the bootloader mode, connect your Google Pixel device to the computer using a USB cable.
- Launch the ADB interface by launching a command prompt or terminal window inside the platform-tools folder.
- On Windows, you can do this by entering cmd in the address bar while inside the platform-tools folder.
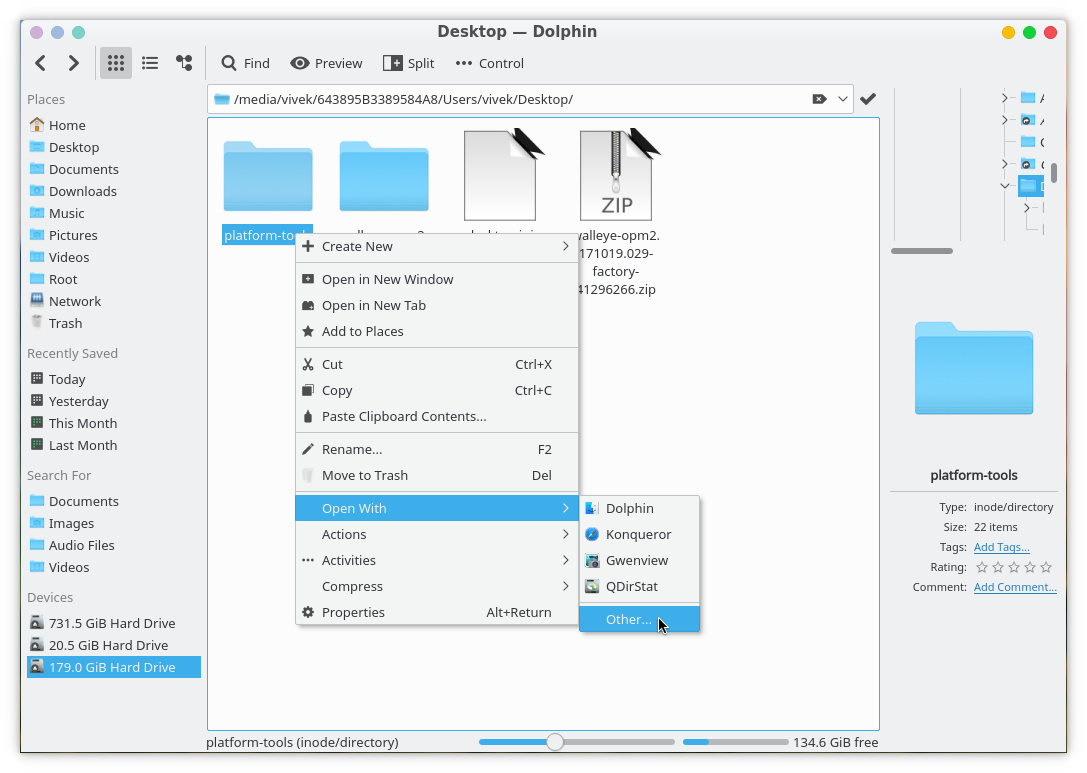
- On Linux, depending on your file manager, the process can differ. A general way would be to right-click on the platform-tools folder and select Open with (Open in another application) and then selecting your Terminal app.

- Now simply use the command given below to flash the stock firmware on your Google Pixel device using the flash-all script provided in the firmware files.
- Windows:
flash-all.bat
- Linux/OSX:
./flash-all.sh
- Windows:
- This will start the process, and you may see your device reboot multiple times. Press a key when you’re prompted to do so after the flashing process is complete.
Don’t miss: How to Install Latest Google Software Update on Rooted Google Pixel Devices
How to restore Pixel devices to stock firmware (manual flashing)
Another way that you can prevent your device from being wiped is by manually flashing all the required images. This is a more tiresome process but if the flash-all script doesn’t work for you due to some sort of black magic, this can come in handy.
- The factory image can contain a series of nested archive files. For instance, the factory image for the Google Pixel 2 (codenamed ‘walleye’) contains another zip archive inside the original zip file. There is, in fact, no need to extract this zip file.

- Simply move all the extracted files, including the image zip file, into the platform-tools folder.
- Open a command prompt or terminal window inside the platform-tools folder as described in the previous method.
- Execute the following commands one by one. In case you have any trouble following, you can open the flash-all script file using a text editor. These are the very same commands that you will find in the flash-all script file. Do note that if you use fastboot -w flash update <image zip file name>.zip instead of fastboot flash update <image zip file name>.zip you’ll end up wiping all your data.
fastboot flash bootloader <bootloader image file name>.img
fastboot reboot-bootloader
fastboot flash radio <radio image file name>.img
fastboot reboot-bootloader
fastboot flash update <image zip file name>.zip
- Once you’ve flashed all of the above, reboot your device using this command:
fastboot reboot
The first boot after a restore can take a few minutes.
How to lock the bootloader
- In order to lock bootloader again, reboot the device into bootloader mode as mentioned previously.
- Connect the device to your PC and execute the following command in a command prompt or terminal window opened inside the platform-tools folder.
fastboot flashing lock
- Use the volume keys on your phone to highlight Yes when prompted and select it with the power button.


Join The Discussion: