Back when Google launched Android 7.0, it introduced the concept of Freeform Windows. They are a type of free-floating window and could be dragged and placed anywhere on your screen. It could be taken somewhere along the lines of the Picture-in-Picture mode on Youtube. However, in Android Nougat, it wasn’t enabled by default. You had to set up the Android SDK and Fastboot Tools and execute a few lines of ADB commands to make it run. As a result, not many thought of giving a try. But in the latest Android version, Google has reintroduced this feature, and this time it doesn’t require those long lines codes to enable it. So let’s have a look at the steps to enable Freeform Windows on Android 10. Also, check out 5 best multitasking apps for Android.
Freeform Windows on Android 10
This feature is still hidden in the latest Android build, but the efforts required to unlock it is quite minimal. All you have to do is just enable the USB Debugging mode on your device and turn on the freeform windows on your Android 10 device. Here are all the required steps. However, if you have already enabled USB Debugging before, please skip the first step and begin with Step 2. Moreover, if you’re running Android 10, have a look at the steps to enable the notification snooze feature.
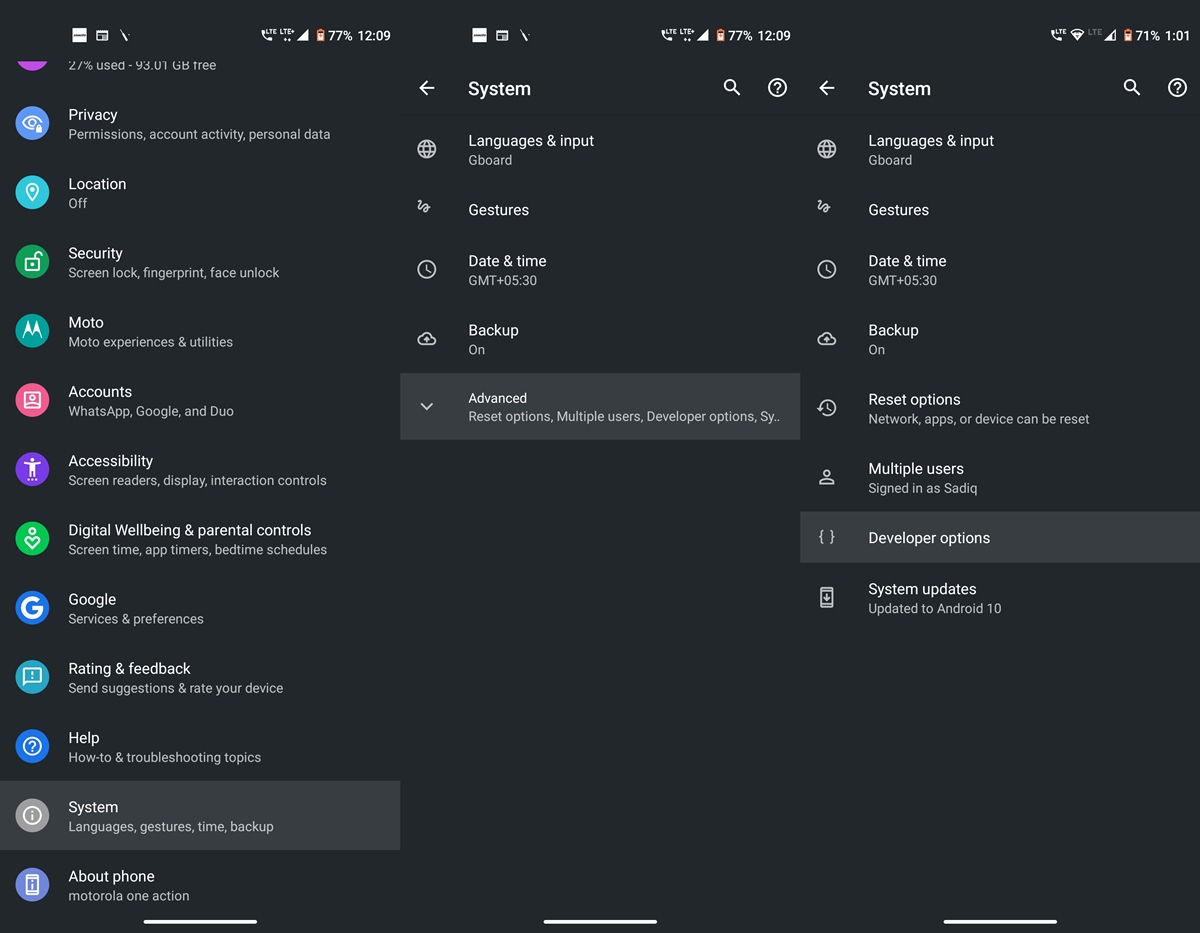
STEP 1: Enable Developer Options

- Head over to Settings on your Android device.
- Now go to About phone and tap on Build Number 7 times. You’ll now get a toast message that Developer Options has been successfully enabled.
- Go back to Settings and tap on System > Advanced. You’ll now see the Developer Options. However, if you are having some issues, take the help of our detailed guide to enable Developer Options.
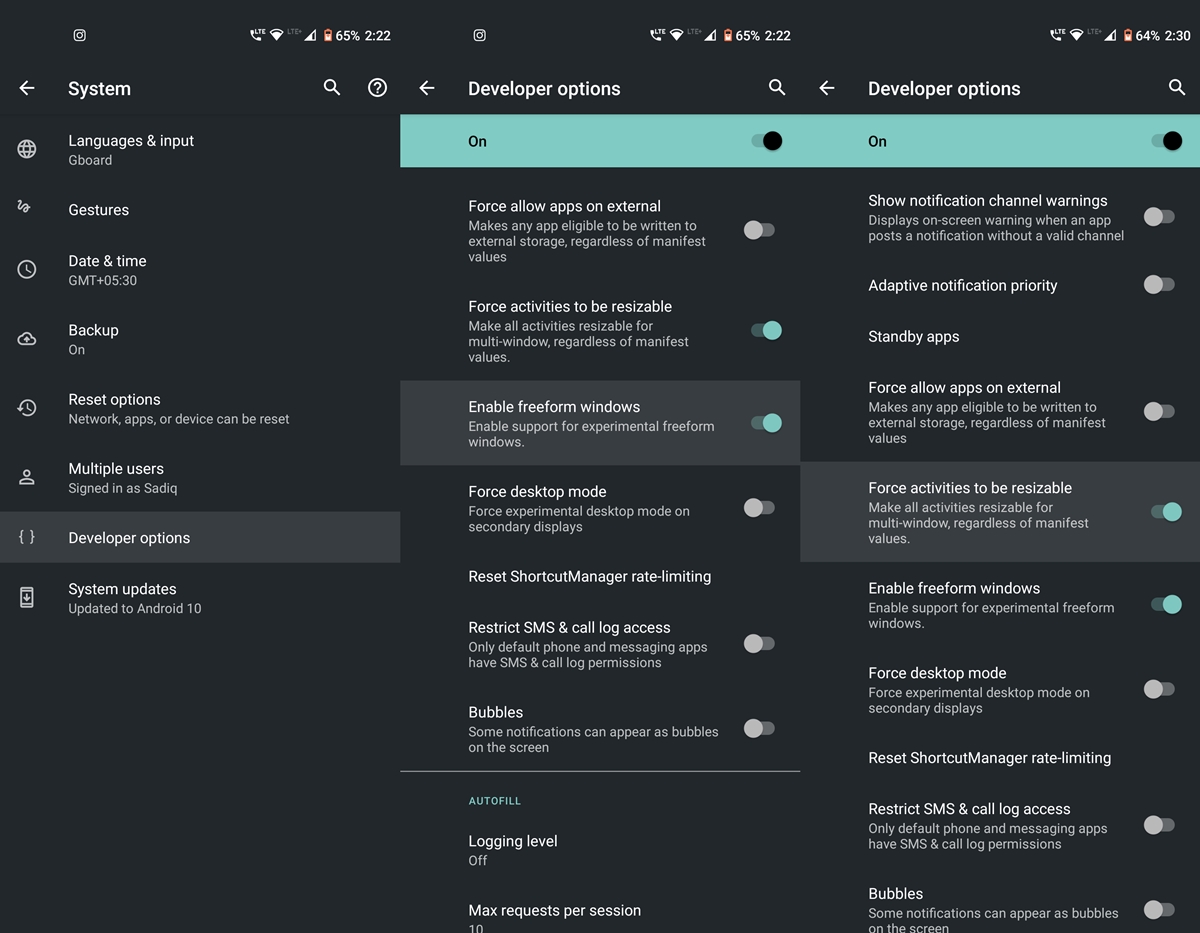
STEP 2: Enable Freeform Windows on Android 10

- Go to Developer options on Android 10.
- Scroll to the bottom until you reach the Apps section.
- Within that, turn on the Enable Freeform Windows toggle. Or you could take the help of the search bar to find this feature.
- Finally, enable the Force activities to be resizeable option. This should be situated just above the freeform option.
Now that you have enabled the freeform feature on your Android 10 device, here is how to make full use of it.
Don’t Miss: Get Pixel 4 Launcher with Overview Text Selection on Android 10
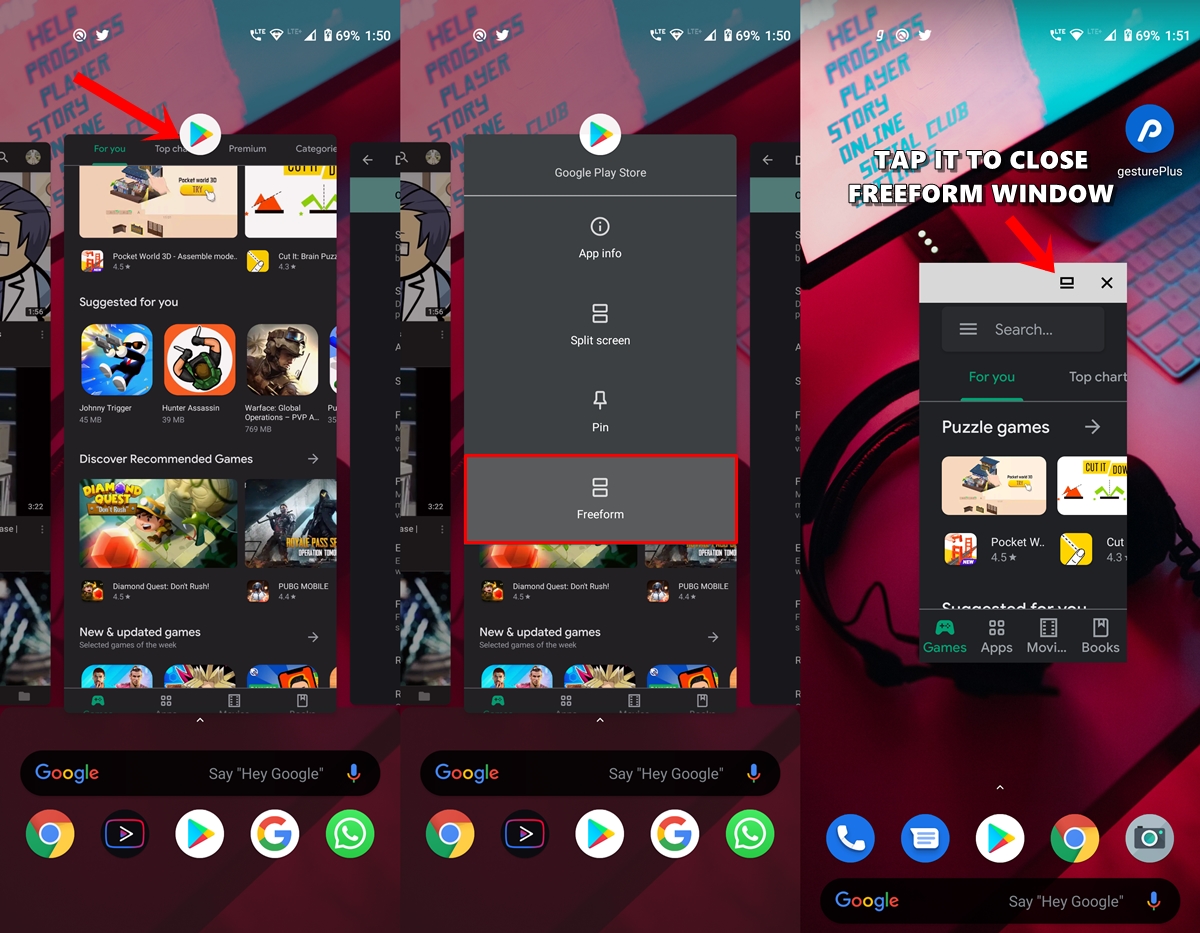
STEP 3: Try out the feature
- Head over to the Recents app view on your device.
- Now tap on the desired app icon that you wish to view in this mode.
- Finally, tap on the Freeform option. That’s it. The app will run in freeform mode and will continue to be in that mode.
- Closing it from Recents or even force stopping it won’t disable this mode. To do so, open that app and tap on the freeform icon(as shown above). This will simply disable the app from the said mode.
With that, we conclude this guide on how to enable the Freeform Windows on Android 10. Stick with us for more such Android 10 tips and tricks.
Read next: How to Add Your Profile Picture to Android 10 Lock Screen


Join The Discussion: