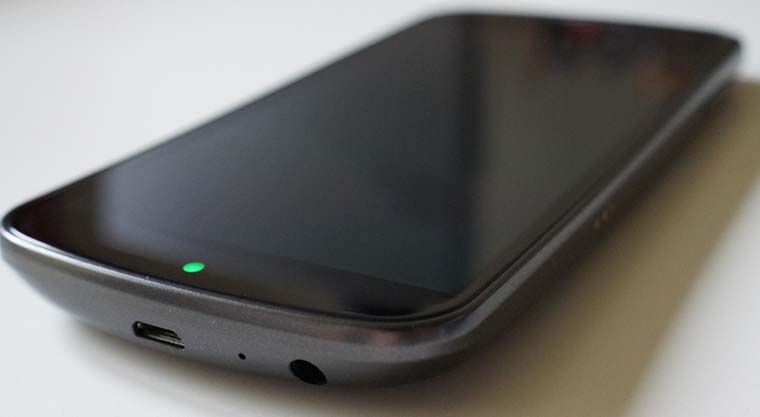
One can never get a smartphone legend out of their minds, especially when its a famous Google production like the Galaxy Nexus. Galaxy Nexus was Google’s 4th Nexus series smartphone manufactured and molded by Samsung. Below are a bunch of Galaxy Nexus tips and tricks that will help you make the most of your new phone.
Galaxy Nexus is a Dual-core 1.2 GHz Cortex-A9 processed device with a 4.65 inches screen offering a huge 16 GB internal storage and a snappy speed of 1GB RAM, the device in its own words has an amazing front camera capable of taking 1080p HD videos and a secondary camera with 720p recording functionality. The History speaks that the device came up with introducing Android 4.0 (Ice Cream Sandwich) and is now easily up-gradable to Android 4.2.1 (Jellybean).
If you have been fortunate enough to handle this device, then I shall cover up some amazing Customization Tips and Tricks for your Galaxy Nexus running Android 4.2.1.
Setting up the Android Homescreen
An Home-screen is the first thing that you look into just as you boot the phone, so a good phone definitely demands an appealing home-screen, made simple, clean and elegant in its representation. While it consists of several parts, including the widgets, wallpaper, icons, folders, and dock. To be more considerate, let’s see how an Android Home-screen looks like and what are its parts.
Change Wallpaper
Wallpaper gives you a nice feel when you are on a desktop. You can easily choose any image as a wallpaper or apply some live wallpapers, just press the onscreen menu button, select “Wallpaper” > “Gallery” and choose your willing wallpaper for the Gallery itself. To apply a live wallpaper (if installed), select “Wallpaper” > “Live Wallpapers“. Too loud wallpapers may sometimes disturb the look and make the icons quite invisible, simple or a less-colored wallpaper are always suggested as to be the best choice. But your choice is what matters.
Add Widgets
Widgets always come in handy, they provide you ease. So putting on some beautiful widgets on the home-screen is worth it. Hit the app drawer icon on the middle of the dock, you shall now see the app drawer, press the “widgets” tab in the app drawer. You now have a set of widgets right in front of you, long-press any widget to drag it to the home screen and place it on any location that you desire or you find to be looking nice.
Create Folders
If you have been using an Android since a while back, then you might have got yourself introduced to folders. Folders can be easily created on a home-screen and can be used to handle a specific set of app shortcuts, all under one hood. While creating folders on Gingerbread was quite a mess, but with the upgraded Android version, its very simple. To create a folder, you must long-press an app shortcut icon on the home screen and drag it over another shortcut icon, whom you want to create a folder with.
Your folder will then be created, to add more shortcuts, just long-press them and drag them to the folder of your choice. You may also want to rename a folder and give it an apt title, press on the folder, now gently press on the name of the current folder and now your keyboard shall slide up. You shall put any title you desire, for in my case I have named it “Google” because it comprises of all my Google apps like the Play Store, Gmail, Play Music and much more.
Dock
A dock is a set of gathered icons at the bottom of the home screen. It generally consists of the 5 major app shortcut icons of the device, namely Phone, People, App Drawer, Messages & Browser. These icons can be modified very easily upon your will, to remove an icon from the dock, just long-press it and drag it either to the home screen or to the very top on the “Remove” option, to remove it from the home screen. You can simply add another icon shortcut by long-pressing and dragging it to the dock location, either from the app drawer or the home screen itself.
Editor’s pick: Display and Touchscreen – Understanding Smartphone Specs
Use the Improved Notifications support
Jellybean came along with improved and away more functional notification drop-down support which not only affects the usability but also leaves its print on the speed. Under are mentioned few important features that you could make use of when a notification is delivered to your device.
- You can now easily drop down the notification bar, by just sliding your finger from the top of any screen.
- Swipe vertically with two fingers or pinch-to-zoom to expand or revert a notification. This will enable all the options compatible with the notification like share, reply, etc.
- If you receive a text message, simply use the two fingers to swipe down and press “Quick Reply” to reply to the text, directly from the notifications bar without opening the messages app.
- Got an unwanted notification? Simply swipe on the notification to remove it.
Know the Now with “Google Now”
Remember Siri from Apple? Well, after that we got a few virtual personal assistant apps, but unfortunately, the level couldn’t be matched but then enters Google stepping in and showcasing its own virtual personal assistant app capable of things which no another app can ever offer. It tells you the right news at the right time, every time you need it. Not just recommendations, it also answers your questions and guides you, undoubtedly as more time you spend with it, it keeps on knowing you more turning to help you and assist you in the best way.
To access Google Now on your Galaxy Nexus, you may follow one of the below mentioned ways:
- By tapping on the Google Search bar at the home-screen.
- By sliding the unlock button on Google icon on the lockscreen.
Now Cards are a part of Google Now, if you don’t need any specific card, you could just swipe it to remove from your cards list.
Make use of Gesture Typing Feature
How can someone forget one of the coolest features delivered with Jellybean 4.2; Gesture typing. If you are an old smartphone user, you might be familiar with Swype. But Gesture typing by Google is much more fun, easy to set up and simple in use. For those who aren’t aware of gesture typing, here is a little for them. It allows a user to simply type any word using their finger’s gestures upon the on-screen keyboard making predictions of the most commonly used words by the specific user, simple isn’t it? Fun tough.
To enable this amazing feature on your Jellybean 4.2 powered Galaxy Nexus, simply go to Settings> Language and Input> Android Keyboard, and tick the “Gesture Typing” and “Next-word suggestions” option. And now you are all ready to hit the keyboard and type messages in a flash.
Quick Settings Toggle Panel
Your Galaxy Nexus now has its own full-featured settings panel, packed right inside your notifications bar. To open, just slide down the notification bar and press on the squared icon on the top-right. There you have it! Looks cool, right?
Opening settings, pressing here and there just to switch some settings is old school now, these Toggles integrated here quite useful and come in very handy when on a move, all the settings just at your fingertips. The Panel itself is full of handy toggles and shortcuts. Look at the image above which describes the action of each toggle.
Limit your Mobile Data Usage
Sometimes the situation moves out of our hands when we exceed our data limit which in turn pushes high charges for the usage, common problem since early times, right? But here’s a backup solution to that, just put a barrier cause your Jellybean powered Android smartphone is smart enough to limit the data. Well, it simply disallows any app to use your mobile data when it has already reached its limit
To set up a limit according to your own choice, go to Settings> Data Usage> Move the slider to set a mobile data usage warning and a limit.
Take a Screenshot
Screenshots are of quiet importance while reporting bugs and on the same side is fun too, so as to show off your Android. While not all devices offer this functionality by default, but a Galaxy Nexus offers you to grab your screenshot without using any third-party application from the Play Store. To take a screenshot of the current screen, simply press the volume down and power buttons together for a few seconds to snap the shot. You may now slide down the notifications bar and use the interactive sharing option, to share it with your friends via MMS or on social networks from with the notification dropdown space itself.
Lock your device with Face-Unlock Feature
You must have seen this in movies earlier when you were a kid but Google has always managed to bring fantasy to reality. And so, Google introduced the Android smartphone world with face unlock technology accompanying as a feature to Android 4.0+.
Google’s Face unlock security system is no fake app but it actually recognizes your face and shall only unlock if you are the owner’s face. Interesting, isn’t it? Well, not just fun but these features saves your data to be accessed by wrong hands in real-time. It shall just be you, who can unlock if this feature is turned on. Let’s take a closer look at how the Face Unlock security setup is done.
To turn on and set up face unlock as the default lockscreen function, go to Settings > Personal > Security > Screen, select Face Unlock. You shall then proceed further with the instructions to analyze your face and save it. Always make sure to set the best picture possible in enough lightened environment. Now, once you have set it up, you will have two new additions into Security, namely “Improve Face Matching” & “Liveness Check”, which will make face unlocking more secure and reliable.
Battery Conservation Tips
- Enable Auto-Brightness: Brightness can lure a lot of battery if not changed intelligently with time to match the surroundings, Jellybean, in this case, brought the “Auto-Brightness” function which uses the accelerometer within the device to detect the amount of light in the surroundings and then act upon the brightness level according to it. To enable, go to Settings > Device > Display > Brightness, and tick “Automatic Brightness“.
- Remove Live Wallpapers: Using a live wallpaper is another battery sucking feature. If you turn out to be truly saving battery, make sure not to use any live wallpaper.
- Disable Location and GPS services: Keeping GPS ON at all times, decreases your battery life, so it’s better to disable it while not in use. To disable, go to Settings > Personal > Location access > and switch it off.
- Disable Wi-Fi or Mobile Data when not in use: Try to avoid situations when you keep your Wifi or Mobile Data ON even when the phone is set in standby.
- Manage Sync carefully: Keeping the Sync ON all the time is another reason for decreased battery life. Enable it anytime you want, manage your emails or services and again turn it off. For those who are on work and want real-time push notifications are advised not to follow this tip.
- Turn OFF Haptic Feedback and screen sounds: To save a little more on battery, it’s better to switch off the screen touch sounds and vibrations. To do so, go to Settings > Device > Sound and untick Dial pad touch tones, Touch sounds. Screen lock sound and Vibrate on touch.
- Turn OFF mobile network when not in the range: It’s very often that you lose the mobile network when you are traveling, so it’s advisable to turn OFF the mobile network by switching ON Airplane mode. Go to Settings > Wireless & Networks, tick Airplane Mode.
Learn how you can turn off the Developer options on Android devices when you don’t need them.
That’s all for today, we shall come back to you soon with more Galaxy Nexus tips & tricks. Please leave your feedback, it’s very much important to us.


my Galaxy Nexus, something i used to replace my prized iPhone 4S, has a stuck power button. nothing related to the power button works. and i cant find any alternative to turn the phone on from the ‘lock’ mode. is there any method to be used as an alternate for the power button, like the volume key?
Try any of these apps.
I’m afraid, no. Gnex has no other hardware key that can be used as an alternative.
But yes, most ROMs offer Volume Rocker Wake option. When enabled, if you press a volume key, the device will show on the screen, after that you can slide and unlock. Still, I would recommend getting it repaired as it holds a prior importance in many processes.