You may have seen system dumps around the net for Android devices and have wondered what it is! Well, a system dump is, in fact, extraction of the stock apps, framework, media, fonts, wallpapers, etc. from the system image of the ROM of an Android device. Thus, you can extract the System Dump of an Android device yourself. In the present, I will show you how you can extract and download system dump. Moreover, I will also give you the links to download the most popular Android superphones.
How to Extract System.img File:
To get the system dump of a device you need the stock Firmware/ROM file of the desired Android device. In my case, I have downloaded the stock firmware of the Samsung Galaxy S3: “I9300ZSALED_I9300OZSALED_OZS.rar”. Extract the .rar/.zip file with Winzip/Winrar and you will see files like these:
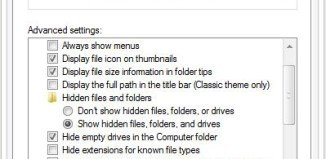
Inside the extracted folder, you will find some files with .tar.md5 extension, The “system.img” is often found inside the biggest file with .tar.md5 extension. Now, right-click on the .tar.md5 files and delete the .md5 so that you have a file with .tar extension. If you are not able to see the extensions of files on your computer, you will have to configure related settings in Windows Explorer. Click on the “Organize” tab in Windows 7 (in Windows 98/Vista you can do it by clicking on “Folder Options”). Organize> Folder Options> View tab and uncheck “Hide extensions for known file types” (see below):
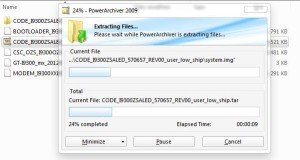
Now you will be able to see and edit the extension of any file on your PC. So now we have a .tar file and we can easily extract it and find the desired files with .img extension:
Here you can see the “system.img” file that contains the System Dump of a firmware/ROM. To this point, everything was rather easy, but from now on you will see “cracking the nut” part of the whole method. Here are the steps:
- To extract the .img file, you will need a tool called “unyaffs-x86-win”. Download and extract the .zip file
- Create a new folder anywhere on your PC. I have created a folder named “1” on the root of the C:/ drive of my PC.
- Copy the two file namely, “unyaffs.exe” and “cygwin1.dll” to this newly created folder.
- Also, copy the “system.img” file to the same folder.
- Now open the Windows cmd window (command prompt window): Click on the Start button and type the following command in the box:
c:\1\unyaffs.exe system.img
- Then hit Enter key and the “system.img” file will be extracted to the same folder. Done!
System Dump Collection:
If you do not want to entangle yourself with the word-puzzle given above, I have made a nice collection of System Dump files of several renowned Android devices. Check out the list below to download the system dump of your choice. All system dumps provided below have been extracted by Chris from the Android source forum and are fully odexed:
- Galaxy S III System Dump
- Download Separate Files from Galaxy S III
- AT&T HTC One X System Dump
- HTC EVO 4G LTE System Dump
- Motorola DROID4 System Dump
- Motorola DROID3 System Dump
- LG Spectrum System Dump
- HTC Epic 4G Touch System Dump
- Motorola XOOM System Dump
- Motorola DROID BIONIC System Dump
- HTC Rezound System Dump
- Motorola RAZR System Dump
Read Next: Check MD5 Checksum on Windows, Mac, Linux & Android


Join The Discussion: