It has been only about 6 hours since I flashed my Galaxy S3 with the official Android 4.1 Jelly Bean firmware and must say it’s greater in all aspects than ICS. So many new features with the new improved TouchWiz on the top is just cool. Having played with the new firmware for a few hours, I decided to root my Samsung Galaxy S3 on stock JB. And having rooted it successfully, I have time and capacity now to write this tutorial for those who have recently upgraded their SGS3 to JB and have a keen desire to get root access on it.
Also Read:
Root Samsung Galaxy S3 on Android 4.1.2 Jelly Bean Firmware
Rooting Samsung Galaxy S3 on ICS Firmware
So, if you are one of my kind (have a Galaxy S3 with Android 4.1 and wish to root it), here is an easy tutorial to help you root your phone. Before we proceed, let’ have a little formality. Rooting your Android phone will void the warranty you got from Samsung while purchasing it and it might pose risk to your device if you are not careful enough.
To-Dos before Rooting Galaxy S3:
In the present tutorial, I will tell you how you can root your SGS3 with the Jelly Bean ROM using Chainfire’s CF-Root via Odin. It is a very easy method and takes only a few minutes to perform, but you need to make a few preparations followed by a few clicks.
- Put your device on charging mode to get at least 50% of battery level.
- Back up the messages, call log, contacts, apps, or any important data saved on your device. Backup your contacts, call-logs, messages, APNs, bookmarks, calendar, apps & games using these nice free apps.
- Open Settings on your SGS3 and turn on USB Debugging: Settings> Developer Options>
- Download Odin3-v3.04 and extract the zip on your computer’s desktop.
- Download CF-Root-SGS3-v6.4.zip file and extract it too at the desktop to find a .tar file.
- Download and install Samsung USB drivers on your computer. Do not forget to restart your PC after installing the USB drivers.
Steps to Root SGS3 on JB Firmware:
- Turn off your phone.
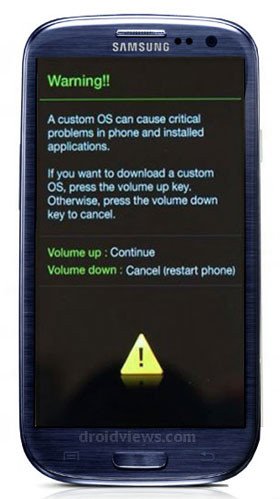
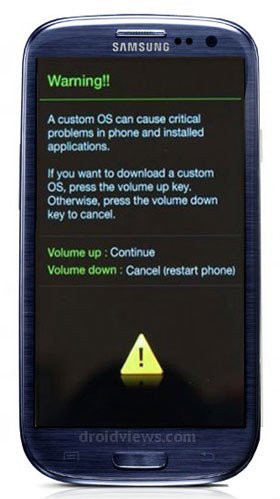
- Boot the device into Download Mode: long press Volume Down + Home (center) keys simultaneously, and then press the Power button for 5-7 seconds. The Download Mode screen will look something like this:

- It will prompt you to press volume up or down key. Press the Up key.

- Now go to the Odin-v3.04 folder and run the Odin.exe file by a double-click.
- When you can see the Odin window, connect your S3 to the computer via a USB cable.
- The ID:COM port at the Odin should turn green showing that it has detected the device.
- Do not play with any of the checkboxes on the Odin and directly click on the PDA button. Browse to the “CF-Root-SGS3-v6.4.tar” file and select it.
- Now click on the “Start” button and let the Odin flash the insecure kernel, CWM Recovery, and the Super User app to your device.
- When the installation is finished, the ID:COM port will turn green and show a pass message.

- The PASS! message with green color indicates that your device has been rooted successfully.
- Your Galaxy S3 should now reboot automatically.
- You can remove the USB cable now.
- If you need to enter the ClockworkMod Recovery any time later, just press and hold the Volume Up + Home button and then the Power button.


Can I get some help? I searched around but couldnt figure out why when I press start in odin after doing all the steps before, I always get a failed notification instead of Pass. My phone doesnt reboot or anything and I have done all steps exactly how they were explained. Any ideas of what I can do?? /:
Hi i got a fail on Odin twice. I’ve done this process before and it worked the first time I tried it. I don’t know why it’s not working anymore.
Make sure you have done all steps and try again with different versions of Odin: http://d-h.st/dFb
OR
http://d-h.st/M14
Hi, I have follow the procedure step by step but still shows 4.0.4 firmware, i’m not sure if I miss something
Well this is a rooting tutorial. Unless you install a Jelly Bean firmware, it will not show 4.1.1 or 4.1.2.
Choose a firmware from here and install it using the guides atached: http://droidviews.com/tag/jelly-bean-update-for-galaxy-s3/
hi rakesh i followed the above steps but odin is not recognising the phone..the phone is stuck on the ‘Downloading… Do not turn off target!!’… i have samsung s3 gt-i9300 jellybean 4.1.1 (xxdlk1)firmware…
what next?????
Sorry for the late reply.
Okay, pull out the phone from cable, remove the battery of the phone and place it back to its place.
Make sure that the usb drivers are installed, if necessary, reinstall it. Make sure Kies is not open during the procedure.
Boot the phone into download mode, check the usb connection. When every thing seems fine, repeat the procedure again.
Thanks Rakesh.
I did have a few hiccoughs due to my lack of knowledge of my phone and not having unzipped files before starting the download. However, I got there eventually and have now been able to enable the firewall on my Avast Mobile Security which was the first matter of importance for me, for security control over my loaded apps.
Now for exploring the other benefits of a rooted phone. 🙂
Nice.
hii i want to update my galaxy s 3 android 4.0.4 to jelly bean 4.1.2..but i can’t download zip file any website..will u please tell me any alternate website to download zip file plz??
You can find mirrors on these pages:
http://droidviews.com/2013/samsung-releases-android-4-1-2-update-for-galaxy-s3-to-fix-exynos-vulnerability-bug/
and
here: http://droidviews.com/2012/android-4-1-2-jelly-bean-update-started-rolling-out-for-samsung-galaxy-s3/